
Integration Guide
WP EasyCart × Facebook Pixel
Facebook Pixel tracks custom events from your website to Facebook — page views, conversions, add-to-cart, checkout, purchases. WP EasyCart is already integrated. Drop in your Pixel ID and shopping events start flowing automatically.
Before You Begin
A Facebook Business account with a Pixel created is required. If you don’t have one yet, set it up in Meta Events Manager. EasyCart sends the shopping events, and can load the Pixel on every page of your site as well.
Step 1 — Get Your Pixel ID from Meta
Find the Pixel ID inside Meta Events Manager so EasyCart can send events to the right account.
Open Meta Events Manager
Log into your Meta Events Manager and select your Pixel from the Data Sources list. The Pixel ID is displayed at the top of the page — a 15- or 16-digit number. Copy it.
Step 2 — Paste the Pixel ID into EasyCart
Drop the ID into the Facebook Pixel setup panel and shopping events start flowing.
Enter the Pixel ID & Save
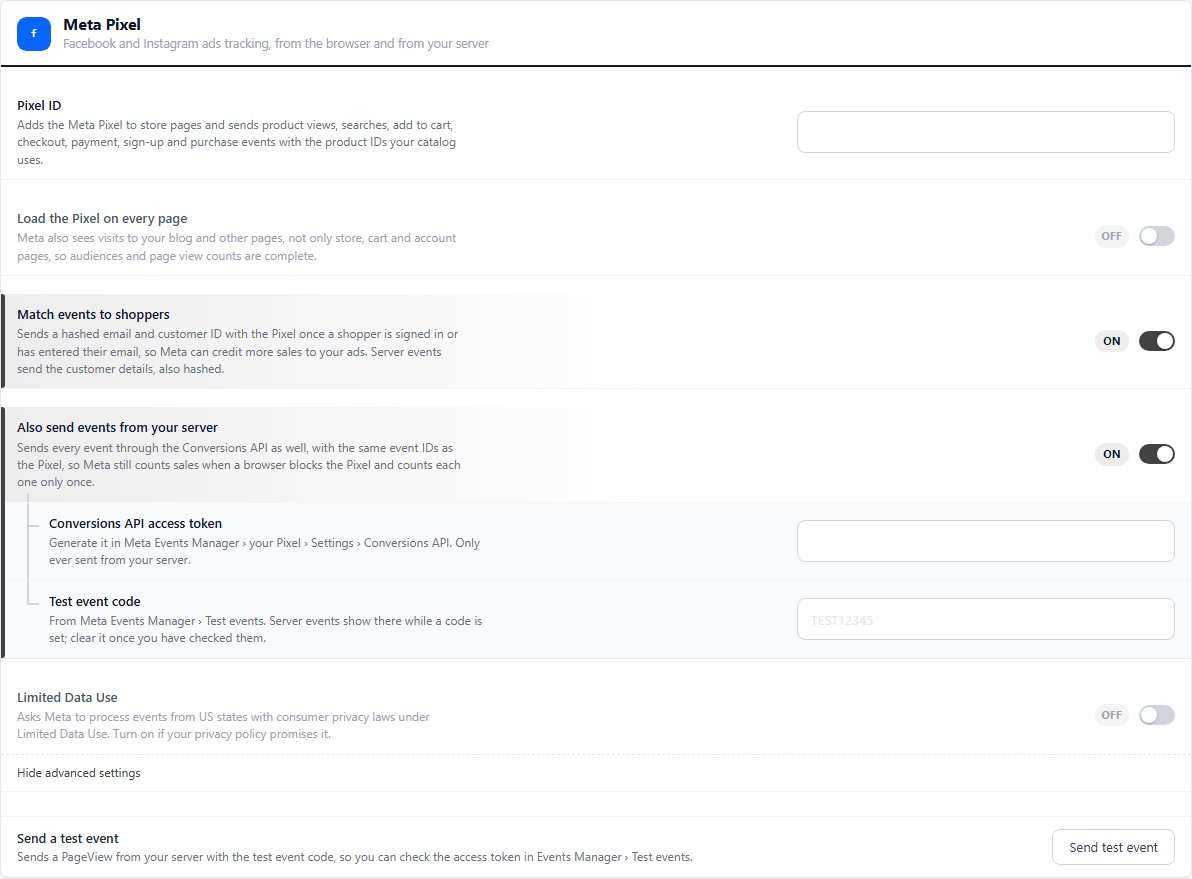
In WordPress, go to EasyCart › Settings › Advanced › Integrations › Meta Pixel. Paste your Pixel ID into the field and save. EasyCart will immediately start firing events for product views, searches, add to cart, checkout, payment, sign-up and purchase. Turn on Load the Pixel on every page to cover your blog and other pages too. Match events to shoppers, on by default, sends a hashed email and customer ID so Meta can credit more sales to your ads.
EasyCart — Facebook Pixel Setup Panel
Good to Know
Every Page, and Events from Your Server
EasyCart’s Pixel integration covers the events that matter for conversion tracking, lookalike audiences, and ad optimization. With WP EasyCart PRO, Also send events from your server sends every event through Meta’s Conversions API too, with the same event IDs as the Pixel, so Meta still counts sales when a browser blocks the Pixel and counts each one only once. With a cookie banner, the Cookie consent section on the same page makes the Pixel wait for the shopper’s answer.
- For site-wide page tracking, turn on Load the Pixel on every page instead of adding a separate Pixel plugin
- For server events, paste a Conversions API access token from Meta Events Manager › your Pixel › Settings › Conversions API. To check them, add a Test event code from Events Manager › Test events ( under Show advanced settings ) and press Send test event, then clear the code
- EasyCart’s shopping events work alongside any base pixel setup — there’s no conflict
Track Conversions & Optimize Your Ads
Combine WP EasyCart with Facebook Pixel to measure ad ROI, build buyer lookalike audiences, and retarget abandoned shoppers automatically.