
Integration Guide
WP EasyCart × Kit
Kit ( formerly ConvertKit ) is an email campaign and automation platform built for creators. Connect it to WP EasyCart and every checkout opt-in flows straight into Kit — ready for broadcasts, sequences, and purchase-based automations.
Watch the Setup Walkthrough
Prefer to watch? This short video walks you through the entire ConvertKit integration setup in just a few minutes.
ConvertKit Setup
We walk you through the quick setup of getting your EasyCart and ConvertKit accounts connected with this simple video.
Before You Begin
An active ConvertKit account is required to use this integration. If you don’t have one yet, sign up at convertkit.com. You can also pair this integration with ConvertKit’s own WordPress plugins or popup tools — EasyCart focuses on the checkout-opt-in flow, but the two approaches combine for a complete solution.
Step 1 — Enable Newsletter Sign-up in EasyCart
Turn on the opt-in checkbox so shoppers can subscribe during checkout and account creation.
Turn on Subscribe to Newsletter
In WordPress, go to EasyCart › Settings › Store › Accounts and toggle “Subscribe to newsletter” checkbox to ON. This adds the opt-in checkbox to the checkout flow and the customer account creation form — every shopper now gets a chance to join your list without leaving the checkout.
Step 2 — Get Your API Credentials
Pull your V4 API key and V3 API secret from Kit so EasyCart can talk to your account.
Open the Developer Settings
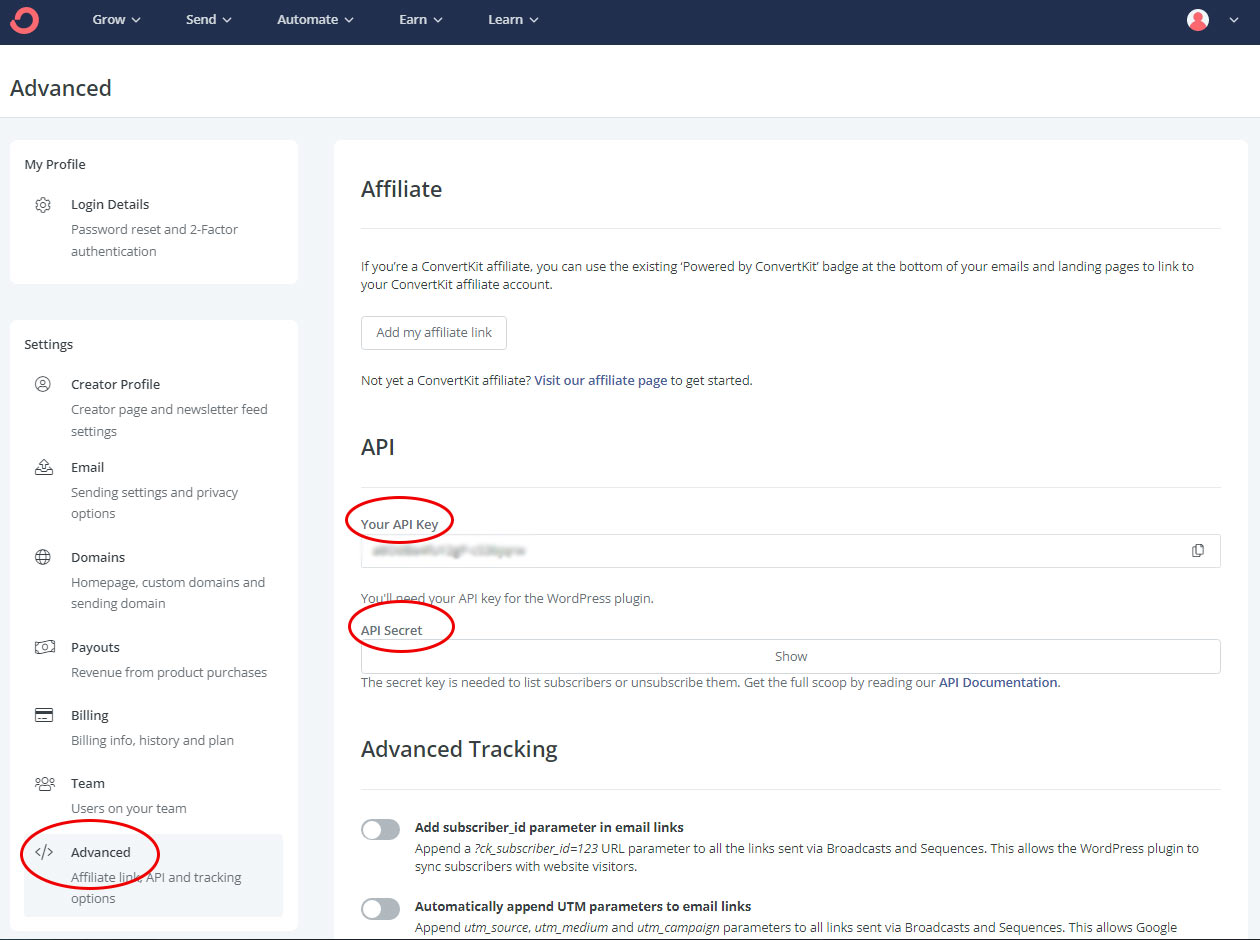
Log into your Kit account and open Settings › Developer. Under API keys, create a V4 key and copy it. On the same page, under V3, copy the API Secret: Kit’s newer API only lets approved apps record purchases, so EasyCart uses the secret for those. You’ll paste both into EasyCart in the next step.
ConvertKit — Advanced Settings (API Key & Secret)
Step 3 — Connect EasyCart & Select a Form
Paste your keys, then choose the form or tags your new subscribers get.
Paste Keys & Choose Your Form
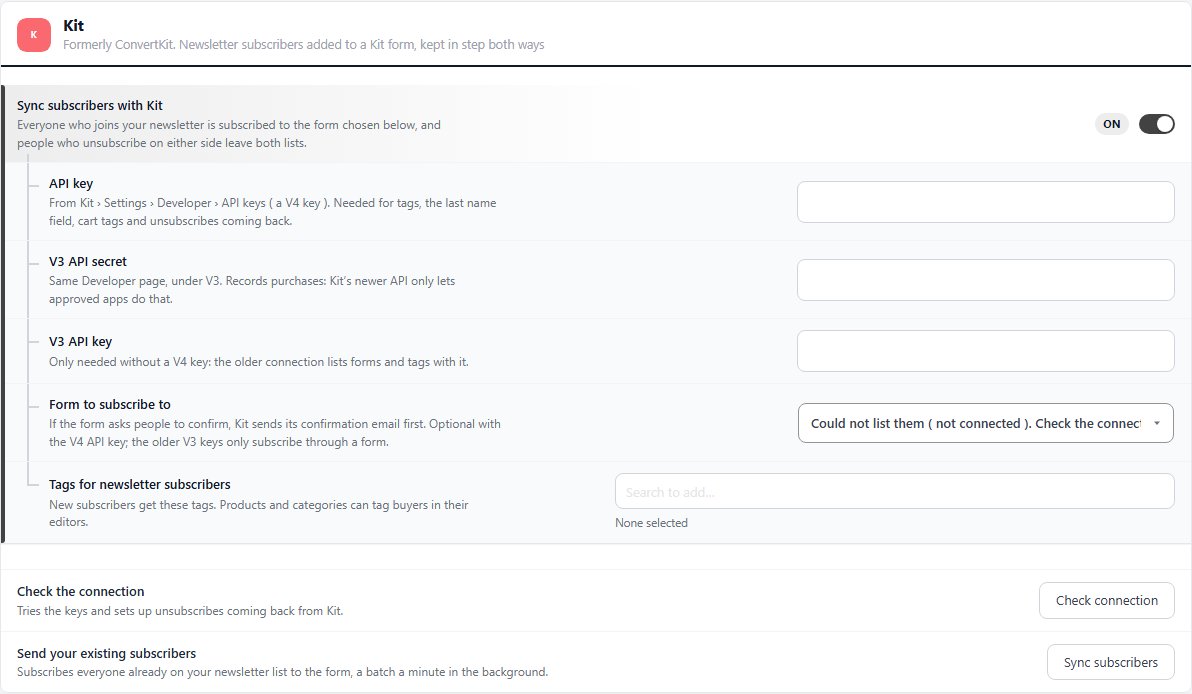
In WordPress, navigate to EasyCart › Settings › Marketing › Email marketing ( a PRO feature ). In the Kit section turn on Sync subscribers with Kit, paste your V4 key into API key and the secret into V3 API secret, save, and press Check connection. Then pick a Form to subscribe to and any Tags for newsletter subscribers. The form is optional with a V4 key; the older V3 API key ( under Show advanced settings ) only subscribes through a form. EasyCart uses its own checkout opt-in, so the form and tags simply decide where your subscribers land on the Kit side.
Going Further
Build Automations Based on What Customers Buy
Once your subscribers are flowing into ConvertKit, you can layer in product-aware automations — trigger a welcome sequence when someone buys a specific product, send upgrade nudges for repeat buyers, or kick off post-purchase education sequences. Kit store data on the same Email marketing page records subscribers’ orders as Kit purchases and can tag subscribers who leave a cart, and products and categories can tag buyers in their editors. The automation logic lives on the ConvertKit side, so you have the full power of their sequences and visual automations to work with.
💬 Note: Automations are built and managed inside ConvertKit, not EasyCart. For specifics on building sequences, tags, and visual automations, see the ConvertKit help center.
Start Growing Your Audience with ConvertKit
Combine WP EasyCart with ConvertKit to capture more subscribers at checkout, automate beautiful email sequences, and turn customers into a loyal audience.