
Registration
What a shopper must do to create an account
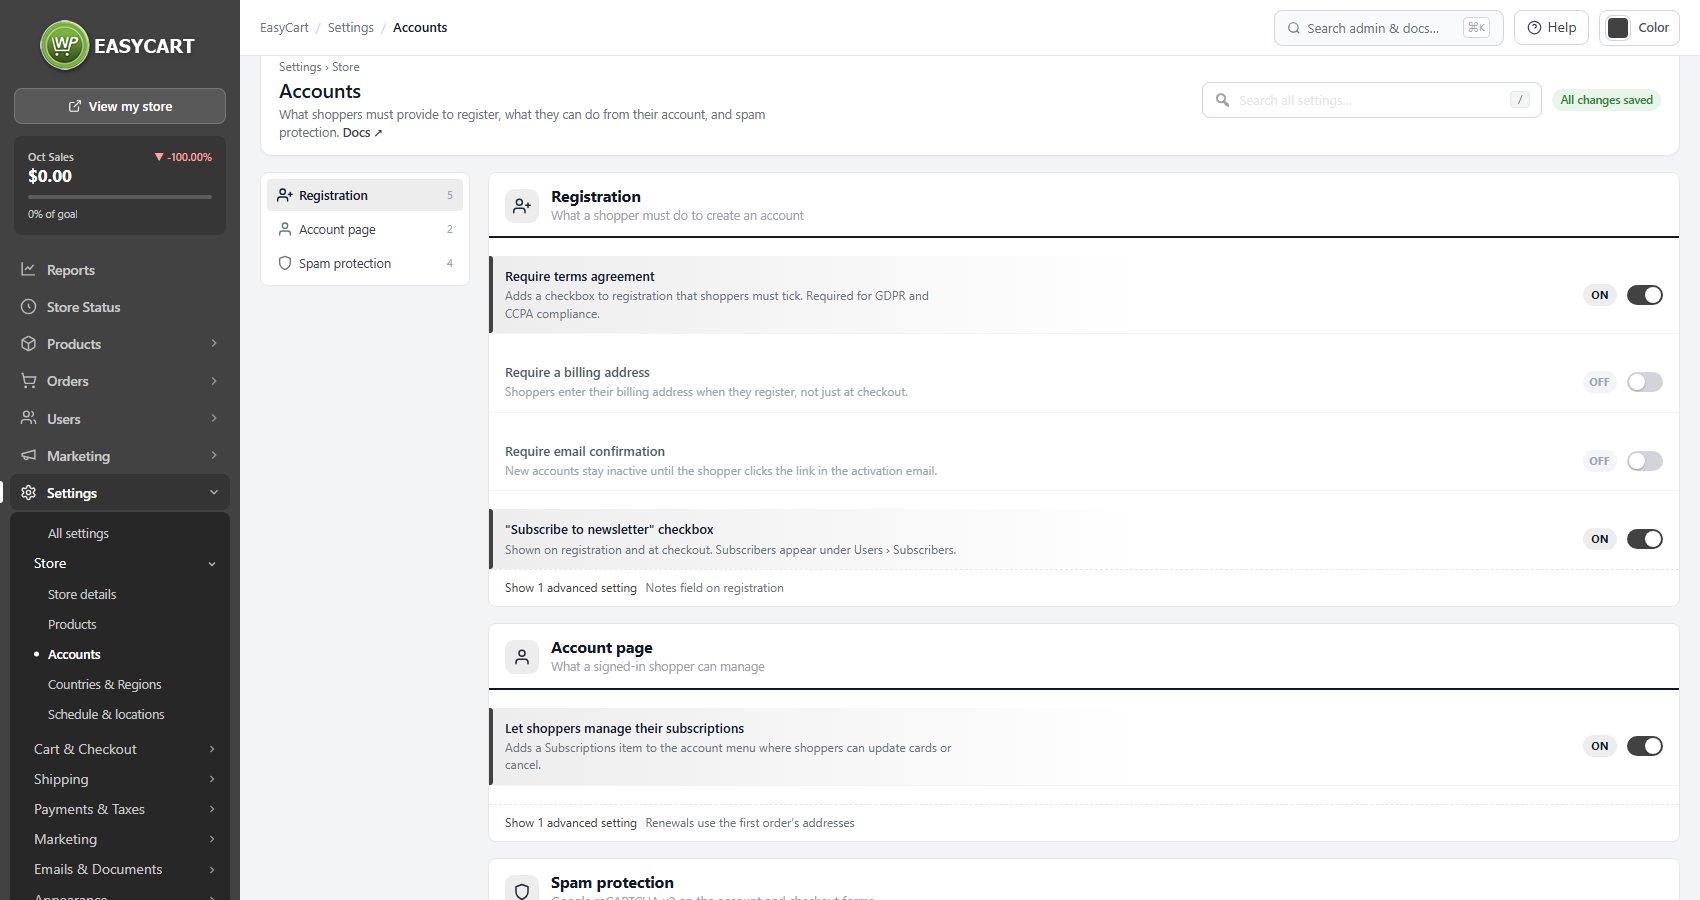
5 settingsRequire terms agreement
Adds a checkbox to the registration form that shoppers have to tick before an account is created. If you operate anywhere covered by GDPR or CCPA you need a recorded, affirmative agreement rather than a line of small print, and this is what produces it. The linked pages are the ones you set under Checkout settings, so those apply here too.
Require a billing address
Shoppers give a billing address when they register rather than waiting until checkout. It front-loads effort onto the sign-up form, which costs you some registrations, so it is only worth it if you genuinely need the address before an order exists. Trade and wholesale stores that vet accounts usually do; ordinary retail stores usually do not.
Require email confirmation
New accounts stay inactive until the shopper clicks a link in an activation email. It stops junk sign-ups and, more usefully, proves the address works before you start sending order emails to it. The cost is a step where some genuine shoppers drop out, particularly if the email lands in spam, so it pairs badly with unconfigured email deliverability.
Notes field on registration
Adds a free-text notes box to the registration form, and whatever the shopper writes appears on their customer record for staff to read. Useful on trade stores where new accounts explain who they are or quote a reference. On a retail store it is mostly an invitation to type something nobody will read.
“Subscribe to newsletter” checkbox
Shows a newsletter opt-in checkbox on both the registration form and at checkout, and anyone who ticks it appears under Users, Subscribers. This is the cheapest list-building you will do, since it asks at the exact moment someone has decided to trust you. Leave the box unticked by default, which is both the legal position in most places and the one that produces a list worth having.
Spam protection
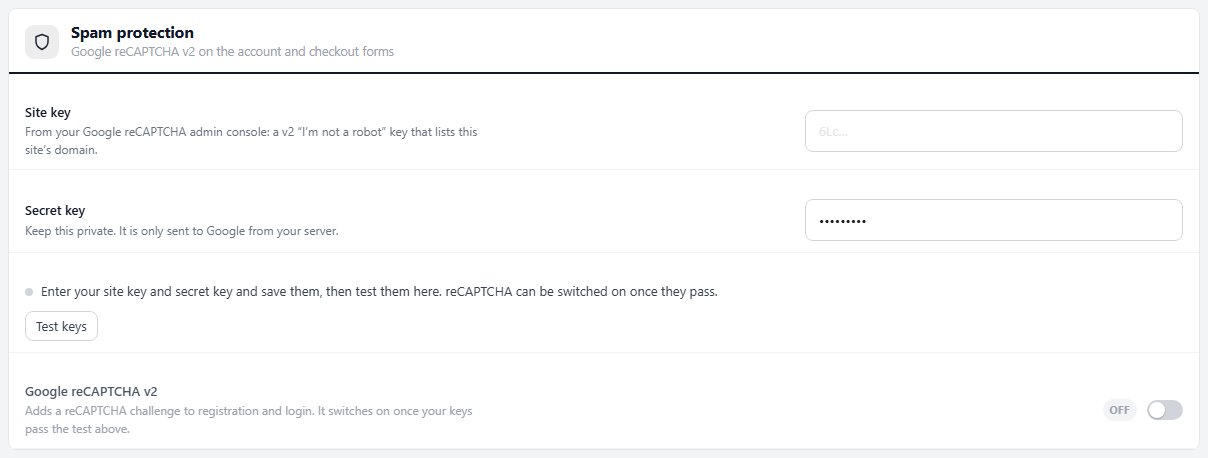
Google reCAPTCHA v2 on the account and checkout forms
4 settingsSite key
The public half of the key pair, from your Google reCAPTCHA admin console. It must be a v2 “I’m not a robot” key, and the key’s domain list in Google must include this site, so a key made for your live domain fails on a staging copy and the other way round. Save it with the secret key, then test them.
Secret key
The private half of the pair. It is only ever sent from your server to Google, never to the shopper’s browser, so keep it out of screenshots and support emails. If you think it has leaked, generate a new pair in the Google console, replace both keys here and test them again.
Google reCAPTCHA v2
Adds a Google reCAPTCHA v2 challenge to registration and login. This is the blunt instrument for account spam and it does work, but it puts a puzzle in front of real customers too. It only switches on once your saved keys have passed the test above, so a wrong key can never lock shoppers out of signing in. Change a key later and the challenge comes off your forms until the new keys pass. The test belongs to the keys, not to the site address, so a copy of your site on another domain, such as staging, keeps the challenge on: list that domain on the key in Google too, or switch reCAPTCHA off on the copy. Note the inquiry form on product pages is protected separately, by checks that are invisible to shoppers, so you may not need this as well.
Also protect checkout
Extends the challenge to the login and details forms inside checkout. Think carefully before turning this on: the last step before payment is the most expensive place in your store to put an obstacle, and a reCAPTCHA that misfires there costs you the sale rather than a sign-up. To stop bots testing stolen cards at checkout, use Checkout protection instead: it only asks for a check when something looks wrong.
Ready to run your store on WP EasyCart?
Everything in this guide works with the free plugin. PRO and Premium add subscriptions, memberships, wholesale pricing and more. Try every PRO feature free for 14 days.
