
Step 2. Run the setup wizard
Four short steps that set up location, payments, shipping and the basics
The first time you open EasyCart with no products, the Setup wizard starts. You can leave with Save & exit at any step and come back.
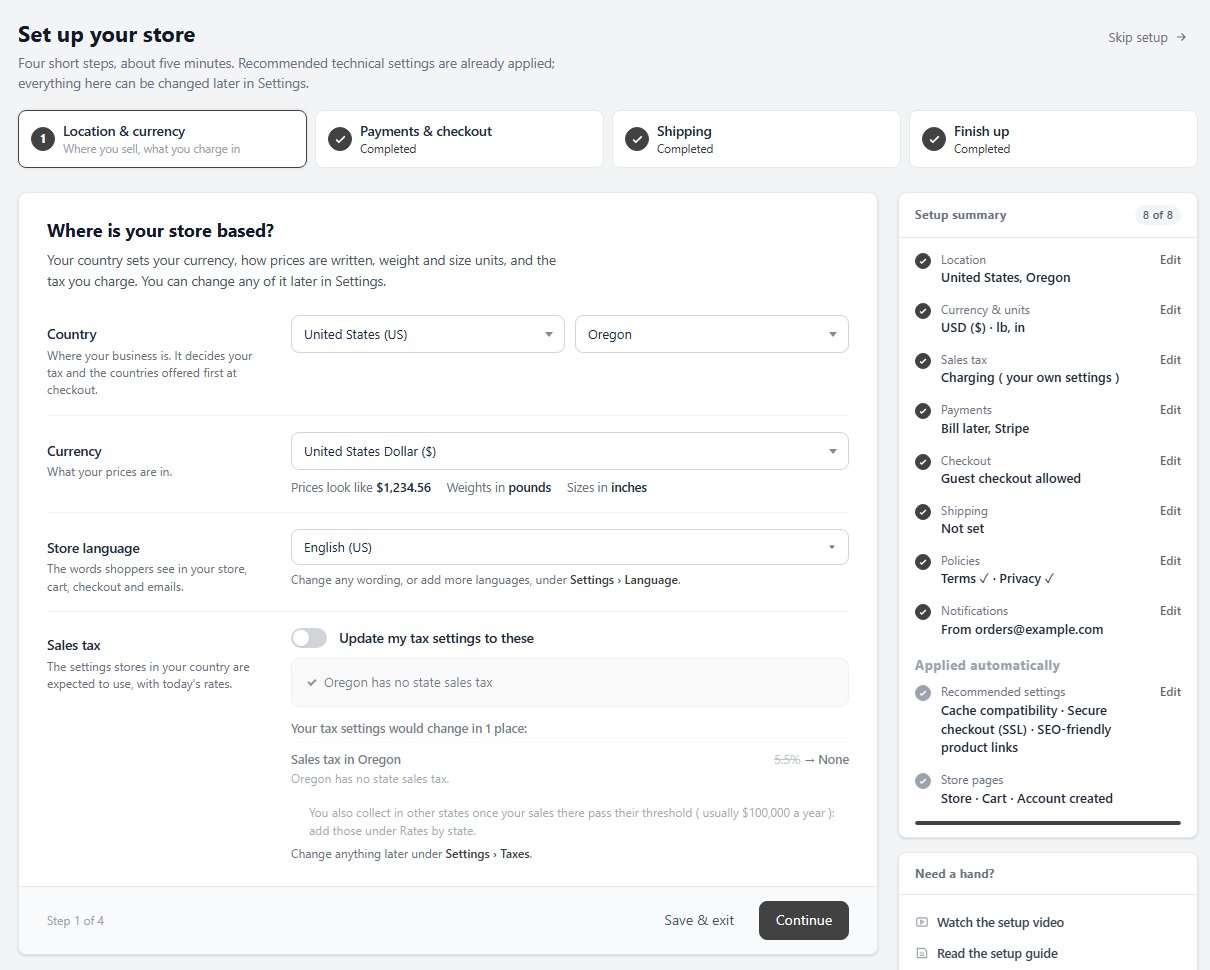
Location & currency. Where is your store based? Choose your Country ( and your state or province in the US and Canada ). The country sets your Currency, how prices are written, such as $1,234.56 or 1 234,56 €, and whether you weigh in pounds or kilograms and measure in inches or centimetres. Then the tax your country expects: sales tax, VAT or GST, with today’s rates, which you refine later in Settings › Taxes.
Payments & checkout. Only the gateways that take payments in your country are shown. Turn on Bill later now for no fees, or connect PayPal, Stripe or Square. On the free edition you first agree to the EasyCart Connect terms. This step also has the Allow guest checkout switch, which lets customers buy without creating an account. It is on the recommended side, because forcing an account loses sales.
Shipping. Pick a starting point: Flat rates, By cart total or By weight, and the wizard installs starter rates in your currency and weight unit. Or choose I don’t ship anything for downloads, services or collection only. Then say where you ship: only within your country, across your region or worldwide. You refine the rates later in Settings › Shipping rates.
Go back to any step and it shows the answers you gave. Save & exit saves the step you are on before it leaves.
Finish up. This step shows your store pages, terms and privacy policy pages, and order email settings. It comes back in the launch checklist below.
Step 3. Check your three store pages
Store, Cart and Account, each one holds a shortcode
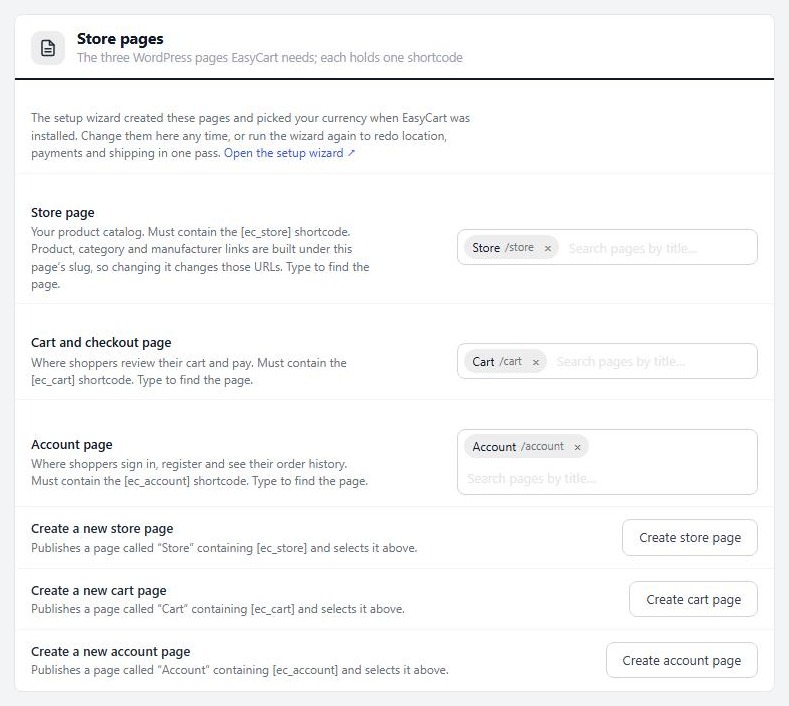
A WP EasyCart store is three ordinary WordPress pages. Open EasyCart › Settings › Store details and find Store pages:
Store page: your catalog. It must contain the [ec_store] shortcode. Product, category and manufacturer links are built under this page’s address, so changing its slug later changes those links.
Cart and checkout page: where shoppers review their cart and pay. It must contain the [ec_cart] shortcode.
Account page: where shoppers sign in, register and see their orders. It must contain the [ec_account] shortcode.
If a page is missing, use Create a new store page, Create a new cart page or Create a new account page. Then add Store, Cart and My Account to your site menu so shoppers can find them. The wizard’s Finish up step has an Add all three to your menu button that does it for you.
Step 4. Add your first product
A name, a price and a photo is all it needs
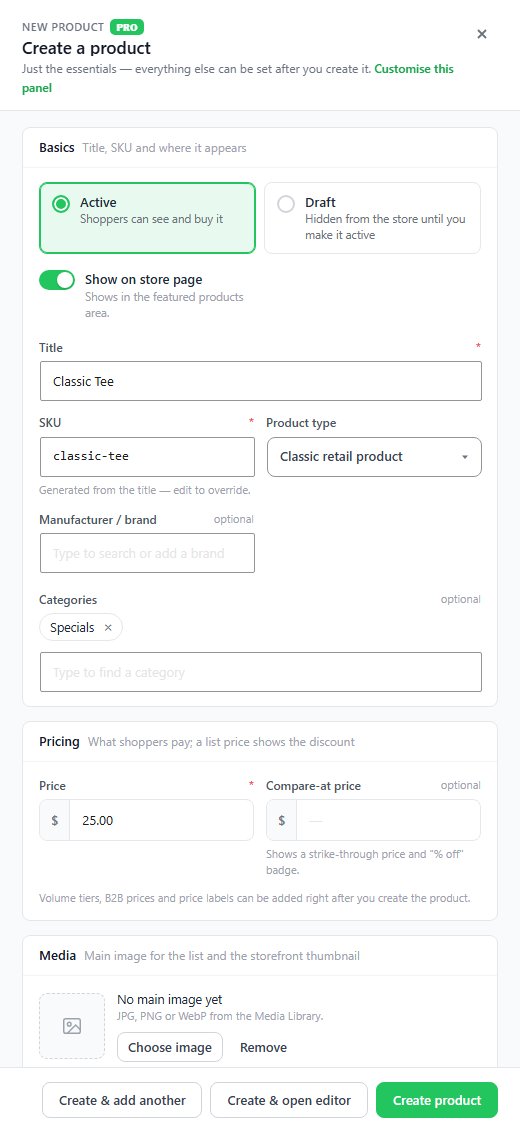
Go to EasyCart › Products and press Add product. The Create a product panel asks only for the essentials:
Active or Draft: Active puts it in the store straight away, Draft keeps it hidden until you make it active.
Title and Price are all you must fill in. SKU generates from the title if you leave it blank.
Product type stays on Classic retail product for now. Subscriptions, downloads and gift cards are PRO product types.
Categories is optional: type to find one and pick it.
Choose image picks a main image from the Media Library.
Tax, stock and shipping fields can be added to the panel with its Customise this panel link. Without them, a classic retail product is saved as one that ships. Set its weight in the editor if you charge shipping by weight or use live carrier rates.
Press Create & open editor to keep going in the full editor, or Create product to finish. Open the Store page on your site and the product is there.
Step 8. Work through the launch checklist
Five checks before you tell anyone
The wizard’s last step, and Settings home, show a launch checklist that ticks items off as you finish them. These are the ones that matter:
Turn off test mode. In Settings › Payment, the banner names every gateway still in test mode and has a Turn off test mode button. Orders are not charged while any gateway is in test mode.
Publish your legal pages. In the wizard’s Finish up step, pick or create your Terms & conditions and Privacy policy pages. The terms link from checkout, and you can require customers to accept them before they place an order.
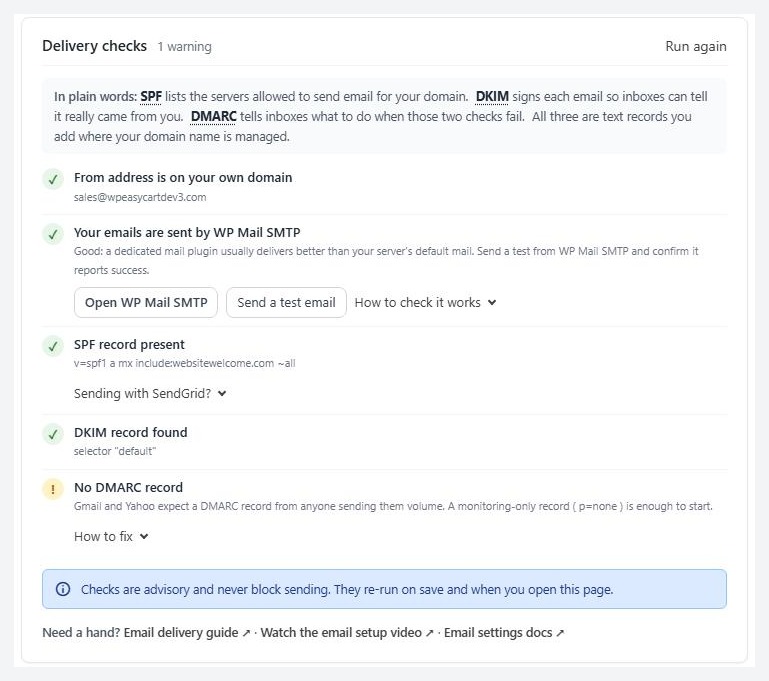
Check email deliverability. Open Settings › Email and look at the Deliverability section. The Email health card shows how many emails were delivered or failed in the last seven days, and Delivery checks flags problems with your sender setup. Send a test and confirm it arrives.
Check Store Status. EasyCart › Store Status runs four readiness checks: Products, Taxes, Shipping and Payment. A failing Payment check means nobody can check out. A failing Taxes or Shipping check means the store is taking orders and not charging for something.
Review the recommended settings. Cache compatibility, secure checkout (SSL) and SEO-friendly product links are set for you. Confirm they show as on.
Find your way around the admin
One search for everything, and your store on the WordPress Dashboard
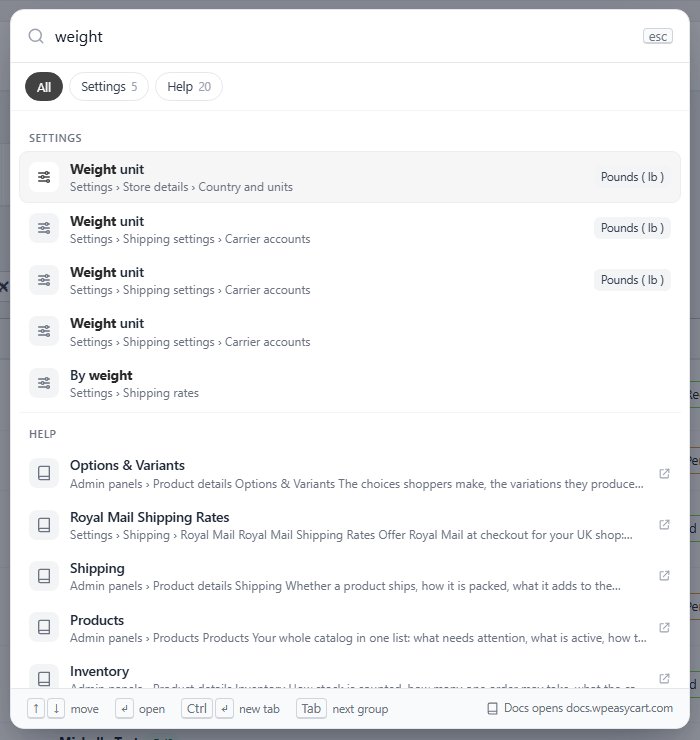
One admin search. Press Ctrl K ( ⌘K on a Mac ) on any WP EasyCart screen, or click the search box at the top of the page, or press / when you are not typing in a field. One window finds orders, customers, products, subscriptions, categories, brands and option sets, every setting with its current value, the admin pages and the help articles on this site. Type # and a number for an order, or paste an email, SKU or code. Before you type, it offers quick actions such as Add product, Add category, Import products and Add customer. Use the arrow keys and Enter to open a result, Ctrl and Enter to open it in a new tab, and Tab to jump to the next group.
With PRO, the same search also finds offers and their codes, classic coupons, gift cards with their balance, and invoice, credit note and PO numbers, each leading to its order, and adds the quick actions New order, Create an offer and Add a gift card.
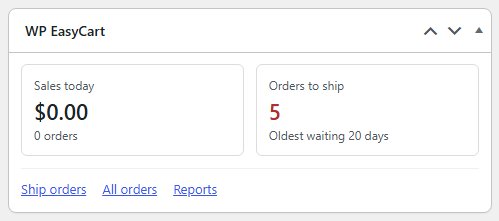
Your store on the WordPress Dashboard. Administrators and store managers get a WP EasyCart widget on the WordPress Dashboard: Sales today with the number of orders, and Orders to ship with how long the oldest has waited, or All caught up. Its links open Ship orders ( the orders waiting to ship ), All orders and Reports. Hide it from the Dashboard’s Screen Options like any other widget.
Ready to run your store on WP EasyCart?
Everything in this guide works with the free plugin. PRO and Premium add subscriptions, memberships, wholesale pricing and more. Try every PRO feature free for 14 days.
