
Authorize.net Payment Settings

< 1 min read

Financial Settings

Authorize.net Payment Settings

Accept credit cards with one of the most trusted names in payments. Connecting Authorize.net to WP EasyCart takes just two credentials — an API login ID and a transaction key — and both live in your Authorize.net control panel. Here’s exactly where to find them.

Find Your API Credentials

Everything EasyCart needs lives in the settings menu of your Authorize.net control panel. Three quick steps and you’re connected.

1

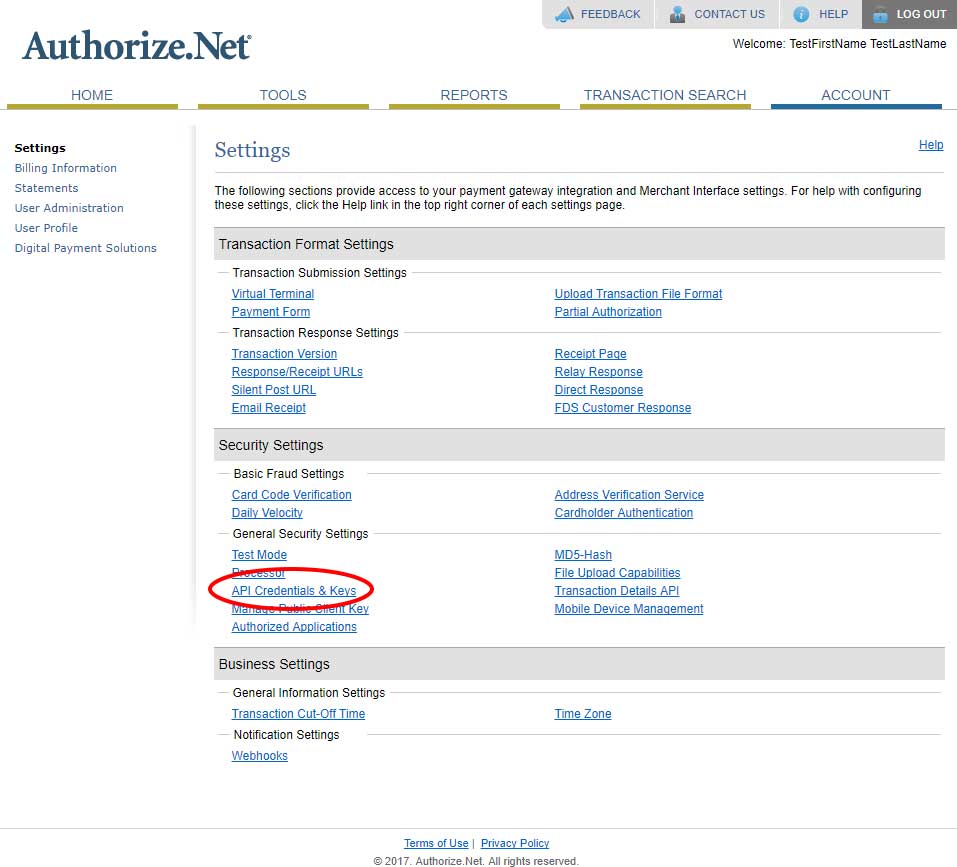
Open the Settings Menu

To access your Authorize.net credentials for the API, go to the settings menu found within your Authorize.net control panel.

Authorize.net — Control Panel Settings Menu

Authorize.net control panel settings menu location
2

Open API Credentials & Keys

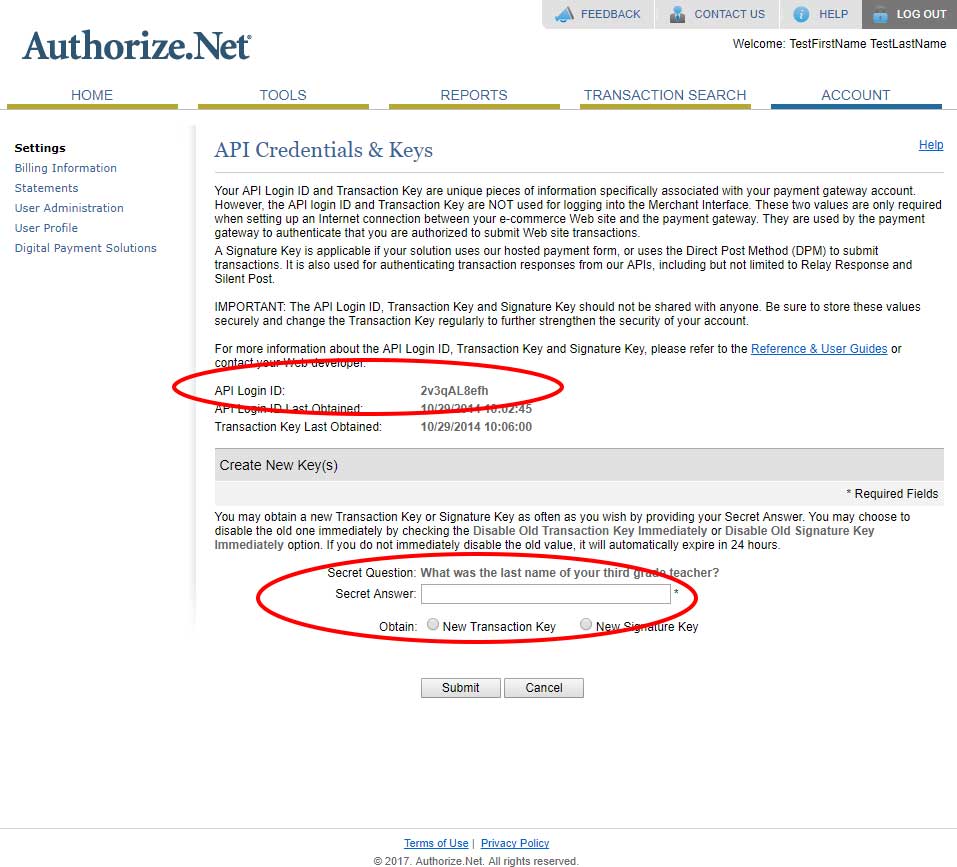
Next, open the API Credentials & Keys section within settings.

Authorize.net — API Credentials & Keys
Authorize.net API credentials and keys section
3

Copy Your Login ID & Generate a Key

You’ll be able to view your API login ID here, but you must generate a new API transaction key each time you come to this area. Once you have both, simply enter them into the WP EasyCart Authorize.net section.

WP EasyCart — Authorize.net Payment Setup
WP EasyCart Authorize.net payment settings with API login ID and transaction key fields

Testing? Both Sides Must Match

If you plan to test transactions, you must have Authorize.net AND WP EasyCart in test mode. Developer accounts are special accounts and most users will not have these types of accounts. And when you’re ready to go live, be sure to check that both accounts are live as well.

Ready to Take Payments?

If your Authorize.net connection isn’t behaving — test mode mismatches, key errors, declined test cards — our support team can get you processing fast.

Updated on July 20, 2026
