
Store pages
The three WordPress pages EasyCart needs; each holds one shortcode
3 settingsStore page
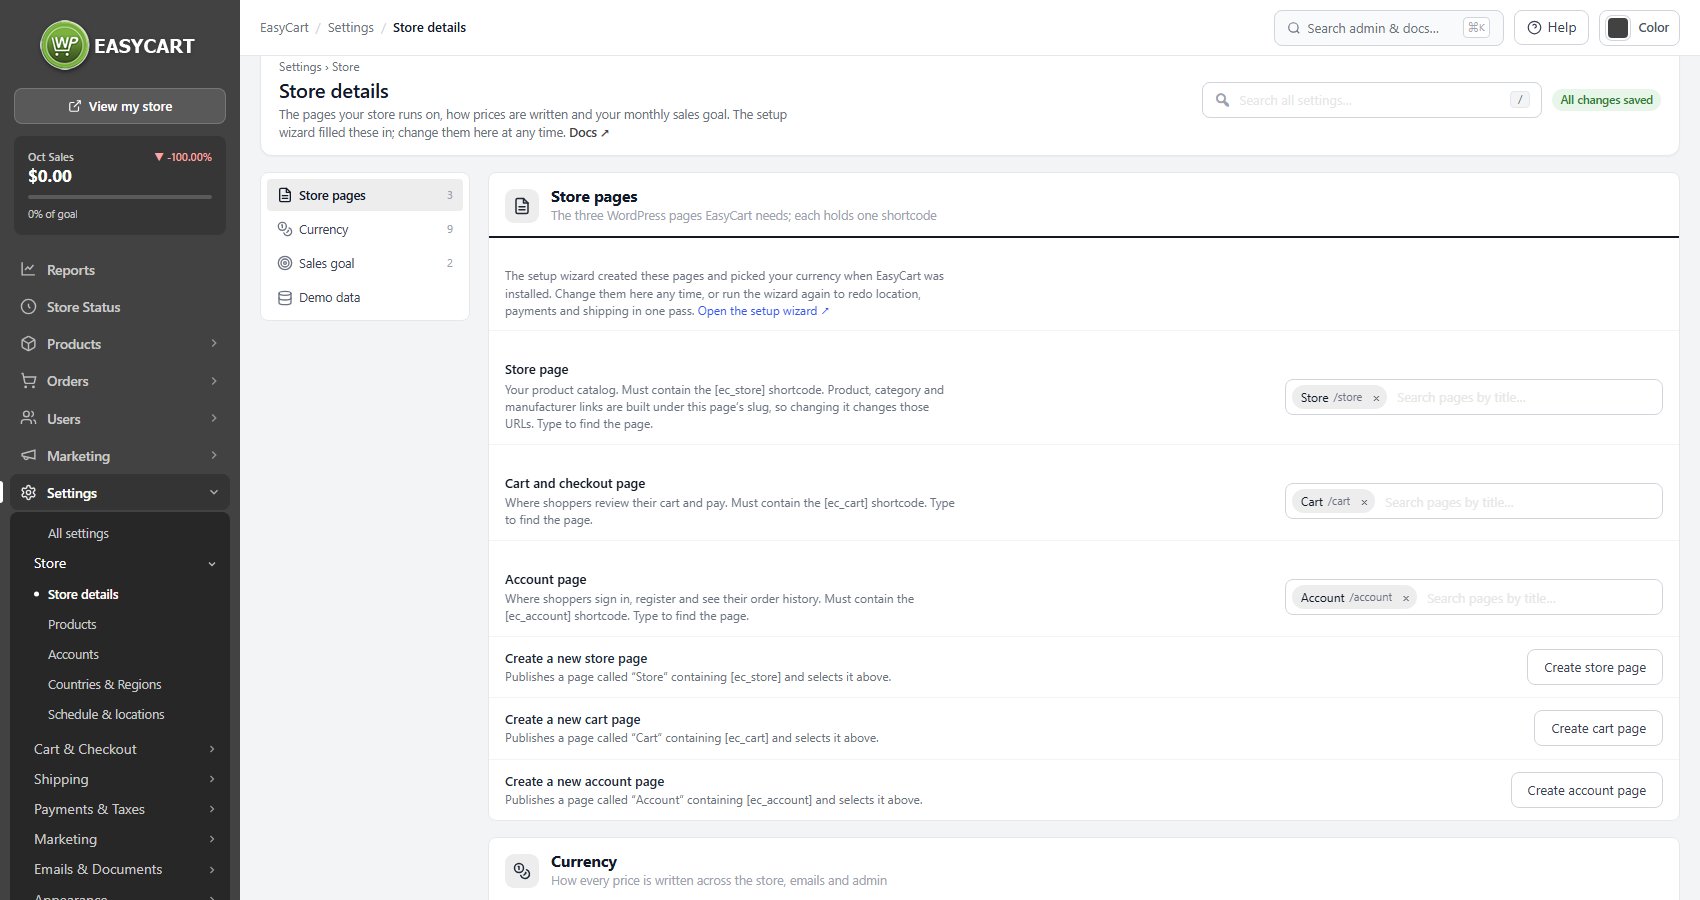
The WordPress page that holds your catalogue, which must contain the [ec_store] shortcode. Every product, category and manufacturer link is built beneath this page’s slug, so a store page at /shop/ gives you /shop/product-name/. That also means changing the page, or renaming its slug, changes every product URL on the site at once; do it before you launch, or plan redirects if you do it after. The picker searches your pages as you type, and the row warns you if the chosen page is unpublished or has lost its shortcode.
Cart and checkout page
Where shoppers review their basket, enter their details and pay. It must contain the [ec_cart] shortcode, and one page does both the cart and the checkout: there is no separate checkout page to set. Keep this page out of menus and sitemaps if you like, but never unpublish it, because every Add to cart button leads here.
Account page
Where shoppers sign in, register, and see their orders, downloads and subscriptions. It must contain the [ec_account] shortcode. Login links in checkout and in order emails point at this page, so it has to exist even on a store that allows guest checkout.
Currency
How every price is written across the store, emails and admin
9 settingsCurrency code
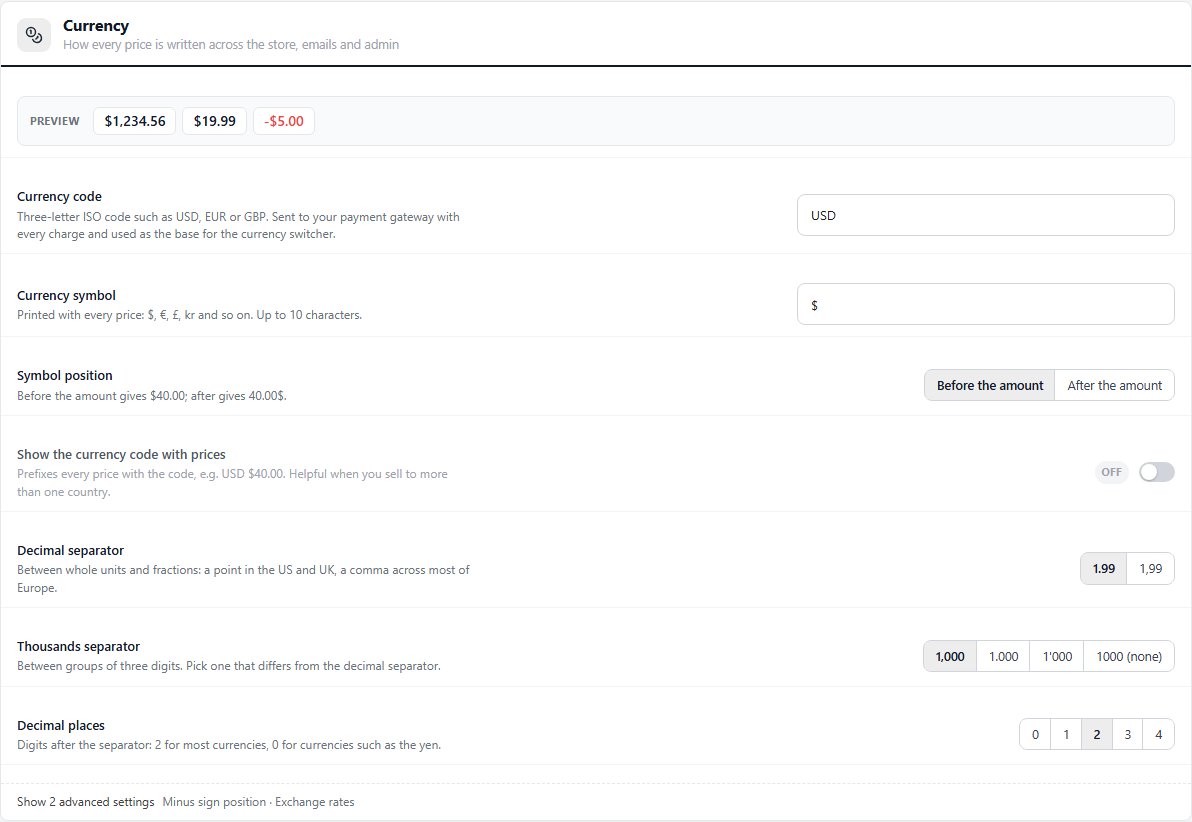
The three-letter ISO code your store trades in, such as USD, EUR or GBP. This is the currency sent to your payment gateway with every charge, so it has to match what the gateway account is set up to take; a mismatch is rejected at payment time, not here. It is also the base the currency switcher converts from. Start typing and the field suggests valid codes.
Currency symbol
The symbol printed beside every price on the storefront, in emails and in the admin: $, €, £, kr, or anything up to ten characters. It is display only. The gateway never sees it, so you can write “US$” or “CA$” to tell two dollars apart without affecting what is charged.
Symbol position
Whether the symbol comes before the amount, as in $40.00, or after it, as in 40.00 €, which is the convention across much of Europe. The price preview at the top of the section updates as you switch, so you can see the result before saving.
Show the currency code with prices
Prefixes every price with the ISO code as well as the symbol, so $40.00 becomes USD $40.00. Worth turning on when you sell into more than one country that uses the same symbol, since a Canadian shopper seeing a bare dollar sign will assume the wrong currency. On a single-country store it is clutter.
Decimal separator
The character between whole units and fractions: a point in the US, UK and most of Asia, a comma across most of continental Europe and South America. This affects how prices are printed, not how you type them into the admin, which always takes a point.
Thousands separator
The character between groups of three digits, so 1,250.00 or 1.250,00 or 1 250,00. Pick one that differs from the decimal separator; the panel warns you if they match, because a price like 1,250,00 is unreadable and a shopper will not know whether it is twelve hundred or a million.
Decimal places
How many digits follow the decimal separator. Two suits nearly every currency. Zero is right for the yen, the won and other currencies with no fractional unit, and three for the dinar family. Prices are rounded for display; the stored price keeps its precision.
Minus sign position
Where the minus sign sits on refunds, discounts and negative fees: before the symbol gives -$5.00, after it gives $-5.00. Most stores never change this. It is folded away because it only matters on the handful of screens that print negative amounts.
Currency
The rates the currency switcher widget uses when a shopper chooses to see prices in another currency. Each row is a currency code and how much of it one unit of your base currency buys, so with a USD base, EUR at 0.92 means one dollar shows as €0.92. Leave your base currency out. These are display conversions only: the order is still charged in the base currency, and the rates do not update themselves, so revisit them or remove the widget rather than show stale numbers. The factory values are placeholders, not today’s rates.
Ready to run your store on WP EasyCart?
Everything in this guide works with the free plugin. PRO and Premium add subscriptions, memberships, wholesale pricing and more. Try every PRO feature free for 14 days.
