
Step 2. Enter your FedEx details
Two keys, an account number and your ship-from details
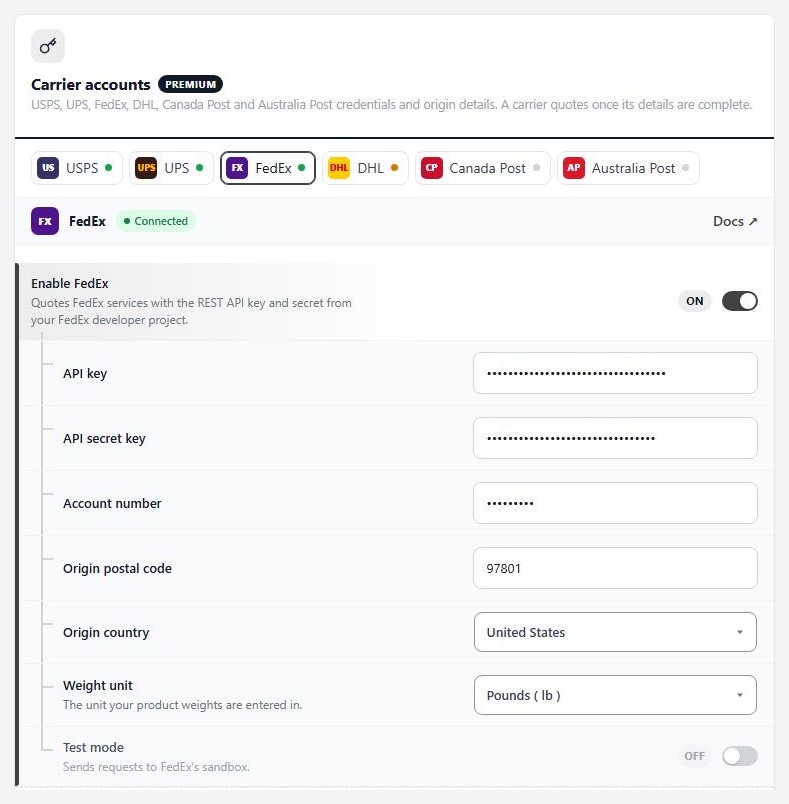
Open EasyCart › Settings › Shipping › Shipping settings, find Carrier accounts, pick the FedEx tab and turn Enable FedEx on. Then fill in:
API key and API secret key: from your FedEx project. Paste them in carefully; a space before or after is the most common reason FedEx refuses them. The secret is hidden as you type.
Account number: your FedEx account number. Use the one that matches the keys: test or production.
Origin postal code and Origin country: where your parcels ship from.
Weight unit: the unit your product weights are entered in, pounds or kilograms.
Every change saves as you make it, and a small Saving … Saved note shows beside it. The first time you save, WP EasyCart adds the usual FedEx services to your live rates for you.
Check the connection
Connected, Needs details, Not set up, or not accepted
The line under the FedEx tab name tells you where you are:
Connected: FedEx accepted the keys and WP EasyCart can get rates.
Needs details: something is still empty. It says what, for example Add: API secret key.
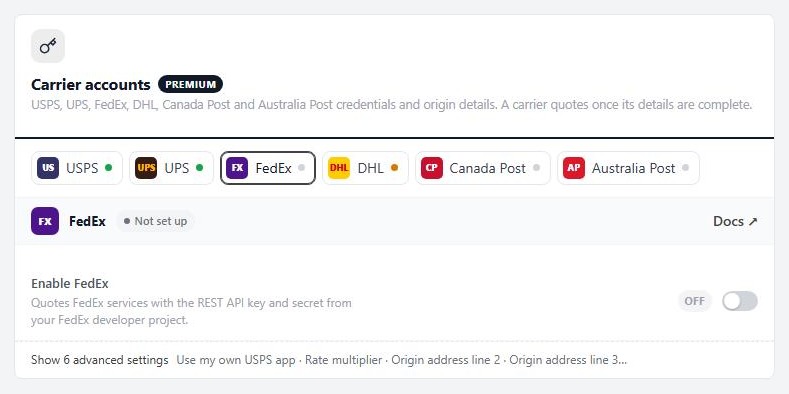
Not set up: Enable FedEx is off.
If FedEx turns the details down, the status says FedEx did not accept these details and tells you to check the credentials, account number and origin address, and whether test mode matches your account.
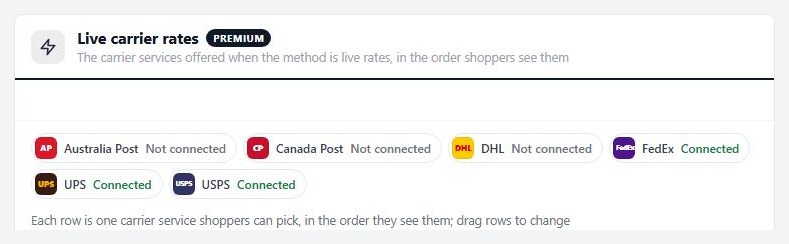
The same FedEx status also shows on Settings › Shipping › Shipping rates, in the Live carrier rates card, beside the other carriers.
Test mode and the advanced settings
Sandbox, discounts, business addresses and a rate multiplier
Press Show advanced settings on the FedEx tab for:
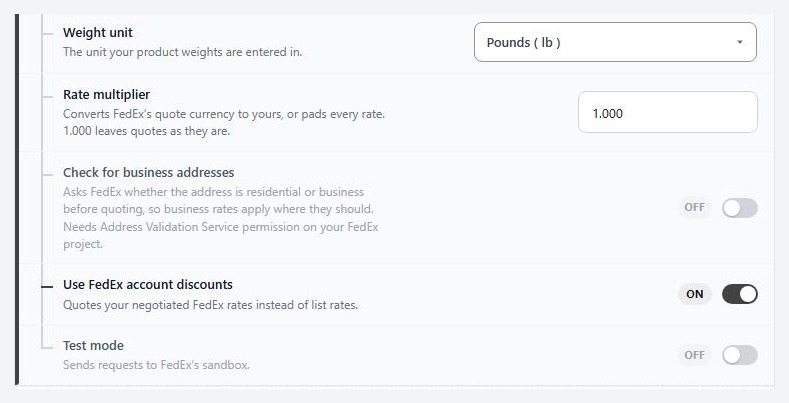
Test mode: sends requests to FedEx’s sandbox, for the test keys. Turn it off when you switch to production keys.
Rate multiplier: 1.000 leaves FedEx’s quote as it is. Enter 1.100 to add 10% to every FedEx rate, or use it to convert FedEx’s currency to yours.
Check for business addresses: asks FedEx whether the address is residential or business before quoting, so business rates apply where they should. Needs the Address Validation permission on your FedEx project, which is why step 1 ticks that API. Off by default.
Use FedEx account discounts: quotes your negotiated FedEx rates instead of list rates. On by default.
Turn FedEx on or off
One switch, and nothing is lost
Turn Enable FedEx off and FedEx stops quoting at once. The status reads Not set up and the rows under the switch fold away. Your keys, account number and ship-from details are kept, so turning it back on brings FedEx straight back to Connected.
Use this to pause FedEx without losing your setup, for example while you test another carrier.
Step 3. Switch your store to live rates
FedEx does nothing until this is the active method
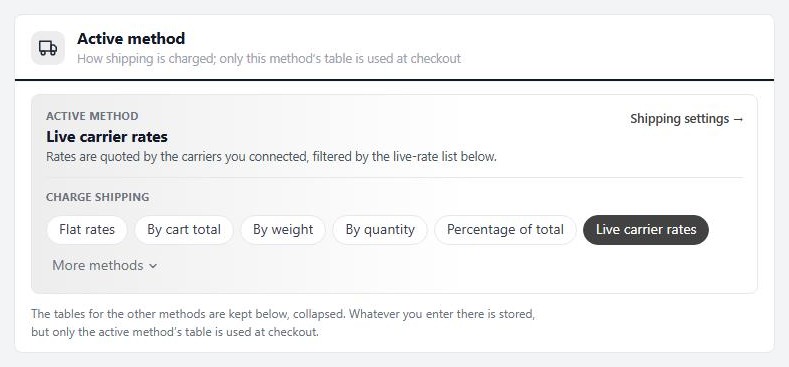
Open EasyCart › Settings › Shipping › Shipping rates. At the top, Active method shows how shipping is charged, and only that method’s table is used at checkout. Under Charge shipping choose Live carrier rates.
The tables for the other methods stay below, folded. Whatever you entered there is kept, but it is not used while live rates are active.
Step 4. Choose the FedEx services shoppers see
Each row is one FedEx service, in the order shoppers see them
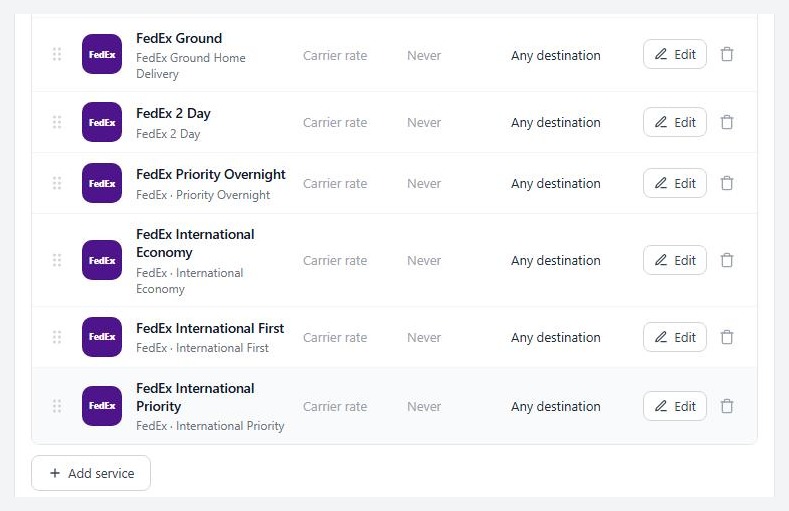
Scroll to Live carrier rates. If none were listed, the first save of your FedEx details adds the usual services: Ground ( Home Delivery ), 2 Day, Priority Overnight, International Economy, International First and International Priority.
Each row shows the name shoppers see, the FedEx service behind it, a fixed Price if you set one ( otherwise Carrier rate ), the Free shipping at amount and the Zone. Drag a row by its handle to change the order shoppers see. Press Edit to change a row, or the bin to remove it.
To add a service, press Add service under the list, choose FedEx as the carrier and pick from the FedEx services: 1 Day Freight, 2 Day, 2 Day AM, 2 Day Freight, 3 Day Freight, Express Saver, Europe First International Priority, First Freight, Freight Economy, Ground, Ground Home Delivery, Freight Priority, First Overnight, International Economy, International Economy Freight, International First, International Priority, International Priority Freight, Priority Overnight, Smart Post and Standard Overnight.
Step 5. Get your products ready
A weight and a size, and Ships to the customer on
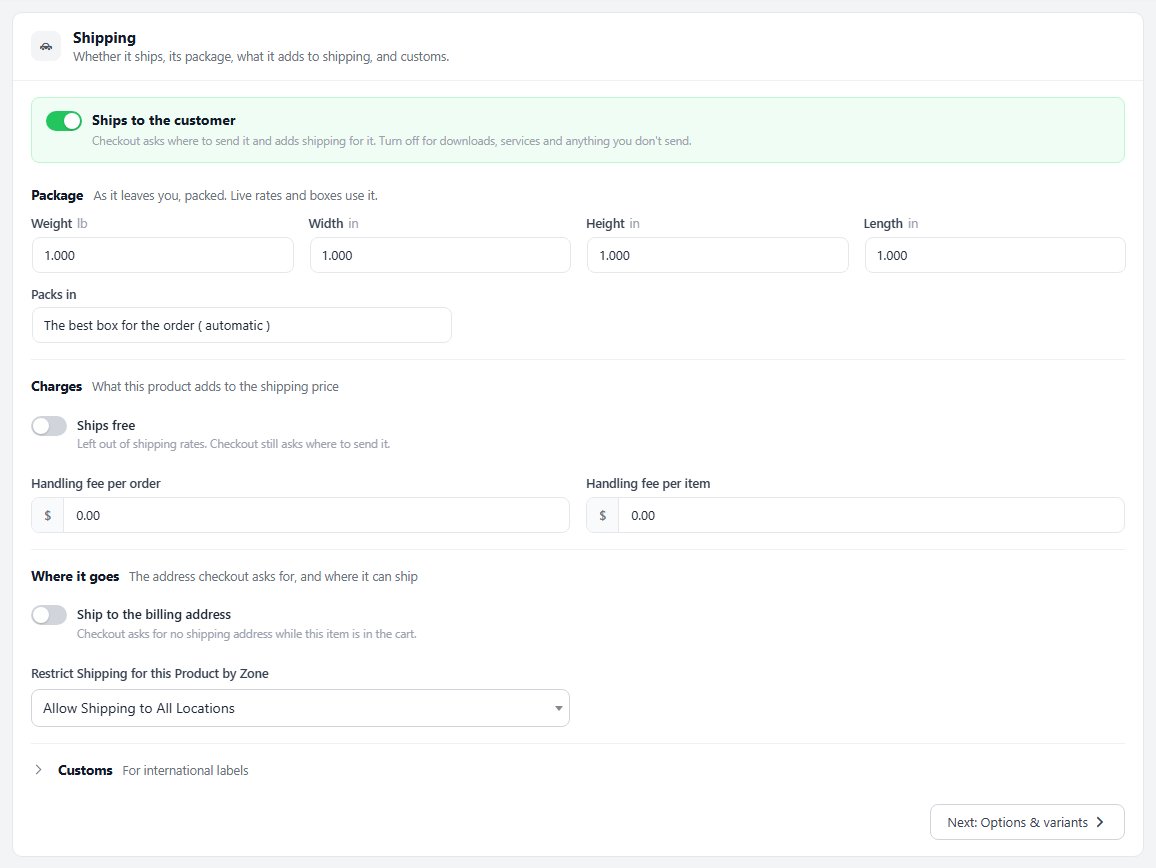
Live rates quote each cart from its products, so edit every product you ship. Open the product, go to its Shipping section, and set:
Ships to the customer: on, or the item is left out of the shipping calculation.
Weight, Width, Height and Length under Package: the package details live rates use. A product with no weight cannot be quoted properly.
Handling fee per order and Handling fee per item under Charges: optional extras added on top of the rates.
Weights are read in the unit you chose for FedEx in step 2. Dimensions are read in inches or centimetres, set by Dimension units in the advanced settings of the Shipping method card on Settings › Shipping › Shipping settings.
Delivery days and other live-rate options
How quotes are shown
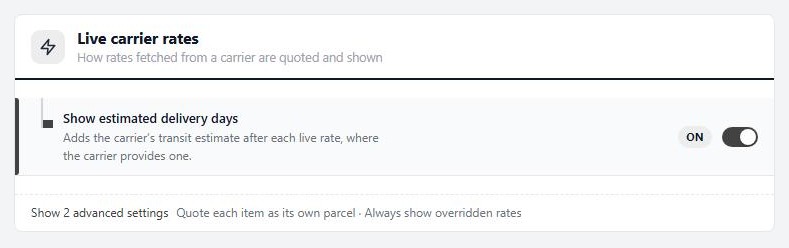
On Settings › Shipping › Shipping settings, the Live carrier rates card covers all carriers:
Show estimated delivery days: adds FedEx’s transit estimate after each rate, where FedEx provides one. On by default.
Quote each item as its own parcel ( advanced ): asks for a rate per item and adds them up, instead of one combined package. Only for goods that cannot ship together; it usually costs more.
Always show overridden rates ( advanced ): a service you gave a fixed price is shown even when FedEx returns no rate for the address.
Ready to run your store on WP EasyCart?
Everything in this guide works with the free plugin. PRO and Premium add subscriptions, memberships, wholesale pricing and more. Try every PRO feature free for 14 days.
