
Financial Settings
Flex-Fee Settings
Flex-Fees give you a more flexible structure for your business and ecommerce checkout workflow. Inject a custom fee based on criteria you establish — either to cover added expenses on your system or to engage unique discounts for customers. They’re extremely flexible, and we’ll cover the most useful scenarios right here.
Constructing a Flex-Fee
Two quick steps: open the Flex-Fee panel, then set your rates and filters.
Open the Flex-Fee Panel & Add New
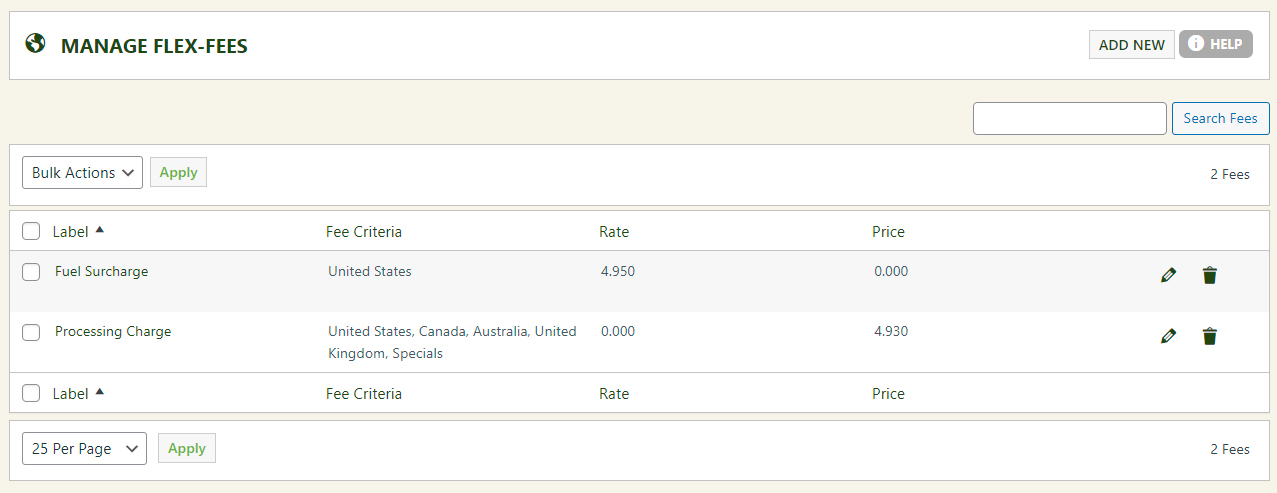
Navigate to the WP EasyCart › Settings › Flex-Fee menu. Here you can see a list of all present Flex-Fees you establish, as well as edit, delete, or add new. Click the ‘Add New’ button at the top to start creating a Flex-Fee.
WP EasyCart — Flex-Fee List
Set Your Parameters & Filters
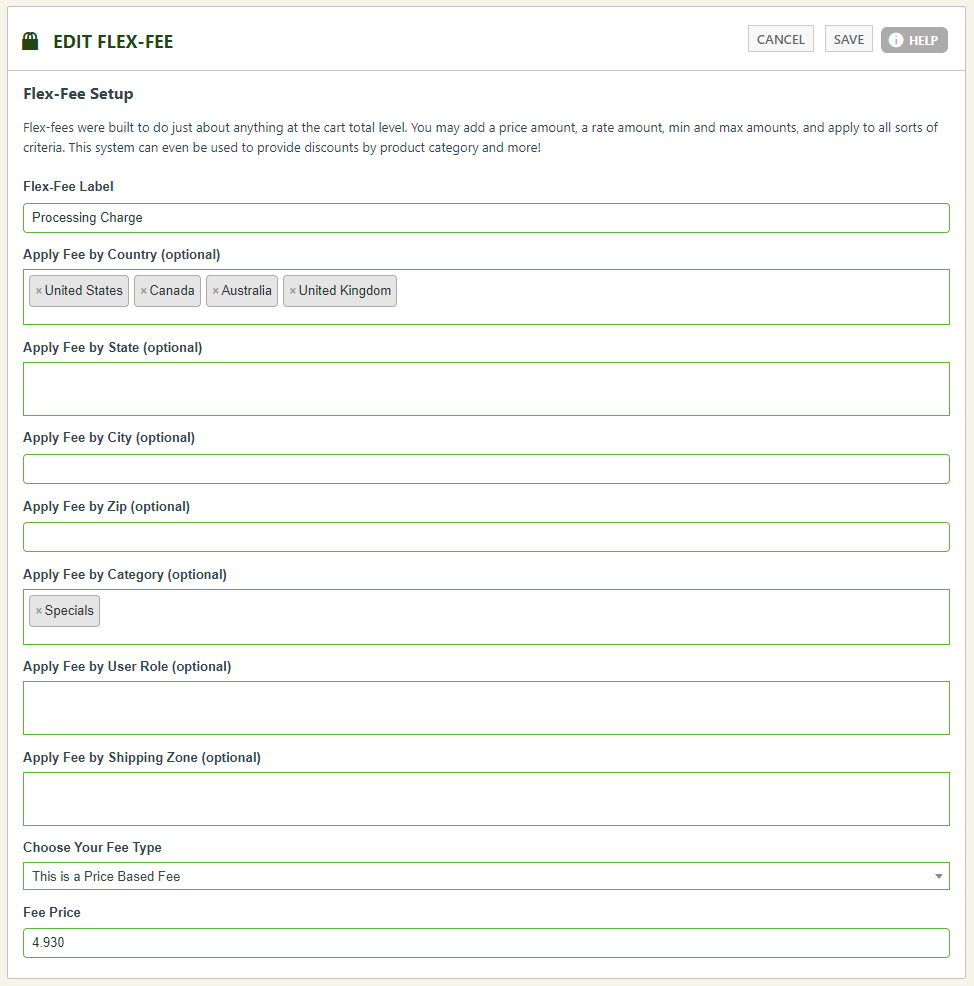
Next, establish all the parameters and filters you need to apply to the Flex-Fee. If you wish for the fee to apply to ALL uses, simply leave the optional filters empty. Required fields are the Flex-Fee Label and the Type/Rate.
- Rate Based Fee: A percentage value of your shopping cart subtotal. You can get creative here and also apply a negative percentage to offer discounts.
- Minimum Fee: Applies a minimum fee, even if you have a percentage based rate established. Leave empty if you do not want a minimum.
- Maximum Fee: Applies a maximum fee — if your rate percentage calculates to above this limit, it will only show this maximum. Leave empty if you do not want a maximum.
- Price Based Fee: A simple price based static fee that will apply. This value may also be negative to apply a price based discount.
WP EasyCart — Flex-Fee Settings
What Your Customers Experience with Flex-Fees
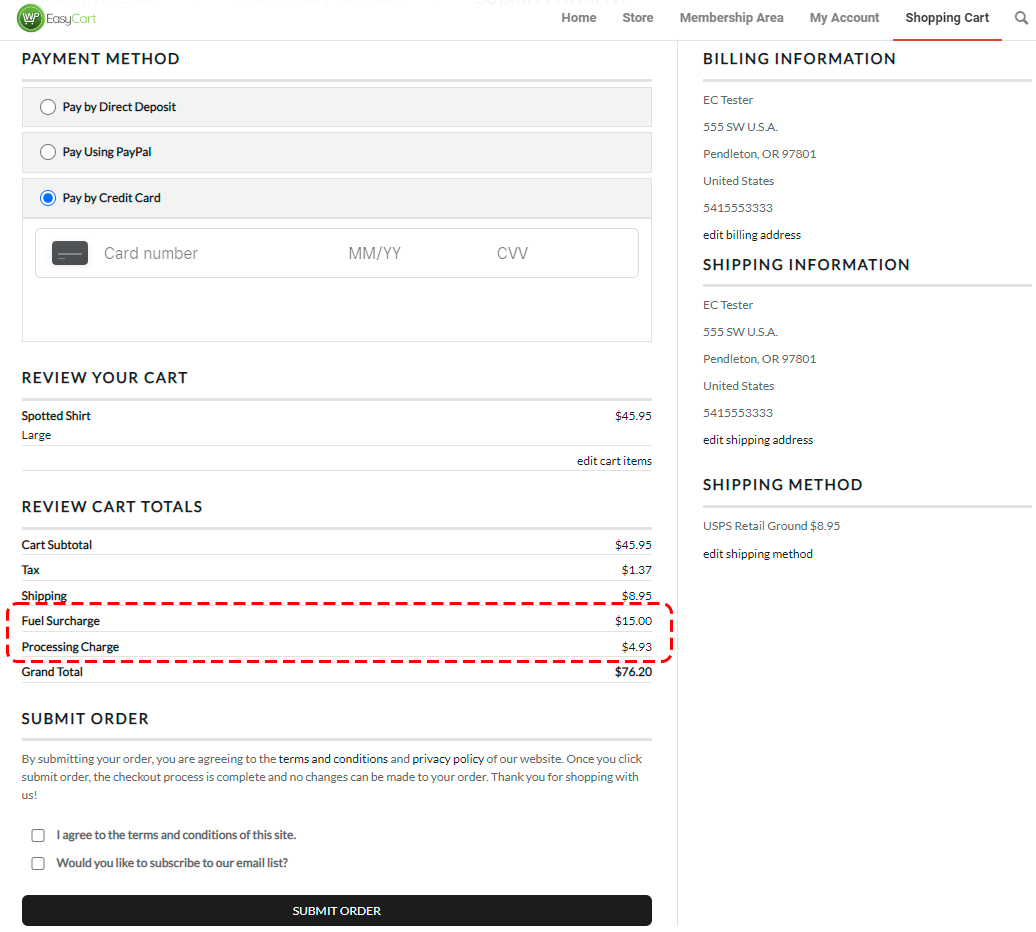
The Flex-Fee appears in your customers’ checkout experience as they flow through checkout. Often the user’s address information must be collected before calculating, and the full charges are visible at the end of the process during payment. In the example below, 2 Flex-Fees are being added — one for fuel or delivery charges and one for processing charges.
- Popular Fee Examples: There are unlimited cases where you might apply a fee — maybe custom postal code based shipping addresses get delivery charges, shipping zones, or simply a category of products gets a specific fee applied. You can also apply to user roles and user groups, cities, or countries.
- Popular Discount Examples: You may also enter negative Flex-Fees and present them as a discount based on user roles, locations, or even postal codes. This can be a great way to provide discounts to local zip codes — or maybe there’s a certain category of product you want to really showcase as a line-item discount during checkout.
WP EasyCart — Flex-Fees at Checkout
Fees In. Discounts Out. Your Rules.
Flex-Fees can model almost any charge or discount your business needs. If you’re unsure how to structure one, our support team is happy to help.