The EasyCart checkout system is designed to work with in over 30+ gateways and shipping systems. There are many settings allowing you to enable/disable features during checkout so that the workflow will meet your business needs. This is an integral and complex part of the shopping cart.
Cart Settings
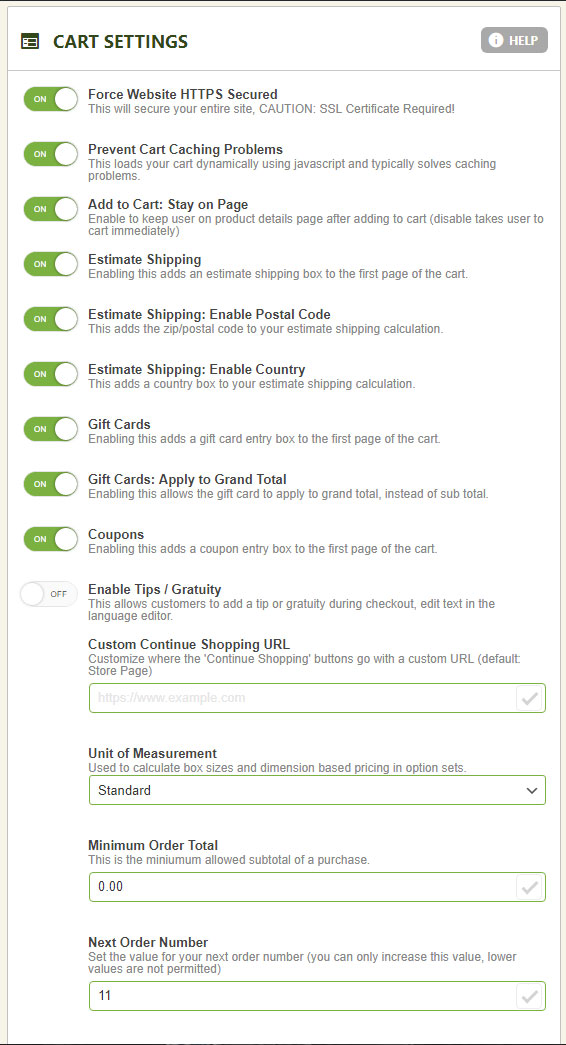
You may enable and disable certain form fields and features that appear during checkout in the billing/shipping/confirmation pages.
- Force Site Secure (SSL Certificate Required): This setting will make your entire site use https:// and go secure. You must have a valid SSL on your web hosting in order to work correctly. Your web host will install an SSL for you, once it is installed, every site should turn this option ON as most payment gateways will not work unless you are running a secured website.
- Prevent Cart Caching Problems (Prefer to leave on): EasyCart can load via scripts the entire cart and account system so that caching plugins will be more compatible. If enabled, you will see a small loader when the cart or account systems load, and caching plugins and server side caching will likely work just fine with this turned ON.
- Add to Cart: Stay on Page: When a user adds an item to the shopping cart from the store, does the user simply stay on that product page, or do you want them to jump to the cart page and view their entire shopping cart.
- Enable Estimate Shipping: The shopping cart lets your customers estimate shipping. Using live shipping is a good example of when a customer could enter their zip code and get estimated shipping. If using trigger based shipping, there is no need for estimates as it automatically calculates and finds correct value, so this section could easily be turned off.
- Enable Zip Code for Estimate Shipping: If enabled, the user can enter their zip code to estimate shipping.
- Enable Country for Estimate Shipping: If enabled, the user can select their country to estimate shipping.
- Enable Gift Cards: During checkout, customers may redeem gift cards by entering their gift card ID. You may disable this section if you do not have or sell gift cards using EasyCart.
- Gift Cards Apply to Grand Total: If using EasyCart gift cards, you can apply them to the cart total, or the grand total. By disabling, only the cart total will be used, with shipping and taxes still applying to the order. If checked, the entire gift card may go toward the cart, shipping, taxes, etc.
- Enable Coupons: During checkout, customers may enter coupons to redeem. You may disable this section if you do not have or utilize coupons within EasyCart.
- Enable Tips and Gratuity: If enabled, users will be presented with options to leave a tip during checkout. These can be static percentages such as 10, 15, 20, 25 by using a comma separated list. Customers will also be given a chance to enter any value they want for a tip amount, rather than choosing a predefined value.
- Customize Continue Shopping URL: If you wish to have the continue shopping button in the cart point to a custom URL, you may do so here.\
- Units of Measurement: STANDARD or METRIC may be selected for units during package calculation and also for within some advanced option sets that calculate measurement.
- Cart Minimum Order Total: Set a value here will require the user to meet this threshold during checkout before they may proceed to placing the order.
- Next Order Number: The order ID is an auto increment value in the database, and you may adjust this integer value to a value greater than what is already set. You may not go lower as the order IDs may run into inconsistency with existing data.
Checkout Form
These options allow you to define further how the checkout process will work in your ecommerce store.
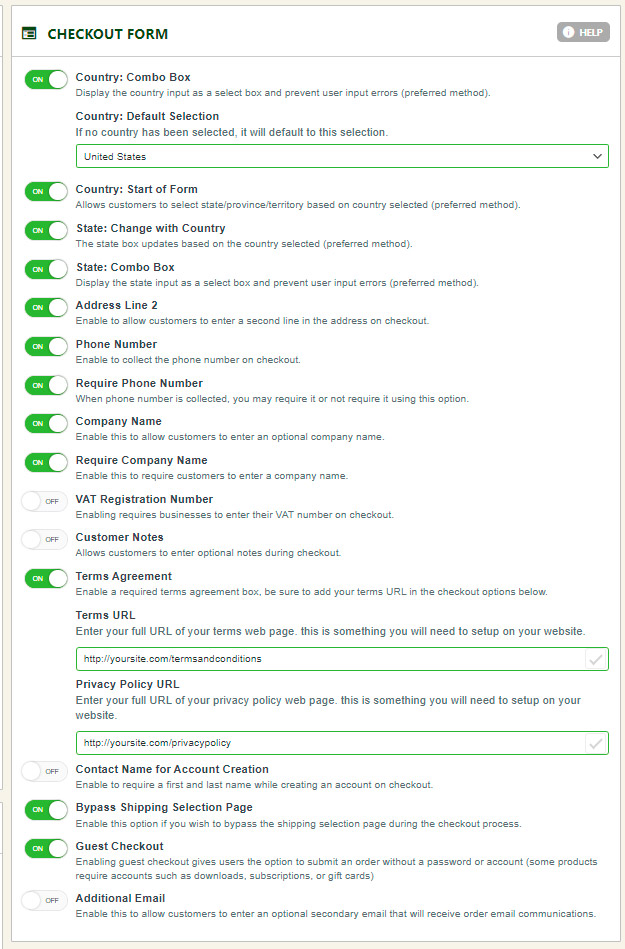
- Country Combo Box (Recommend to leave on): This allows a combo box or an open text box for countries. It’s important to use the combo boxes in nearly all situations as it offers valid countries during payment, shipping api calls, etc. If you have an open text box for countries, then the users may enter non-standard names, misspelled countries, often causing errors in shipping and payment processing. (Be sure to leave this on in most situations as it will ensure data integrity with payment gateways, live shipping API systems, shipping zones, and other areas requiring correct country and state codes)
- Default Country Selection: During billing/shipping completion, the customer could have a default country selected, making checkout easier given the country is already on the most common method.
- Display Country Selection at top of form (Recommend to leave on): You can decide if you want country to be the first field/selection on the billing/shipping page or not. We recommend you have this first because it can change the state/province list depending on what country is selected along with various language headers. If not selected, country will appear near the bottom of the form after they enter their city, state, zip code.
- States Change with Country Selection (Recommend to leave on): This referees to smart states list. If enabled, a change in the country selection will automatically adjust which states/provinces appear in the state pulldown. (Be sure to leave this on in most situations as it will ensure data integrity with payment gateways, live shipping API systems, shipping zones, and other areas requiring correct country and state codes)
- States Combo Box(Recommend to leave on): This allows a combo box or an open text box for states. It’s important to use the combo boxes in nearly all situations as it offers valid states during payment, shipping api calls, etc. If you have an open text box for states/provinces, then the users may enter non-standard names, misspelled states, often causing errors in shipping and payment processing. (Be sure to leave this on in most situations as it will ensure data integrity with payment gateways, live shipping API systems, shipping zones, and other areas requiring correct country and state codes)
- Enable Address Line 2: You can enable this 2nd address line if you have businesses which offer 2 line addresses. Some customers choose to enable this 2nd address line and re-label it using our language editor to collect business name or other data.
- Enable Phone Number: Choose whether you wish to collect the users phone number or not.
- Require Phone Number: If you have the phone number collected, you may make it optional.
- Enable Company Name: Choose whether you wish to collect the company name and address.
- Require Company Name: If you have the company name collected, you may make it optional.
- Enable VAT registration number: If enabled, you can allow the user to enter a VAT registration number for collection during billing/shipping address input. This is required in some countries.
- Enable Customer Notes: If enabled, during checkout on the confirmation page there is the ability for customers to leave any notes or comments they wish you the business owner to see.
- Enable Terms Agreement: We highly recommend you build a terms & conditions page in wordpress and put the url in this location. It will appear in the terms agreement statement for users to click on and agree to before order confirmation.
- Privacy Policy URL: We highly recommend you build a privacy policy page in wordpress and put the url in this location. It will appear in the terms agreement statement for users to click on and agree to before order confirmation.
- Custom Return to Cart URL: By default, this is empty and your continue shopping button will return users to the store. IF you want to enter a custom URL here, then all of your users will see the continue shopping button go to a this custom set url.
- Contact Name for Account Creation: If enabled, a users first and last name will be collected during account creation. This could be different than the billing/shipping address coming from companies and such, so the name collection can be more personalized to the user and the account. If not enabled, only a password is required for account creation.
- Bypass Shipping Selection Page: Depending on your shipping method, it may not be necessary for customers to see the shipping panel after billing/shipping address. Using trigger shipping is a good example of when you do not need to show the shipping panel, as it’s already calculated. You may also rather prefer to streamline the panels so leaving shipping selections on the payment page may be preferred.
- Allow Guest Checkout: If enabled, you can let users bypass entering a password and saving their account data. The only difference between a guest checkout and a regular checkout is the addition of a password to save their account information. IF selling things such as digital downloads, customers are required to have an account to access their purchased goods.
- Additional Email: You may enable this setting to allow users while checking out to enter an additional email in which they may want to send order confirmations to. This can be optional and every order confirmation, shipping notice or other email from EasyCart will also go to this secondary email on the order. This email also appears on the order details panel within EasyCart and it does not tie into the users account. It is merely tied to the order in which they enter it on.
Order Statuses
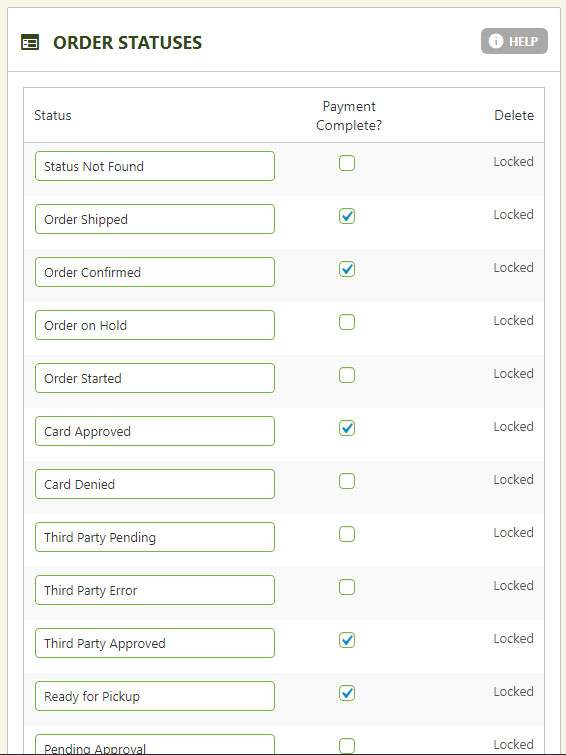
All order statuses are configurable with the exception of some critical locked fields. Simply change the label of a standard order status, or create your own custom order status at the bottom. You can also assign whether this is an order approved status, or should it behave as a pending or no payment status. This attribute can effect the various front-end perspective for a client, such as downloadable products or membership content.
Checkout Stock Control
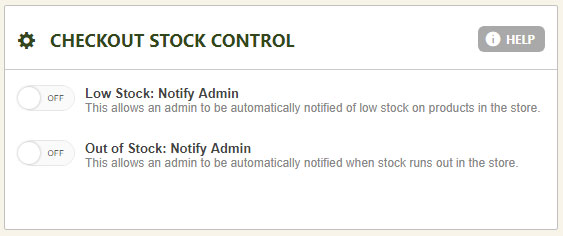
This section determines what happens when you monitor and track inventory stock levels and how EasyCart should handle that data.
- Send Low Stock Admin Emails: If enabled, and you are controlling inventory at the product level with quantities and inventory levels, an email may be dispatched to admin users when the low stock quantity trigger is met.
- Send Out of Stock Admin Emails: If enabled, and you are controlling inventory at the product level with quantities and inventory levels, an email may be dispatched to the admin user when the stock quantity drops to zero.
- Low Stock Trigger Quantity: This sets the low stock quantity trigger for emails to be dispatched.
Payment Page Options
This section determines what happens on your final payment page.
- Collect Card Holder Name: If enabled, the users card holder name will be collected during credit card transactions using live payment gateways. This is usually not a requirement for the card processing companies, but can be helpful if passed.
- Default Payment Selection: You can choose which payment method is selected during checkout by default. You could possibly have manual payments, third party payments, and live payments all enabled, giving your customers a default is a good choice.

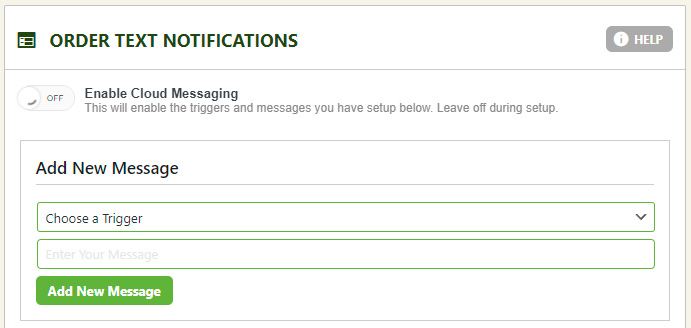
Enable Cloud Messaging
Cloud messaging allows your customers to enter their phone number and receive text messages when orders statuses are changed. This is a monthly cloud service that WP EasyCart offers and is a low-cost texting solution to give customers extra notifications and engagement opportunities. Simply sign up for the service, and we’ll take care of sending for you.
To learn more and sign up for the service, we have a full guide here!
The solution allows you to completely customize your text messages and we send them all for you. Customers can Opt-In on the thank you page after an order to receive these alerts! Very low cost and a great way to engage your customers.
Store Scheduling Checkout Settings
When you enable restaurant scheduling by sliding on, EasyCart becomes a powerful preorder and pickup ordering platform. These settings will display to the user on the final ‘Payment‘ checkout page next to each items for scheduling.
Restaurant Orders: Scheduling Range: This setting allows users to pick a time using these intervals. If set to 15 minutes, then the user will see 15 minute intervals in which they can schedule for their preorder/pickup times.
Restaurant Orders: Expected Prep Time: This is the amount of time you expect each order to need for prep. For example, if a user orders and wants it delivered ASAP (As Soon As Possible) then the system will show them this time period for pickup. 30 minutes means they will see the order will be ready in 30 minutes. If you require 45 minutes when an order is placed, then select 45 minutes.
Cart Schedule: Preorder for Pickup Instructions: During checkout, on the final payment page you can customize instructions here for the preorder section.
Cart Schedule: Restaurant Pickup Instructions: During checkout, on the final payment page you can customize instructions here for the restaurant section.

