Integration Guide
WP EasyCart × Google Merchant
Push your WP EasyCart product catalog to Google Merchant Center as a structured feed — ready for Google Shopping, Product Listing Ads, and free product listings in search results. Build the feed CSV in EasyCart, fill in Google-required fields, and upload to Merchant Center.
Before You Begin
A Google Merchant Center account is required. If you haven’t set one up yet, visit merchants.google.com. You’ll also want to verify and claim your store URL with Google before importing the feed.
Step 1 — Export Your Product CSV from EasyCart
EasyCart builds the starting CSV with all your product data — ready for the Google-specific fields you’ll add next.
Create the CSV File
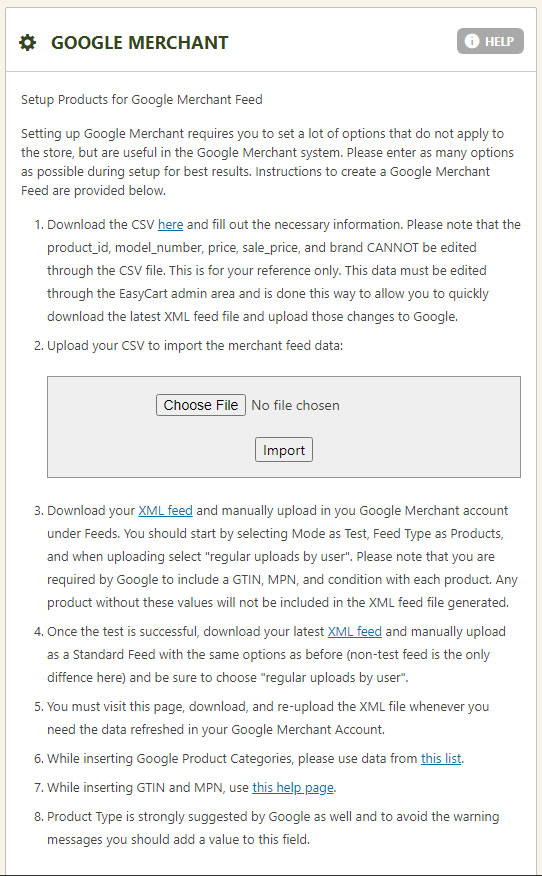
In WordPress, go to EasyCart › Settings › Third Party › Google Merchant and follow the on-screen steps to create a CSV file from your product catalog. This CSV is your starting feed — it includes all the EasyCart product data Google needs.
EasyCart — Google Merchant Settings Panel
Step 2 — Fill in Google-Required Fields
Add GTIN, MPN, and the other Google-specific fields before generating the final feed.
Add GTIN, MPN & Google Fields
Open the CSV in your spreadsheet editor and fill in the Google-specific columns: GTIN, MPN, brand, product condition, and Google product category. Save the CSV. Re-upload it to EasyCart in the same panel, and EasyCart will generate a Google-compatible XML feed file for you to import into Merchant Center.
Step 3 — Upload the Feed to Google Merchant Center
Start with a test feed, confirm everything looks right, then promote to a live feed.
Test, Then Go Live
In Google Merchant Center, import your XML feed as a test feed first — this lets you verify the data without disrupting any live ads. Once the test feed looks clean, re-import it as a regular live feed. From there, your products can power Google Shopping ads and appear in free product listings.
Per-Product Control
Set Google Merchant Fields on Individual Products
You can also manage Google Merchant fields product-by-product directly in EasyCart — no need to round-trip through a CSV every time.
- Go to WP EasyCart › Products and edit any product
- Open the Google Merchant tab on the product edit screen
- Fill in brand, GTIN, MPN, condition, product category, and any other Google fields directly on the product
- Save the product — the fields flow into future feed exports automatically
Get Your Products into Google Shopping
Combine WP EasyCart with Google Merchant Center to appear in Google Shopping results, Product Listing Ads, and free product listings — all driven from your existing EasyCart catalog.