
Financial Settings
How to Sell with Amazon on WordPress
Amazon Pay provides a quick and easy way to have customers checkout on your EasyCart platform with only a few clicks. EasyCart has already done the complete integration for you — Amazon does require quite a few steps to get started, but follow the instructions and the whole process can be completed in less than 10 minutes.
Start with Amazon’s Setup Guide
Amazon walks you through the account side step by step. Keep their guide open as you work: Amazon Pay Setup Instructions.
Amazon Pay — Get Set Up for Integration
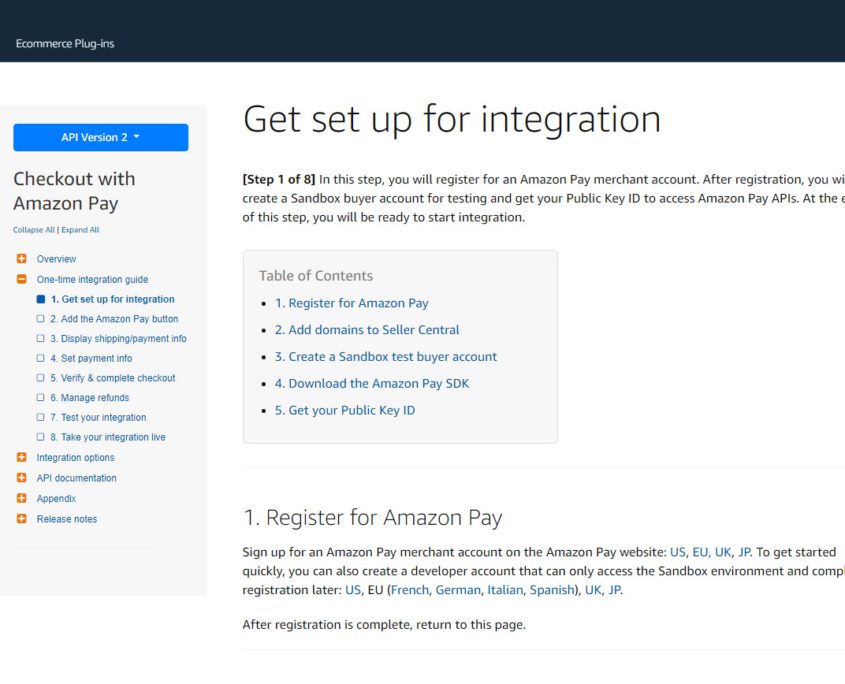
Step 1 — Register for Amazon Pay
First things first: a merchant account.
Get a Merchant Account with Amazon Pay
You will need to flow through this step and get a merchant account with Amazon Pay. This is how you collect payments and how Amazon distributes your funds.
Step 2 — Add Domains to Seller Central
Set up your store and acquire the Store ID that EasyCart needs.
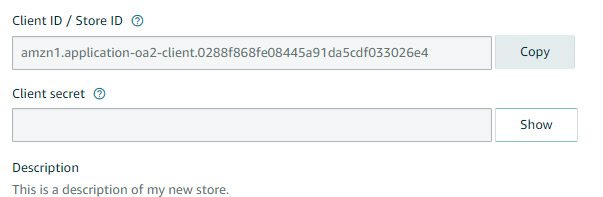
Create a Store & Copy the Store ID
Follow the instructions to setup a store: add a store name and description along with a privacy policy page you have on your website. Once you enter the information, Amazon will give you a Store ID that you copy and paste into the EasyCart settings.
💡 No privacy policy page yet? It’s a good idea to create one and post it in the footer of your website, along with terms & services for your ecommerce business.
Amazon Seller Central — Store ID
Step 3 — Create a Sandbox Test Buyer
A dedicated test account makes sandbox purchases painless.
Set Up Your Test Account
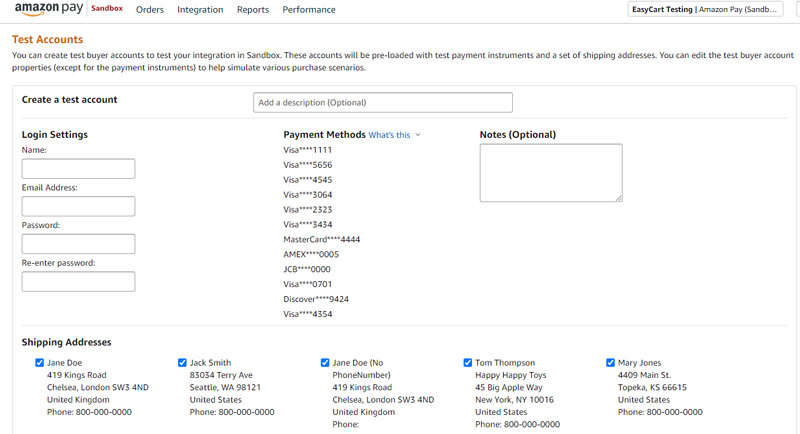
Amazon directs you to their Seller Central system — follow the instructions there to create a new test account you can use as a sandbox buyer. This is great for testing and provides a bunch of addresses and credit cards for testing purposes. Be sure to retain the email address and password you setup here, so when you make test purchases in sandbox mode you can do so quickly.
Amazon Seller Central — Create a Test Buyer
Step 4 — Downloading the Amazon SDK
The easiest step on the list.
Skip It. Seriously.
Good news! You can skip all this technical stuff — the integration is already done for you in EasyCart. Move on to Step 5!
Step 5 — Get Your Public Key ID
You are now ready to connect EasyCart with your Amazon system. You have a merchant account, a test buyer account, and the integration is already complete — a few settings finish the connection. Follow the link provided to your Seller Central › Integration Center.
Answer Amazon’s Integration Questions
Here you will be asked several questions, including your integration channel and what ecommerce software you are using. Choose ‘website or mobile’ and the ‘self-developed’ one-time payments solution.
Amazon Integration Center — Self-Developed Solution
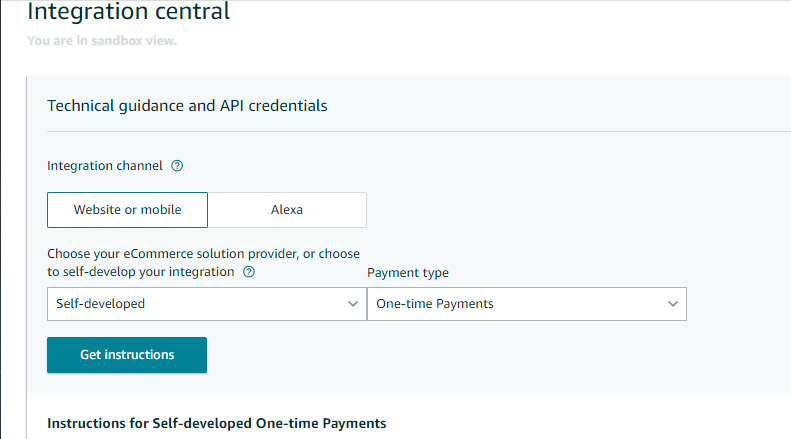
Below this you will then create API keys using the store you created in the previous steps. You can copy/paste your Store ID and Merchant ID at this time into your WP EasyCart › Settings › Payment panel where we ask for it.
You will then ‘Create API Keys’ for your store. When you create your new API keys, you give them a name and Amazon builds you a ‘Public Key ID’ which you can copy into the EasyCart settings panel as well. You should also note that you receive a downloaded AmazonKey PEM file.
Amazon — Downloaded AmazonKey PEM File
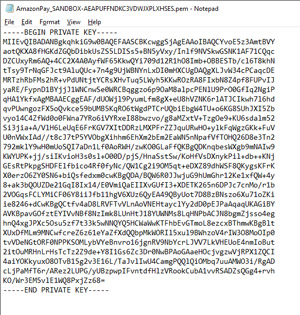
💡 Opening a PEM file: You will likely need a text editor on your PC or Mac to view the contents — Notepad, Word, WordPad, or another text editing program will open this file so you can view, copy & paste. At that point, copy and paste all of the text in this file — including the ——begin private key—- and end private key sections — into the Settings › Payments panel in EasyCart.
A complete example of your settings in EasyCart would look something similar to the following.
WP EasyCart — Complete Amazon Pay Settings Example
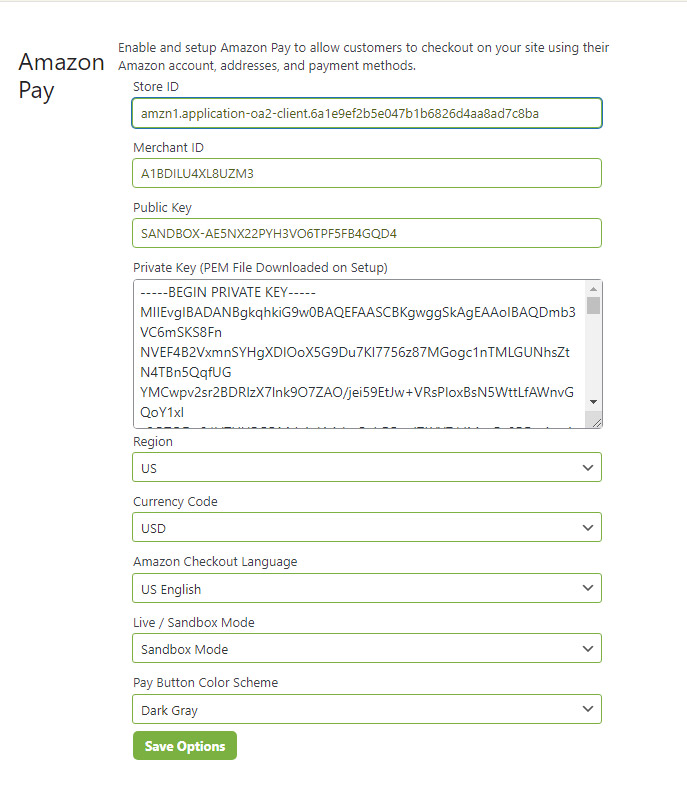
You may finish the settings now on this page, including your region and currency. This information should align with your merchant account and active currencies and languages from the onset. Sandbox Mode is where you typically will start — and you may use the test buyer account you created in Step 3. You can also choose the color or design of your Amazon Pay button.
WP EasyCart — Amazon Pay Button Styles

Testing & Production
You are now ready to start testing your site and should notice Amazon Pay buttons in the shopping cart. Users can checkout quickly at the start, or they may jump to Amazon Pay directly at the end if they checkout on your site and change their mind. It’s a flexible system.
Going live? You must recreate your API keys
When you get ready to go production, you must switch to the production section and recreate API keys just as you did in Step 5! This can be confusing, but Step 5 is where you create all the keys and IDs you need — and it must be redone for production and sandbox separately. You can find it in the top menu section, which is obscure in many ways to switch between production and sandbox. It took us a minute to find this as well!
Amazon Integration Center — Production / Sandbox Switch

This allows you to create production API keys and complete Step 5 just as before, but in production mode. You must also change the EasyCart settings to indicate whether you are using production or sandbox mode. We always recommend you place a live order with a live credit card before launching anything, so you know with confirmation that your site is working. Amazon is now setup and configured.
Checkout in a Few Clicks with Amazon Pay
Ten minutes of setup opens your store to millions of Amazon customers. Hit a snag with keys, PEM files, or sandbox mode? Our support team has your back.