
WP EasyCart — Export Users to CSV
Spreadsheet — Edit the Template
WP EasyCart — Run the User Importer
WP EasyCart — Import Completed
WP EasyCart — Force Password Resets
3 min read
User Management
Move customer accounts — names, emails, billing and shipping addresses — into EasyCart with ease. Export a template. Mirror your data. Import. A few simple rules tell EasyCart when to add a new user versus update an existing one, and they’re all right here.
Grab a perfect column-for-column template straight from your own store.
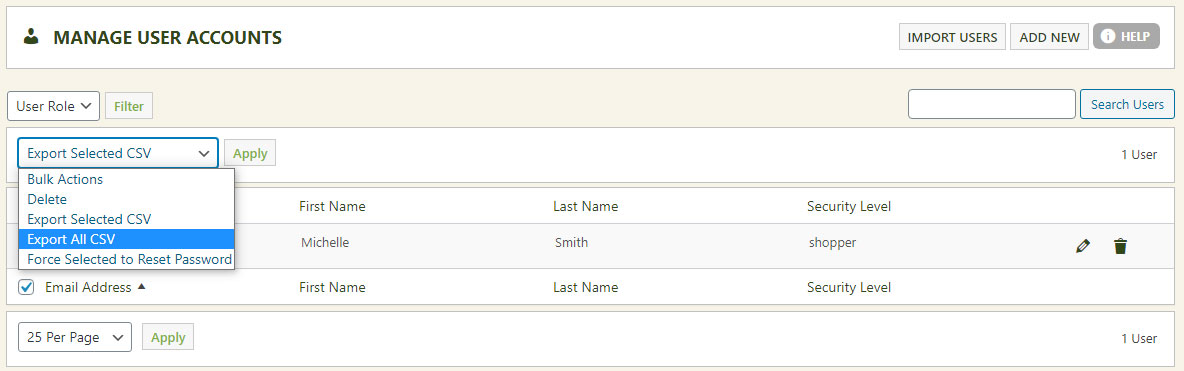
Select one or two users to export so you can see the correct column layout in your spreadsheet program. Go to WP EasyCart › Users, highlight an account, and use the bulk pulldown menu to choose Export Selected to CSV.
WP EasyCart — Export Users to CSV
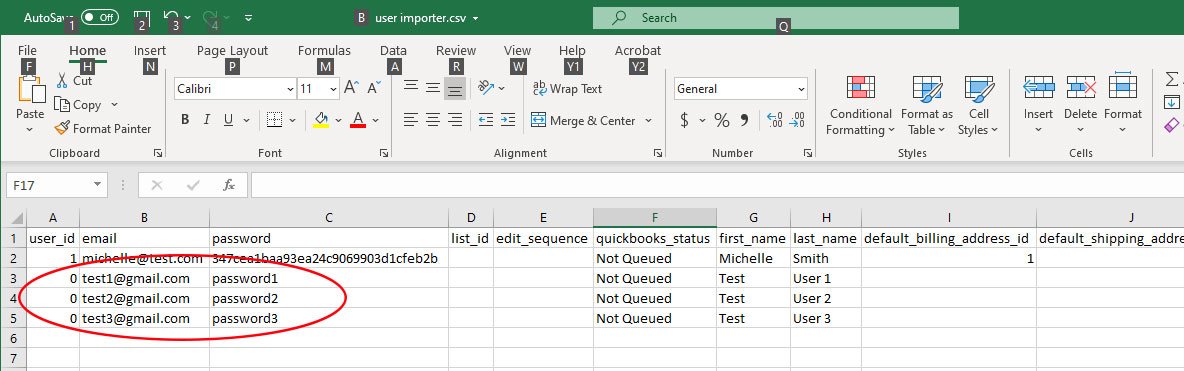
Add your customer data to the spreadsheet, following the format of the exported user.
Do not delete or move columns in the spreadsheet. Instead, copy and paste your user data into the appropriate columns. The key is telling EasyCart which rows are NEW users: set the user_id field to 0. New users import with a zero and receive a real user_id automatically. It’s also a good idea to give all users the default ‘shopper’ user_level. When you’re done, save the file in .csv (Comma Separated Values) format.
user_iddefault_billing_address_iddefault_shipping_address_idbilling_address_idbilling_user_idshipping_address_idshipping_user_idSpreadsheet — Edit the Template
With a clean CSV in hand, it’s one browse and one click.
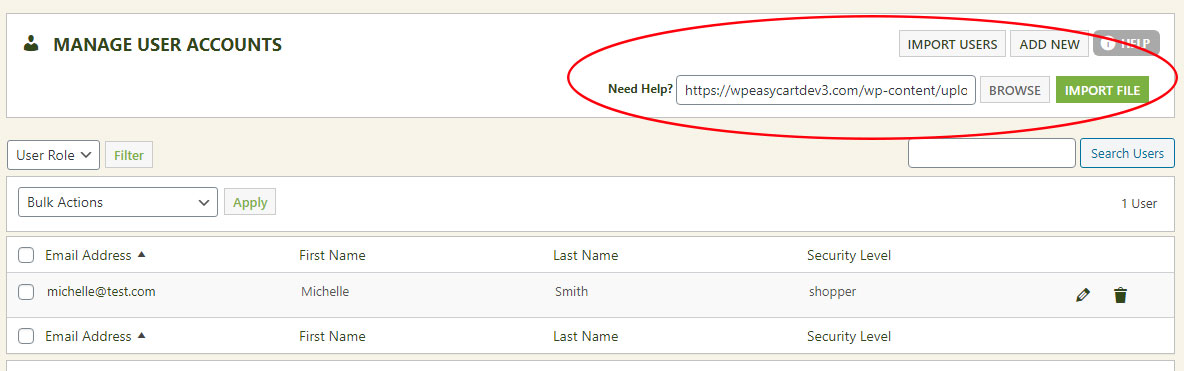
Browse to your CSV file and hit Import. You can watch the status of the run as it processes. Hit errors? Simply delete any users it created, fix the file, and re-run the process.
WP EasyCart — Run the User Importer
The importer tells you exactly how the run went — success or errors.
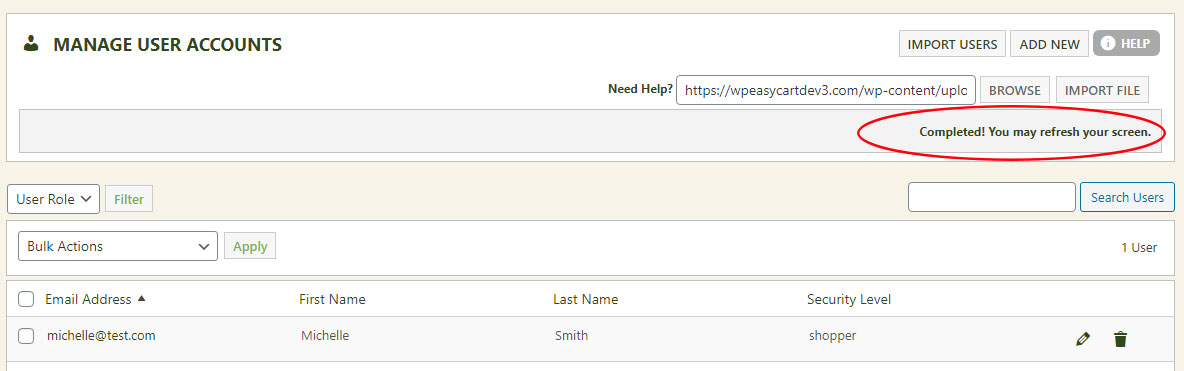
When the process completes, it reports success or lists any errors. Refresh your screen to see the newly imported users. If errors occurred, delete any new additions, edit your file, and re-run the process. Want proof everything aligned? Do a fresh export of your imported users — you’ll see they now have a real user_id plus billing and shipping IDs matched to their accounts.
WP EasyCart — Import Completed
Finish strong: make sure every imported user sets a password that’s truly their own.
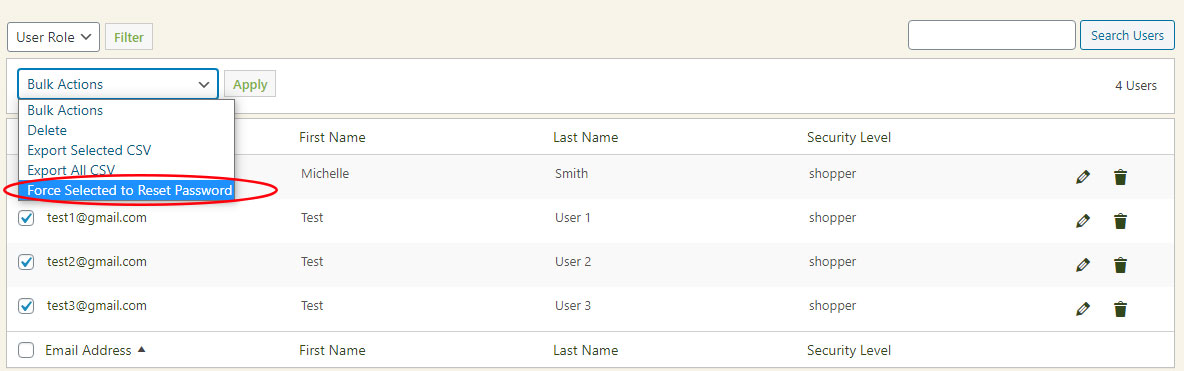
Highlight all your new users and run the Force Selected to Reset Password bulk action. Each user will be required to create a new password custom to them the next time they log in.
WP EasyCart — Force Password Resets
Large migrations can get tricky. If your CSV won’t cooperate, our support team is ready to help you get every customer moved over safely.