How-to › Product setup

How to Import Products from a CSV

Add or update hundreds of products from a spreadsheet. You export, edit, import and check. 8 parts.

Quick links

Where to find it:WP Admin › EasyCart › Products › Products › Import Products

Before you start

What you are doing

What you need, and the rule that keeps you from duplicating your catalog.

How the product import works

What you need, and the one rule that matters

no stored settings

What you need. WP EasyCart and a spreadsheet program. The import is in the free plugin. Your file must be a plain CSV, with commas between values.

The one rule. A row with a product_id of 0 adds a new product. A row with a real product ID updates that product. If a spreadsheet drops the ID column, an update of 500 products becomes 500 duplicates.

Nothing is written until you confirm. The store reads your file, shows how many rows will add and update, lists problem rows and waits for you. The import then runs in chunks of 100 rows.

The steps: export your products, edit the file, import it, then check a few products.

Do it

Four steps

Export, edit the file, add new products, import and check the result.

Step 1. Export first

Products › Products › Import Products › Export

no stored settings

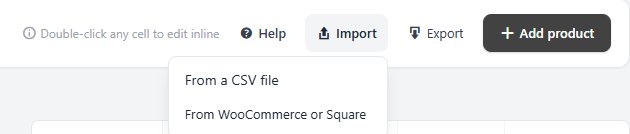
Go to EasyCart › Products › Products and press Import Products. The Import & export products panel opens with three tabs: Import, Export and Help.

On the Export tab, Export all products downloads one CSV with every product. Export selected products does only the ones you ticked in the list, which is the right choice for a bulk edit of one range. Large catalogs export as several files. The size of each file is Products per export file in Settings › Products › Import & export, an Advanced setting that starts at 500. Lower it if your export times out.

Even when you only want to add products, export at least one and use its header row. The export carries the exact column names the import expects. You can also press Download sample on the Export tab for the header row and one example product.

Keep the original file. It is your backup if the import goes wrong.
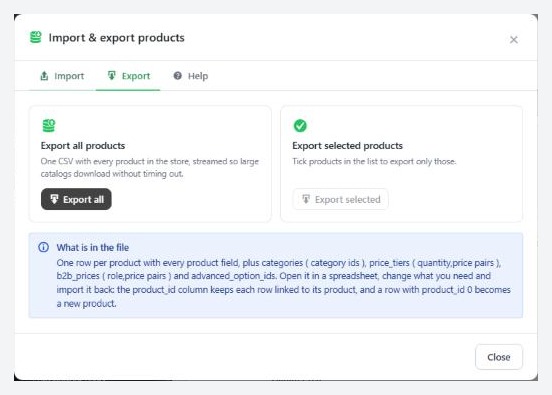
The Import & export products panel, Export tab.

💡 Note: Export a copy of every product before a big update. It takes a minute and undoes a bad import.

Step 2. Edit the file

The columns, and which ones you can leave out

no stored settings

Open the CSV in a spreadsheet. There is one row per product. Column names must match the export exactly, in lower case with underscores. Save it as a CSV again, comma separated.

Two columns are required. product_id and model_number (the SKU). Every other column is optional, but a column that is in the file is written for every row. Delete the columns you are not changing, or keep them exactly as exported, so you never overwrite a value with a blank.

Common columns. title, description, short_description, price, list_price (the previous price), stock_quantity, weight, manufacturer_id and activate_in_store (1 for live, 0 for hidden). model_number keeps letters, numbers, dashes, underscores and slashes. Other punctuation is removed.

Categories. categories takes category IDs separated by commas, such as 4,7. It replaces the product’s categories with that list. IDs are in the ID column of the Categories list, on a wide screen. The same goes for manufacturer_id (Manufacturers list) and the option set columns option_id_1 to option_id_5 (Option Sets list).

Images. product_images is a comma separated list. Use ml: and the Media Library ID of an uploaded image, such as ml:123,ml:124. The first is the listing image. Upload your pictures to the Media Library first, and note their IDs. An image’s ID is in the address of its edit screen, as post=123.

Volume and role prices. price_tiers takes quantity,price pairs, and b2b_prices takes role,price pairs, for example Wholesale,8.50. Each replaces what the product has now. These are PRO features in the store, so use them on a store that has PRO.

Modifiers. advanced_option_ids lists option set IDs for modifiers. The CSV does not carry variation rows, meaning the SKU, price and stock for each size and color combination. Set those on each product, and with PRO use Import Variations on its Options & Variants tab.

⚠️ Careful: Every column in the file is written to every row. A column full of blanks wipes those values. Delete any column you do not mean to change.

Adding new products

product_id 0, and a SKU that has never been used

no stored settings

For each new product, put 0 in product_id and a model_number that no product in the store has, and that no earlier row in the file has used. Set activate_in_store to 1 if the product should be live. New products are published when it is 1 and private when it is 0.

Leave the post_id column empty. The store makes the product’s page for you.

To fill many products, copy the row of a product that is close to what you want, change the SKU and title and set the ID to 0.

Step 3. Import, and read the preview

Choose the file, check the counts, confirm

no stored settings

Open the panel again. On the Import tab, drop the file or choose it. The file is checked at once and you get a preview.

Read the counts first. The preview shows how many rows are new products, how many are updates and how many are problem rows. A large file counts every row but shows only the first twenty. If you meant to update 500 and it says 500 new products, stop. The ID column has been lost.

Fix these before importing. Problems that block the import are listed at the top: a column with no name, a column named twice, a name that is not a product field (with a suggestion, such as rename it to price), or a missing product_id or model_number column.

Rows that will be skipped. A row is skipped with a reason if its product_id is not a number or not in the store, its model_number is empty, used earlier in the file, or already taken by another product, or it has the wrong number of cells.

A blank line stops the import. The import stops at the first blank line or the first row without a model_number. The preview warns you if that would skip rows.

Press Import with the number on it. A progress bar counts rows. Keep the window open. A 10,000-row file takes a few minutes. At the end you see how many were added, updated and how many rows did not import, with the reason for each.
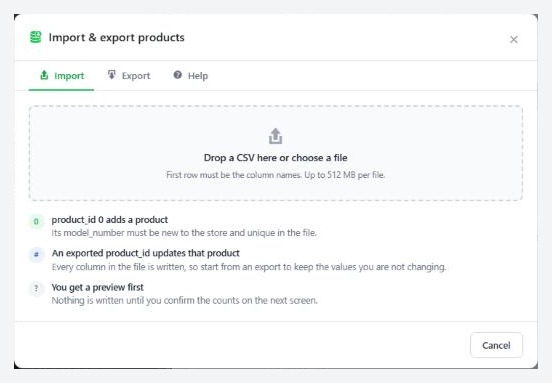
The Import & export products panel, Import tab, before a file is chosen.

⚠️ Careful: Test with a copy first. Put five rows in a file and import them on a staging site, or import five rows here and check them before you run the whole file.

Step 4. Check the result

Open a few products and look

no stored settings

Refresh the products list and open three products: one new, one updated and one with many options.

1. Are the title, price and description right?
2. Is the listing image the one you meant, and are the other images in order?
3. On the Organization tab, are the categories right?
4. On the Options & Variants tab, are the option sets attached, and do the variations look right?
5. Open the store page in a private window and find them.

If something is wrong, fix the spreadsheet and import it again. Because your rows have product IDs now, the second import updates them.

Good to know

Customers, and when it goes wrong

Importing customers, and the usual reasons an import stops.

Importing customers too

Only if you are moving accounts across

no stored settings

Customers have their own import. Open EasyCart › Users › User Accounts and press Import Users. It works the same way: a preview, then chunks of 100 rows, with a reason for every skipped row.

A row with a user_id updates that customer. A row without one creates a customer, and needs an email that is not already in the store. Turn on Update existing by email to update a customer who already exists instead of skipping the row. A user_level column sets the role, so this is how you put a list of trade customers into a wholesale role. The role must exist, or the row is skipped.

Passwords are never imported. A new customer gets a random password and uses Forgot password to set their own.
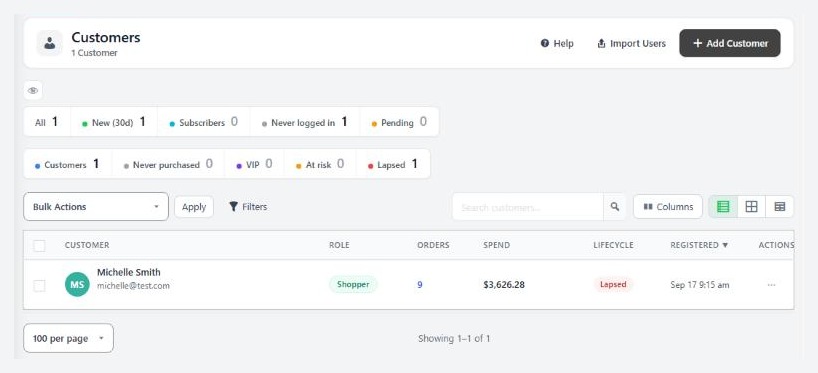
Users › User Accounts, with the Import Users button.

If it does not work

The usual reasons an import stops or misbehaves

no stored settings

The file is over the upload limit. The panel says so, with your server’s limit. Split the file, or ask your host to raise it.

That is not a text CSV file. Save the sheet as CSV (comma separated), not as an Excel workbook.

Everything is a new product. The product_id column is missing or all zeros. Use the IDs from your export.

A column is not a product field. It is misspelled, or has capitals or spaces. Rename it as the preview suggests.

The import stopped early. The server did not answer. Rows already imported are kept. Upload the file again to finish. Rows already at their new values are simply updated again.

Some fields did not change. A product whose details another service manages, such as a fulfillment partner or Square, keeps those fields, and the results say so.

Prices show blank. A column that was in the file but empty overwrote the value. Import again from your original export.

Still stuck? Open a ticket at wpeasycart.com/my-account.

Keep going

Related panels

Product Importer

Every column and the panel in full.

Products

The products list and its bulk actions.

Categories

Category IDs for the categories column.

Option Set Manager

Option set IDs, and option sets in full.

User Accounts

Customer accounts and roles.

Ready to run your store on WP EasyCart?

Everything in this guide works with the free plugin. PRO and Premium add subscriptions, memberships, wholesale pricing and more. Try every PRO feature free for 14 days.

The WP EasyCart admin: orders and offers
Updated on September 30, 2026