How-to › Wholesale and B2B

How to Invoice Trade Customers on Net 30

Let trade customers order now and pay in 30 days. You turn on Bill later, set terms, number the invoices and send them with a Pay button. 10 parts.

Quick links

Where to find it:WP Admin › EasyCart › Settings › Documents

Before you start

What you are building

What you need and how an invoiced order flows.

How trade invoicing works

What you need and the path an order takes

no stored settings

What you need. WP EasyCart PRO or Premium, with both plugins up to date. Payment terms, PO numbers, invoice numbers, the invoice email and credit notes are PRO. Bill later, the invoice PDF settings and pay links are in the free plugin. A free trial covers all of it.

The idea. A trade customer orders, chooses Bill later at checkout and does not pay yet. The order gets terms, such as Net 30, and a due date thirty days out. You send an invoice with a Pay button. The customer pays by card on the pay page, or by bank transfer using the details you give them. You mark it paid, or the card payment does that for you.

What Bill later means. It is the store’s manual payment method: the order is placed and you collect the money yourself. Terms and due dates only apply to orders placed this way. A customer who pays by card at checkout gets no terms.

The steps: turn on Bill later, set your terms, ask for PO numbers, number your invoices, decide how invoices go out, then handle an order.

Set it up

Six steps

Turn on Bill later, set terms, ask for PO numbers, number invoices, decide how they go out and handle an order.

Step 1. Turn on Bill later

Settings › Payment

no stored settings

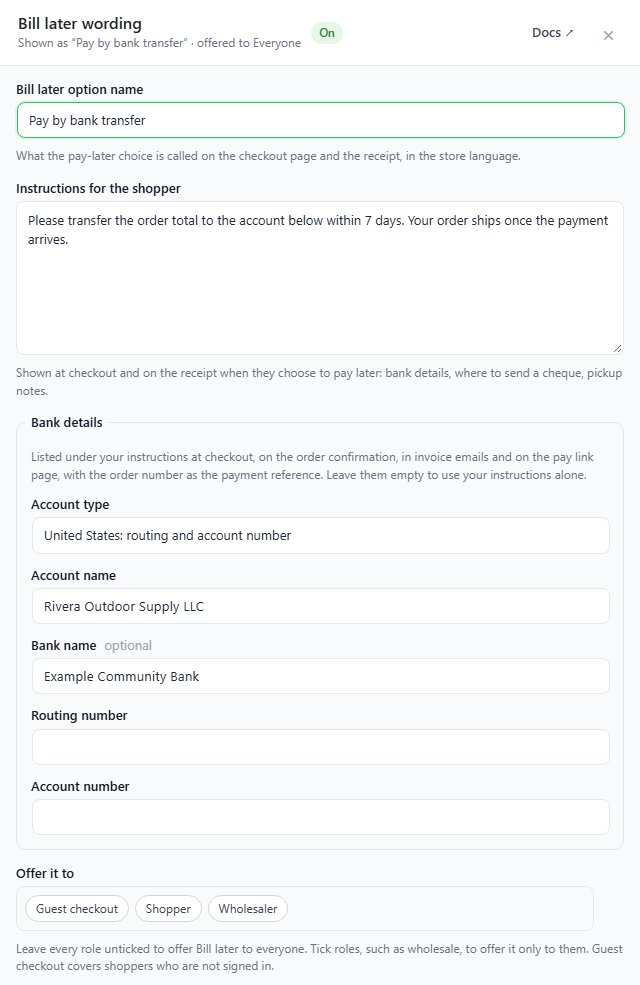
Open EasyCart › Settings › Payment and turn on Bill later (order now, pay you offline). Open its wording and fill in Bill later option name, which is what customers see at checkout, and the message. The message appears at checkout and on the receipt. Put your bank details, where to send a cheque or how to use the Pay button.

Bill later is offered to every customer who reaches checkout. There is no setting to show it only to some roles. If you sell retail as well, say in the message that it is for trade accounts, and check new trade orders before you ship. Your other payment methods stay as they are.

Settings › Payment, where Bill later is turned on.

⚠️ Careful: Bill later takes the order without payment. Only ship to customers you trust, or wait for approval before you mark the order approved and ship.

Step 2. Set your payment terms

Settings › Documents › Payment terms

no stored settings

Open EasyCart › Settings › Documents and find the Payment terms card. Turn on Give manual-payment orders payment terms.

Terms you offer is a list with a name and a number of days. It starts with Due on receipt (0 days), Net 15, Net 30 and Net 60. The due date is the order date plus the days. Press Add terms for your own, such as Net 45 with 45 days.

Store default is what a customer gets when nothing else applies. Choose Net 30 if most of your trade orders are on Net 30.

Different terms for one customer. Open the customer in Users › User Accounts, go to the Tax & Preferences tab and find Payment terms. Choose a term for them, or leave it on The store default. A customer’s own terms beat the store default, and a document rule can replace both.

Terms are set when the order is placed. To change one afterwards, use the order’s Invoice & PO card, covered in step 6. The customer sees the terms on the invoice and the receipt email, and on the order in My Account, with a due date while it is unpaid.
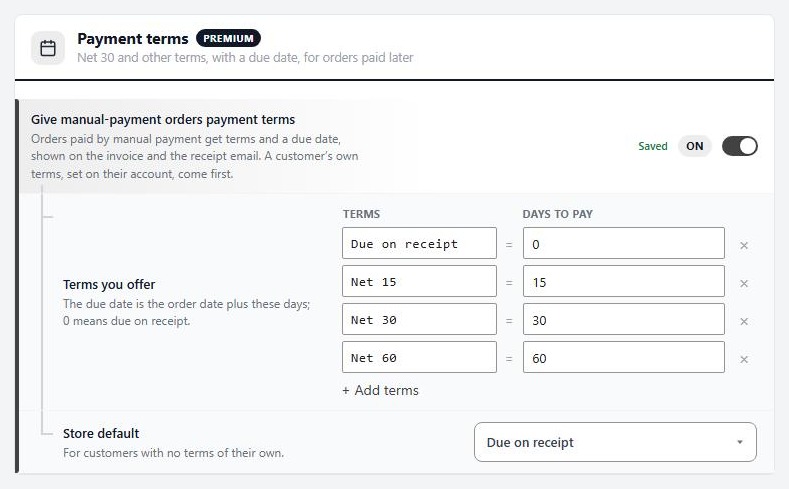
Settings › Documents › Payment terms.

Step 3. Ask for purchase order numbers

Settings › Documents › PO numbers

no stored settings

Business customers usually need their PO number on your invoice. In the PO numbers card, turn on Ask for a PO number at checkout.

Who sees the field takes your roles, such as Wholesale, so retail customers never see it. Leave it empty to show it to everyone.

PO number is Optional or Required. Choose Required when you refuse to invoice without one.

The PO number is saved on the order and printed on the invoice and the emails. You can add or change it later on the order screen, whether this setting is on or not, and you can search the orders list by PO number.
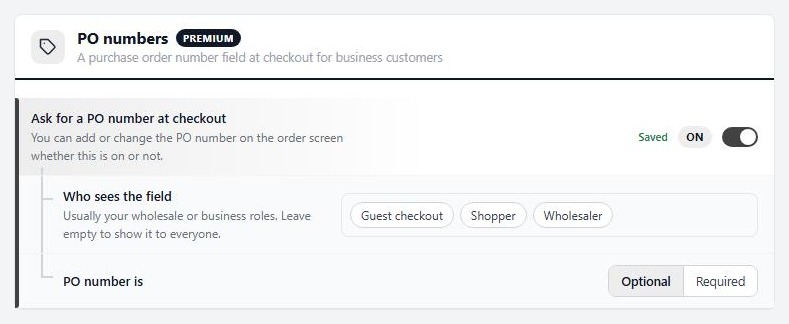
Settings › Documents › PO numbers.

Step 4. Number your invoices

Settings › Documents › Invoice numbers

no stored settings

Turn on Give invoices their own numbers in the Invoice numbers card. Each order then gets the next number once, and its invoice PDF is kept exactly as it was issued, so a reprint never changes.

Issue the invoice decides when the number is given: When payment is approved, When the order is placed or Only when I send it from the order. For Net 30, choose one of the last two. An invoice that only appears once the customer has paid is not much use to a customer who has not.

Number format starts as INV-{year}-{number}. Next number lets you carry on from your old sequence, and Digits (an Advanced setting) pads it, so 4 makes 7 into 0007. Numbers start again from 1 each year unless you set Start again from 1 to Never.

In My Account. Show the invoice number in My Account is on, and Show it only to these roles lets you limit it to your trade roles.

To see and set up the invoice itself, use the Invoice PDF card: your business details as they must appear, the file name, and the paper size. Its wording and layout come from a document profile. See the Document Profiles doc.
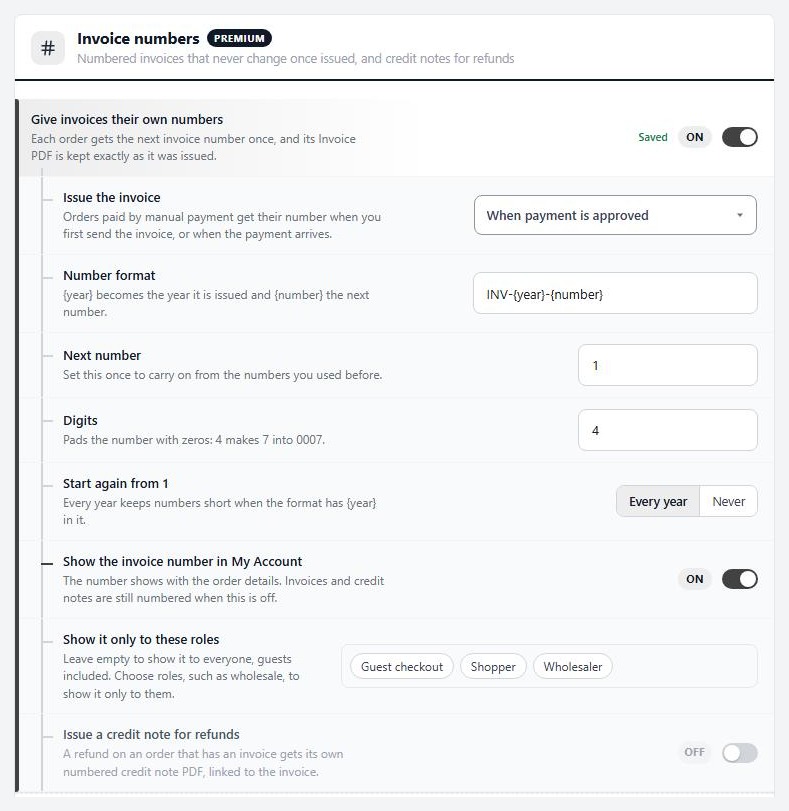
Settings › Documents › Invoice numbers.

💡 Note: Issued invoices are permanent. Test your number format and Next number on a test order before you issue your first real invoice.

Step 5. Decide how invoices reach the customer

The invoice email, the Pay button and pay links

no stored settings

The invoice email. The Invoice email card in Settings › Documents sets the wording, the profile (Standard or Itemized) and the logo and footer of the email you send from an order. It carries the invoice PDF, the terms, the due date, the PO number and, while the order is unpaid, a Pay button. When there is no pay link it shows the Bill later message, such as your bank details, instead.

Pay links. In the Pay links card, Let customers pay unpaid orders from a link is on by default. The Pay button opens a page for that one order, where the customer enters billing details and pays. The link works with Stripe, Square and PayPal. When it is paid, the order moves to an approved status and stock is taken. A store that takes cards through another gateway cannot use pay links yet. The card names the gateway.

The invoice email is a PRO feature. The pay page itself is in the free plugin, and appears on the order in My Account too.

Step 6. Handle a trade order

The Invoice & PO card, sending, and marking it paid

no stored settings

A Bill later order starts at Direct Deposit Pending. Stock is not taken yet, because nothing is paid. It is taken when the order first moves to an approved status.

Open the order in EasyCart › Orders. The Invoice & PO card shows:

Invoice. Its number and a PDF button. If it is not issued yet, press Issue invoice now. It gets the next number and is frozen. You are then offered Email invoice.
Pay link. A link you can copy, and Email pay link or Resend pay link, with when it last went out.
PO number, Payment terms and Due. Change any of them and press Save. An issued invoice keeps the terms it was issued with.

Send it. From the order’s menu choose Send Email, then Invoice. Tick Invoice PDF to attach the PDF, check the recipients and preview, and send. See the Sending Order Documents doc for the window.

Mark it paid. When the money arrives, change the order status to Direct Deposit Received. A payment on the pay page does this by itself. Stock is taken and the due date stops showing to the customer.

Chase late invoices. On the orders list, use the Invoice filter and pick Payment overdue: the due date has passed and the order is not in an approved status. WP EasyCart does not send overdue reminders for you, so use Resend pay link. Turn on the Invoice column from the Columns button to see numbers in the list.
An order’s Invoice & PO card, with the invoice, pay link, PO number and terms.

Keep it running

Good to know

Refunds, testing and what to check when something is missing.

Refunds and credit notes

A numbered credit note for every refund on an invoiced order

no stored settings

Invoices never change once issued. When you refund an order that has an invoice, the right paperwork is a credit note. In the Invoice numbers card, turn on Issue a credit note for refunds. A refund on an invoiced order then gets its own numbered PDF linked to the invoice, with its own format (Credit note number format, default CN-{year}-{number}) and Next credit note number.

The credit note is listed under the invoice on the order’s Invoice & PO card. Its wording and layout are in the Credit note card of Settings › Documents. An order that never had an invoice number gets no credit note.

Test it end to end

One trade order, start to finish

no stored settings

Use a test customer with a trade role, and Stripe or Square in test mode.

1. Sign in as the customer, add a product and choose Bill later at checkout. Enter a PO number if you asked for one.
2. In the admin, open the order. It should be Direct Deposit Pending with the terms, a due date and the PO number on the Invoice & PO card.
3. Issue the invoice and email it to yourself. Check the number, terms, due date, PO number and Pay button.
4. Press Pay in the email, and pay with a test card. The order should become approved.
5. Refund it in full. If credit notes are on, a credit note appears under the invoice.

If it does not work

The usual reasons terms, numbers or pay links are missing

no stored settings

The order has no terms. Terms only go on Bill later orders, and only when Give manual-payment orders payment terms was on when the order was placed. Add terms by hand on the order’s Invoice & PO card.

The Invoice & PO card is missing, or settings show Update. These need WP EasyCart PRO and WP EasyCart, both up to date. Update both plugins.

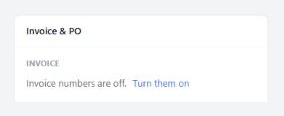
Invoice numbers are off. The card says so and links to the setting. Turn on Give invoices their own numbers.

There is no Pay button, or no pay link. The order is already paid, or Pay links are off, or a card gateway that pay links do not support is active. The card names it.

The invoice was issued too early. An issued invoice cannot be edited. Change Issue the invoice for future orders, and use a refund and credit note to correct this one.

The PDF could not be created. Check Settings › Logs for the reason. The send window also shows it before you send.

Still stuck? Open a ticket at wpeasycart.com/my-account.

Keep going

Related panels

Documents

Every setting in Settings › Documents.

Document Profiles

The wording and layout of invoices and credit notes.

Sending Order Documents

The Send Email window on an order.

Payment

Bill later and your other payment methods.

Order Management

Order statuses and the orders list.

Ready to run your store on WP EasyCart?

Everything in this guide works with the free plugin. PRO and Premium add subscriptions, memberships, wholesale pricing and more. Try every PRO feature free for 14 days.

The WP EasyCart admin: orders and offers
Updated on September 30, 2026