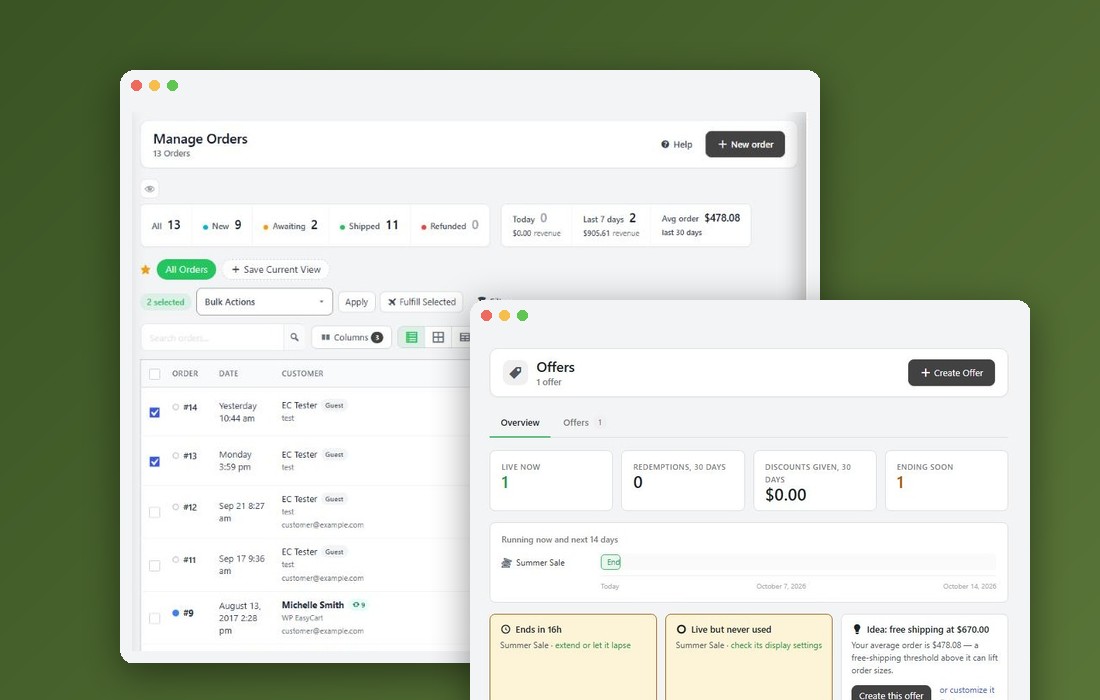
Step 1. Open Add a product
Quick start first, once you have products
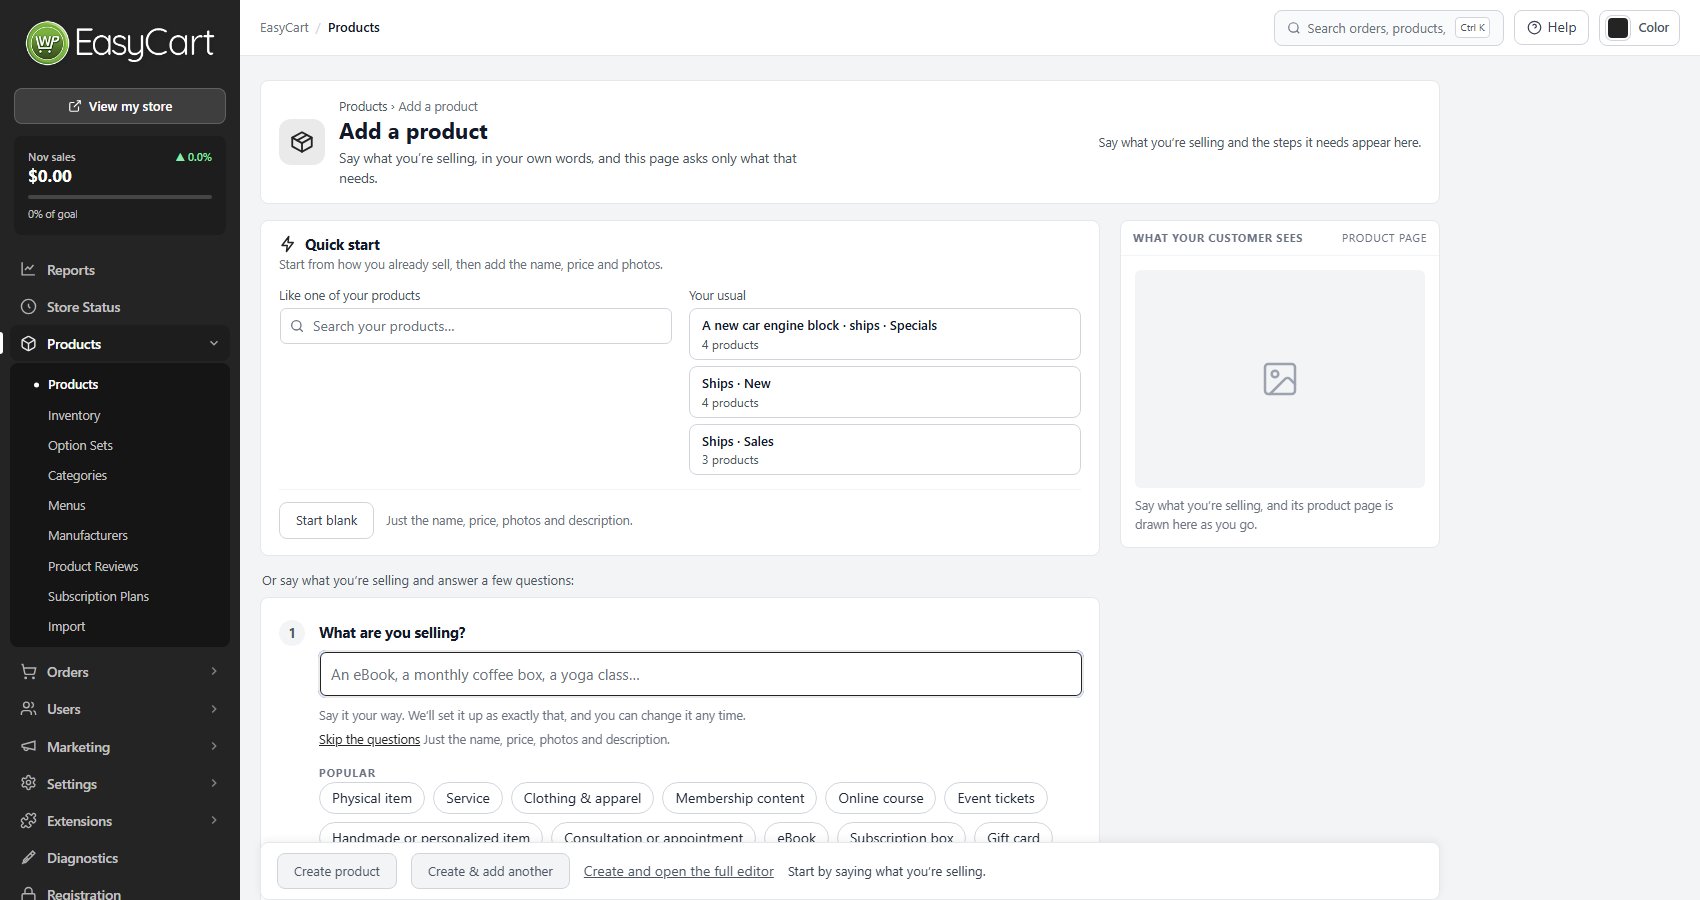
Go to EasyCart › Products and press Add product. A bar across the top tracks the steps, such as 3 of 6 steps done, and each step’s pill takes you to it.
Once your store has three active products, the page opens with Quick start, which makes the new product like one you already sell ( see Quick start below ). Below it, or on its own in a new store, is the question: What are you selling?
Step 2. Say what you’re selling
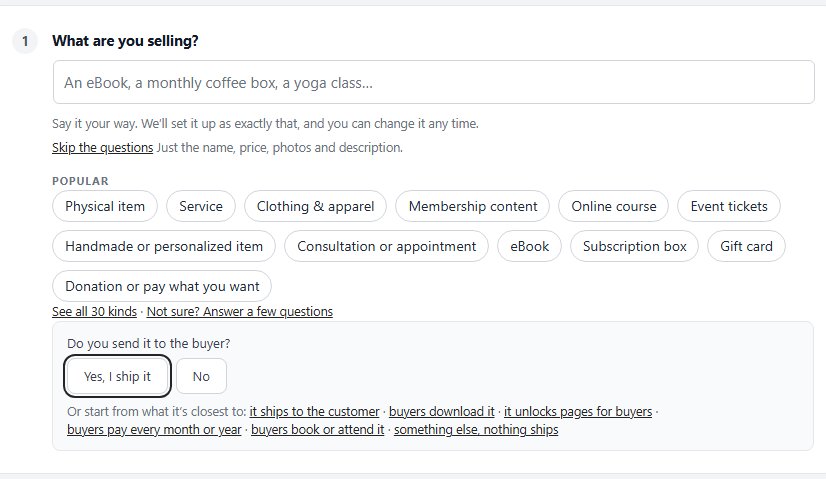
Type it, pick a kind, or answer a few questions
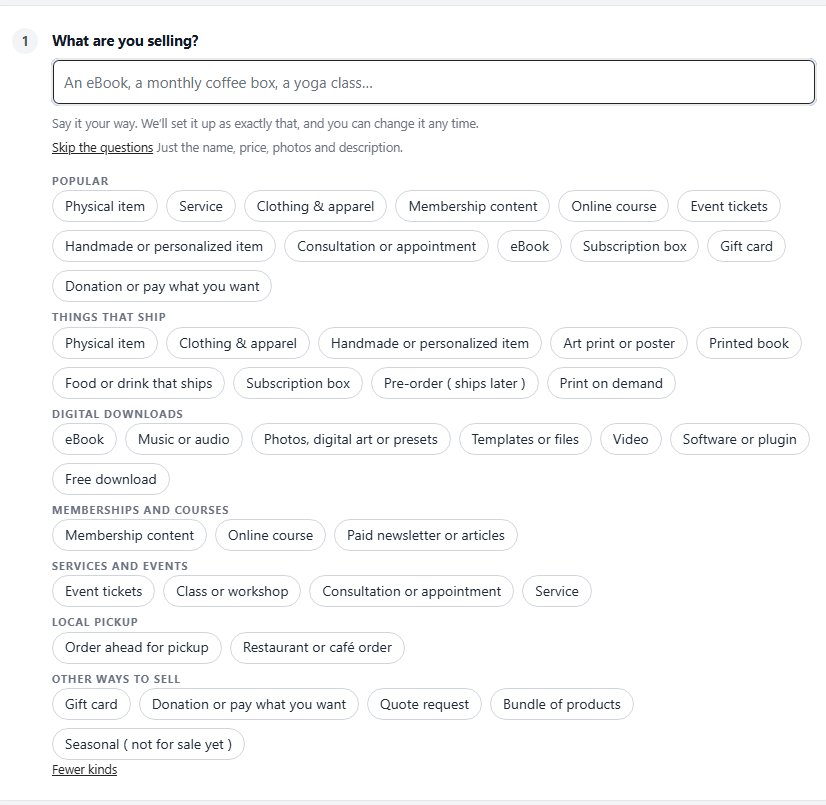
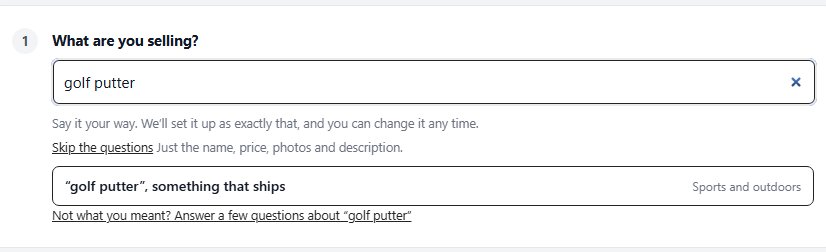
Type it the way you would say it: an eBook, a monthly coffee box, a yoga class. The page matches your words to a kind and keeps them: type golf putter and it offers “golf putter”, something that ships, keeping your name for it. Under the box, Popular offers the common kinds, starting with Physical item and Service, and See all 30 kinds lists every one by group: things that ship, digital downloads, memberships and courses, services and events, local pickup, and other ways to sell.
Not sure which it is? Not sure? Answer a few questions asks yes or no: do you send it to the buyer, do buyers get a file, does buying it open pages on your site, do they book or attend it, and do they pay again every month or year. Skip the questions goes straight to the name, price, photos and description.
Once you pick, What it does shows four switches: Ships to the customer, Includes a download, Opens members-only pages and Billed every month or year. Switch off anything that does not fit, or on to mix them, such as an eBook that also ships as a paperback. Change picks another kind and keeps what you typed. Where a kind needs something WP EasyCart does not do yet, such as license keys for software or a booking calendar for appointments, the page says so before you build it.
Step 3. Name, price and photo
What shoppers see first
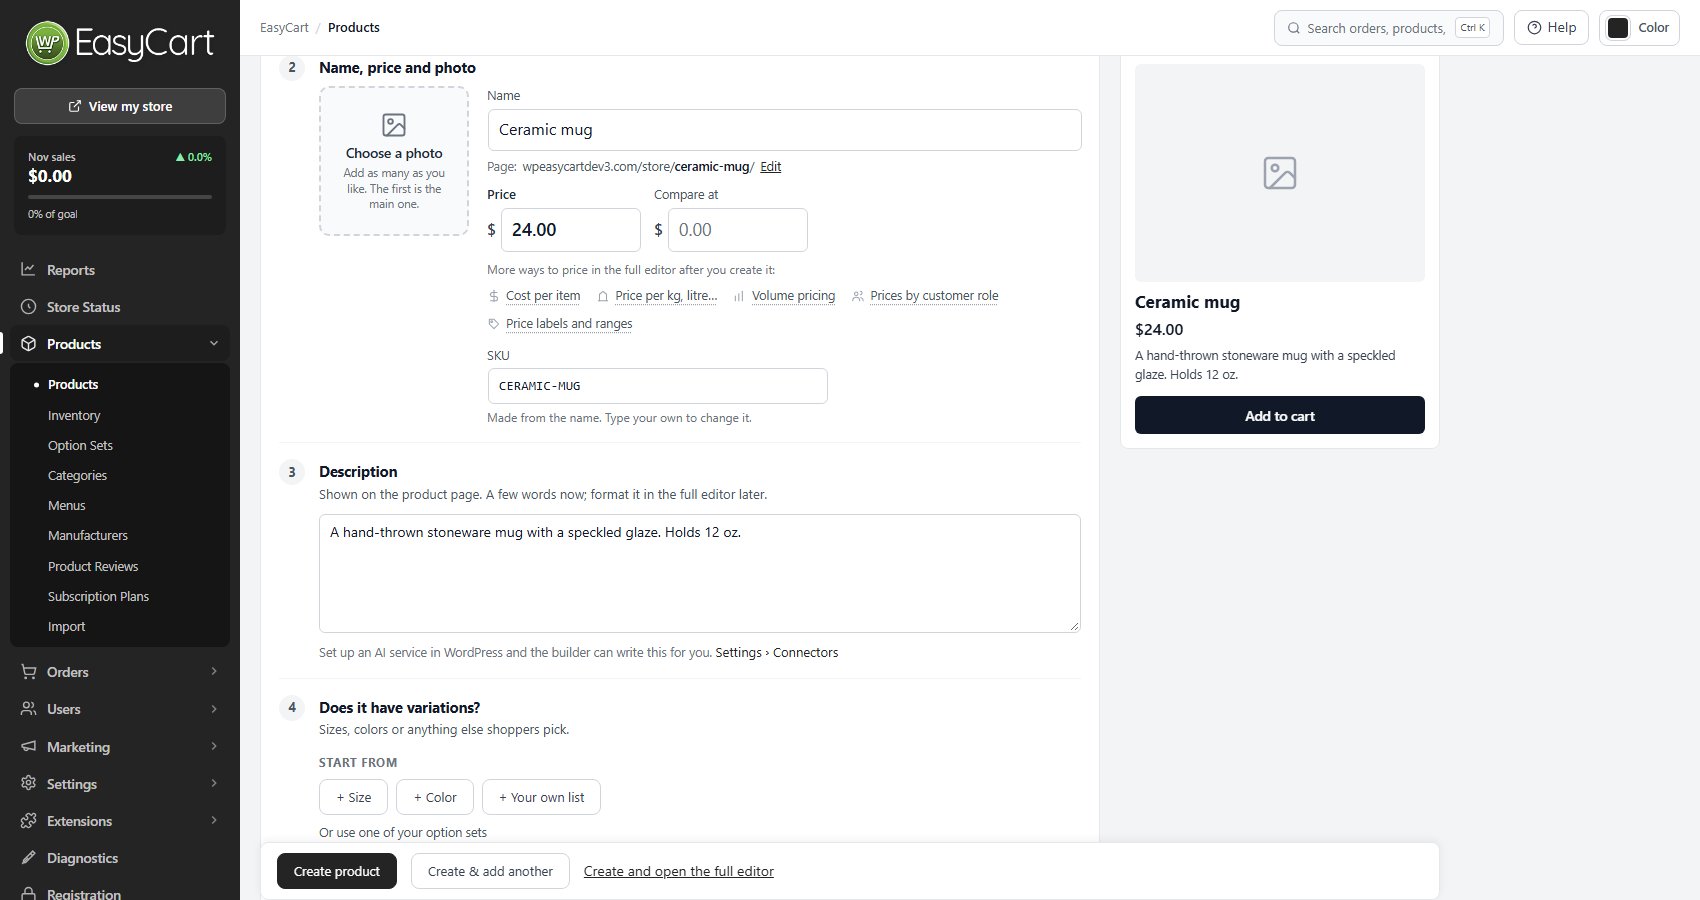
Type the Name. The page address under it is made from the name; Edit changes it. Add the Price and, for a sale, a Compare at price, shown crossed out. A free download shows Free instead, and a gift card or donation has no price here.
The SKU is made from the name; type your own to change it. If another product already uses it, the page says Another product already uses this SKU.
Choose a photo opens the media library. Add as many as your plan allows; the first is the main photo and Make main moves another to the front. Without PRO a product holds two photos. Under the price, More ways to price in the full editor after you create it names what waits there: cost per item, a price per kg or litre, volume pricing, prices by customer role, and price labels and ranges. Point at one to read what it does.
Step 4. Write the description, or let AI draft it
A few words now; format it in the full editor later
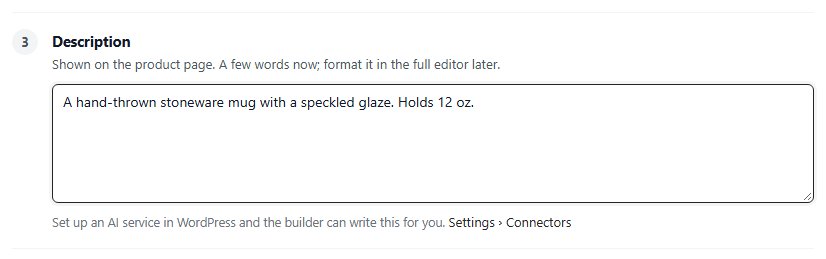
Description is the text on the product page. Write a few lines here; headings, lists and pictures are added in the full editor later.
With an AI service set up in WordPress, Write with AI drafts it for you from what the page knows: the name, the kind, what it does, its variations and modifiers, and any notes you already typed. Give the product a name first. Read the draft before you create the product, change what is wrong, or press Write it again with AI. Without a service, the step says Set up an AI service in WordPress and the builder can write this for you. with a link to Settings › Connectors, for anyone who can set one up.
Step 5. Answer what this kind needs
Only the steps your product uses
The next steps depend on what you picked:
A download: The file buyers get ( Your eBook file for an eBook ). Upload the file, then set Downloads allowed and how many days the Link works for. The file is kept in a protected folder and each buyer gets their own link, in their email and their account.
A membership or course: How do members pay? ( Once, Every month or Every year, the last two with PRO and Stripe ), then What do members get?: find pages or posts with Find a page or post, or + Create a members page ( a course adds lessons with + Add a lesson page ). On Create they are saved as Limit Access rules, so visitors who have not bought see a members-only message with a link to buy.
An event or class: When and where, shown on the product page and in the order email, which is the buyer’s ticket. Stock counts the places left. An appointment asks How customers ask for a time ( preferred date, time and what it is about ), and a Handmade or personalized item asks What customers tell you ( text to engrave, a photo they upload, a note ); both use PRO.
A pre-order: When it ships, with the date in Ships from. A gift card: the Amounts shoppers pick from. A donation: the Smallest amount. A quote request: an Ask about this button in place of Add to cart, with an optional starting price. A seasonal product: the phrase shown in place of the buy button. Pickup and restaurant orders: collected at the times set under Schedule & Locations. A Subscription box sets its Billing: a box ships each time they are billed.

Step 6. Variations, modifiers and stock
Sizes, colors, add-ons, and how stock is counted
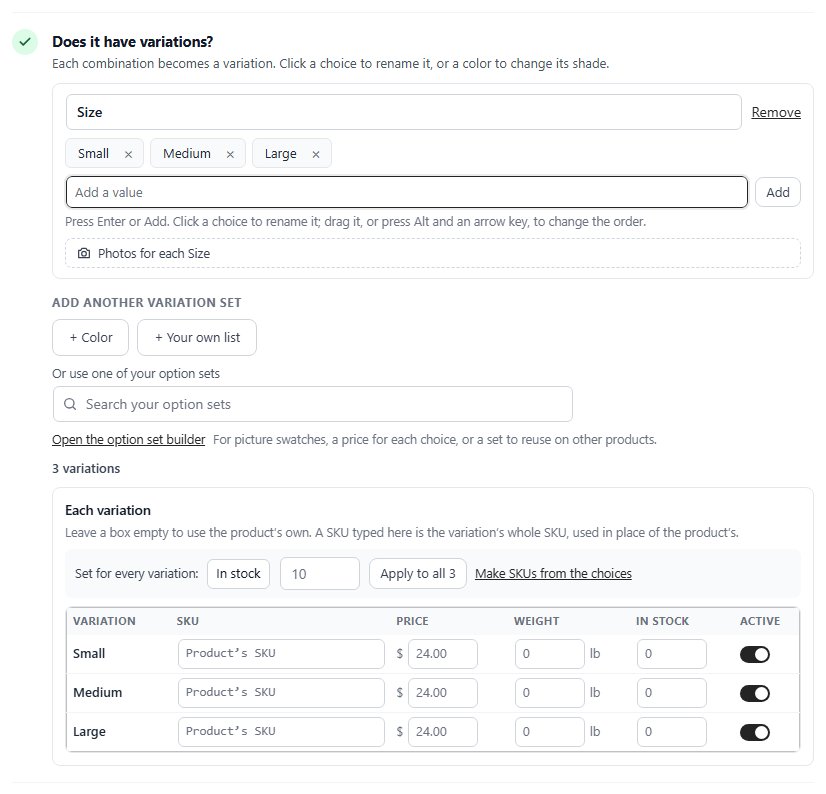
Does it have variations? Under Start from, press a ready set such as + Size or + Color, or + Your own list to name your own, such as Material or Scent. Type a choice and press Enter or Add; paste a list to add one choice a line. Click a choice to rename it, and drag it to change the order. Each combination becomes a variation, and Or use one of your option sets reuses a set you already have. Open the option set builder is there for picture swatches or a price for each choice.
With PRO, Each variation gives every variation its own SKU, price, weight, stock and Active switch; Set for every variation fills one value into all of them and Make SKUs from the choices builds their SKUs. Photos for each the first set shows different photos for each choice. Without PRO every variation sells at the product’s price.
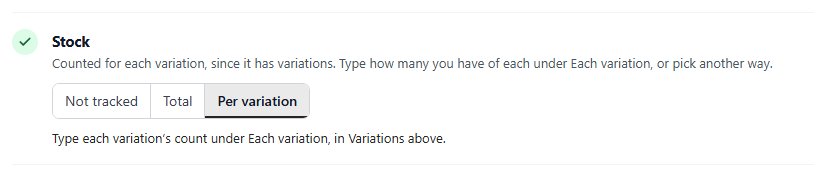
Modifiers ( PRO ) are choices that add to the price or ask for something, such as gift wrap or engraving text, without making variations: Add one of your modifiers or Build a new modifier. Then Stock: Not tracked, a Total, or Per variation ( PRO ), which a product with variations starts on.
Step 7. Shipping and tax
Read from your store’s own setup
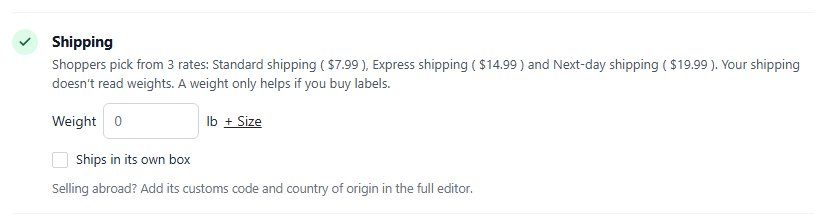
Shipping shows for anything that ships and starts with a sentence on how your store charges for it. Give the product a Weight, and + Size for its length, width and height. When your rates go by weight the step says so, and a product without a weight counts as your default weight. Ships in its own box is for something that goes out in its own packaging. Customs codes and country of origin are set in the full editor.
Tax follows your tax settings: Charge tax on this product for sales tax, the rate for VAT or GST, or your tax service’s code. A store that charges no tax sees Your store doesn’t charge tax, so there’s nothing to set. with Set up tax.
Step 8. Where it shows, then Create
Active, on the store page, reviews and categories
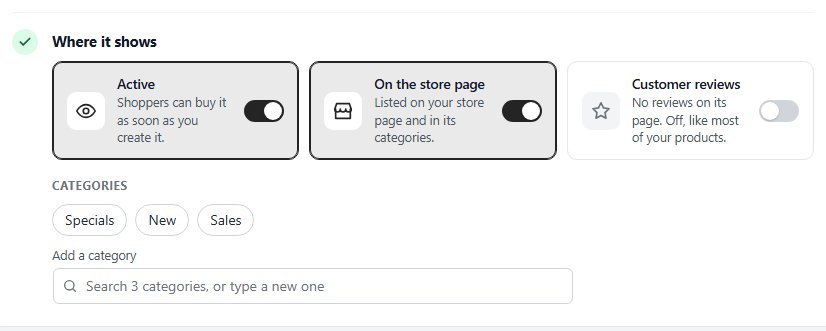
Where it shows has three switches. Active lets shoppers buy it as soon as you create it; off, it is saved as a draft nobody sees. On the store page lists it on your store page and in its categories; off, its own page and link still work. Customer reviews starts the way your store usually does, and the line under it says why. Pick its Categories from the most used, search them, or type a new one to make it.
Then press one of the three buttons at the foot of the page. Create product makes it and goes to your products list, with the new product at the top and Edit it, View it and Add another product. Create & add another makes it and starts a fresh page. Create and open the full editor makes it and opens it in the product editor. Until the product has what it needs, the bar says what is missing, such as Give it a name to create it.
Quick start: like one you already sell
The name, price and photos, and the rest copied
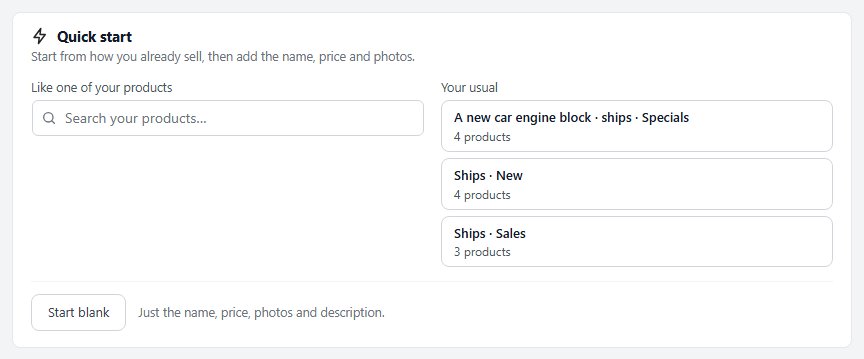
Once your store has three active products, Quick start sits at the top of the page. Like one of your products searches your catalog and copies how that product is set up: what it does, its variation sets and modifiers, categories, brand, tax, weight, how stock is counted and where it shows, with its price to start from. Your usual offers the setups your store uses most, with how many products use each. Start blank asks for just the name, price, photos and description, set up the way you sell most often.
After a quick start you fill in the name, price, photos and description, along with anything that product needs of its own. Everything else waits in a block of cards under Everything else, each changed in place, or press Show every step. Start over goes back to the beginning. Anything the copied product has that your plan does not include is left out, and the page names it.
In the full editor afterwards
The kind stays with the product
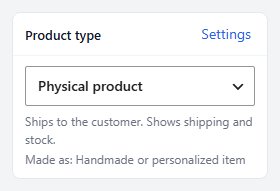
A product made here keeps your word for it. The products list shows it under the title, such as Handmade or personalized item · 2 variations, and the Product type card in the editor’s Summary column adds Made as: Handmade or personalized item. The product type above it still decides how the product behaves, so change that, not the kind, if it should sell differently.
Everything the page left for later is in the editor: formatted text, video, customs, volume and role prices, and more. Write with AI is there too, beside the description, short description, specifications and search engine fields.
Ready to run your store on WP EasyCart?
Everything in this guide works with the free plugin. PRO and Premium add subscriptions, memberships, wholesale pricing and more. Try every PRO feature free for 14 days.