
Step 1. Set up your cart page
Cart, Checkout and Order Confirmation on one page
no stored settingsEdit your cart page with Elementor. Your cart page is the one chosen in Settings › Store details, in the Store pages card. Then either insert the starter layouts (Cart page, Checkout page and Order confirmation page, from Add Template › My Templates, one below the other) or drag the Cart, Checkout and Order Confirmation widgets yourself.
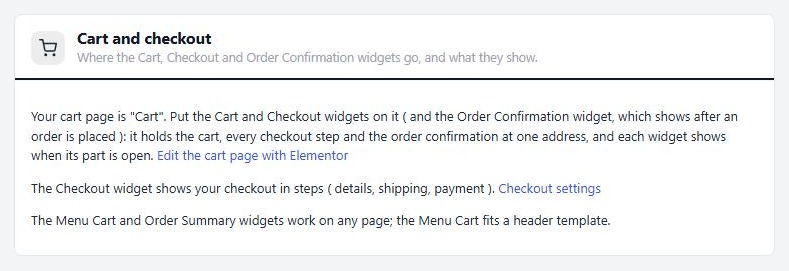
Each widget shows when its part of the cart page is open. The cart shows first, the checkout steps show when the shopper checks out, and the confirmation shows once an order is placed. Settings › Elementor has a Cart and checkout card that names your cart page, links to edit it with Elementor and links to the Checkout settings.
Step 3. The Checkout widget
Your checkout, one page or in steps
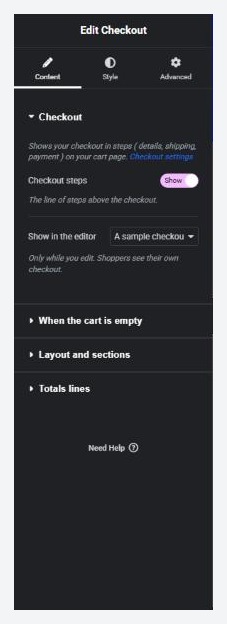
no stored settingsThe Checkout widget shows your checkout on your cart page: the one-page checkout, or details, shipping and payment in steps, as you chose in Settings › Checkout. The widget links to those settings. Checkout steps shows or hides the line of steps above the checkout, and Show in the editor switches between A sample checkout and The empty cart. Layout controls set the order summary width (100% puts the summary under the checkout) and the space between columns. The Style tab covers heading lines, the shipping and payment choices, the order summary and the gift options.
With PRO the widget gains two sections. Layout and sections puts the order summary beside the checkout on the right or left, above it or below it, or as totals only below it when you use the Order Summary widget. It also switches Coupon box, Gift card box, Gift options, Order notes and Express checkout buttons (the wallet and PayPal buttons at the top of the one-page checkout), and lets you place your own Text, HTML or a saved template between the checkout’s sections. Contact, shipping and payment stay in checkout order. Totals lines hides the Shipping line or the Tax lines. Only what the shopper sees changes: the order is still charged its full total, and the grand total always shows. The free plugin shows both sections locked, with an upgrade link.
Step 4. The order confirmation
The thank-you page after an order
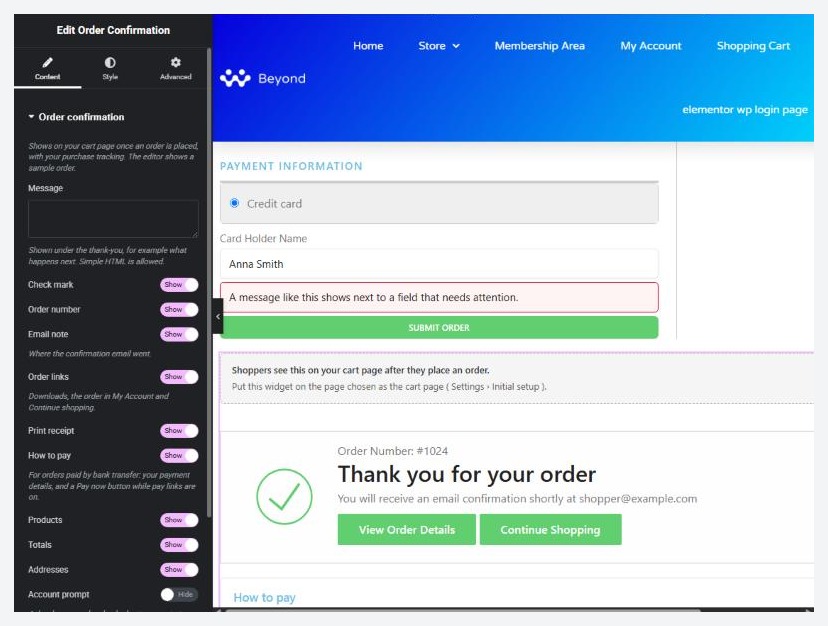
no stored settingsAdd the Order Confirmation widget to your cart page. It shows once an order is placed, together with your purchase tracking, and the editor shows a sample order. It draws the store’s own confirmation and adds what you choose below it.
Write a Message for what happens next; simple HTML is allowed. Then switch each part on or off: Check mark, Order number, Email note (where the confirmation email went), Order links (downloads, the order in My Account and Continue shopping), Print receipt, How to pay (for bank transfer orders: your payment details and a Pay now button while pay links are on), Products, Totals and Addresses.
Account prompt is off by default. It asks guests to create an account and opens your sign-up page, but the order they just placed stays a guest order, so switch it on with that in mind. The Style tab has the Thank-you box (check mark colour) and Products and totals.
Step 5. A menu cart for your header
Menu Cart and Order Summary
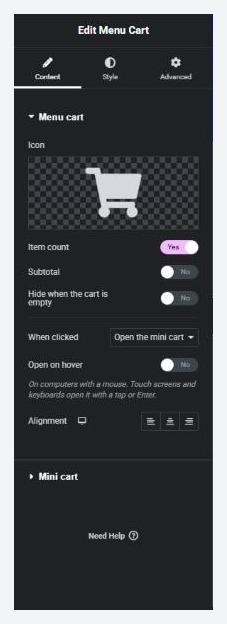
no stored settingsThe Menu Cart is a cart icon with the item count. It fits a header template: in a header built with Elementor Pro’s Theme Builder, or wherever your theme lets you use Elementor. It replaces the older Cart Icon widget. A page that still has the Cart Icon offers a Replace button.
Choose the Icon, and switch Item count (on by default), Subtotal and Hide when the cart is empty. When clicked can Open the mini cart below it, Open the mini cart in a side panel or Go to the cart page. A dropdown can Open on hover (on computers with a mouse). A panel has a Panel side, left or right, and a link can go to a page you choose. Set the Alignment. The Mini cart section sets the Title, the View cart button and its text, the Checkout button and its text, and Show it open in the editor so you can style it.
The Menu Cart never prints the visitor’s cart into the page, and fills it in after the page loads. So it stays correct on a cached site.
Order Summary works on any page. It shows the products and totals in the shopper’s cart, kept up to date while they check out, and shows nothing while the cart is empty. Choose a Heading and its text, and switch Product images, Product options and Totals. Pair it with PRO’s Totals only position when you want the summary somewhere else on the page.
Step 6 (PRO). A side cart
A cart that slides in when a product is added
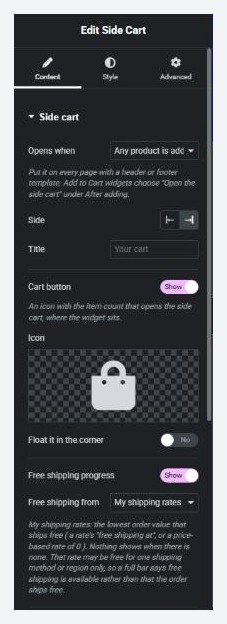
no stored settingsThe Side Cart slides in from the side when a shopper adds a product. It shows quantities with remove buttons, a free shipping progress bar, and buttons to the cart and the checkout. It needs PRO with an active license. The free plugin shows a locked description in the editor, and visitors see nothing.
Put it on every page, in a header or footer template. Under Opens when choose Any product is added, An Add to Cart widget set to open it adds a product or Only its cart button is clicked. In the Add to Cart widget, the After adding choice can be Stay on the page and confirm, Open the side cart, or Go to the cart. Set the Side (left or right), the Title, the Cart button and Icon, and whether it floats in the corner.
Free shipping progress takes the amount from My shipping rates (the lowest order value that ships free) or An amount I enter. A full bar means free shipping is available, which may depend on the shipping method or region. You can also add a Note under the subtotal and change the View cart and Checkout button texts.
Ready to run your store on WP EasyCart?
Everything in this guide works with the free plugin. PRO and Premium add subscriptions, memberships, wholesale pricing and more. Try every PRO feature free for 14 days.
