
Step 1. Read the Status card
Settings › Checkout protection
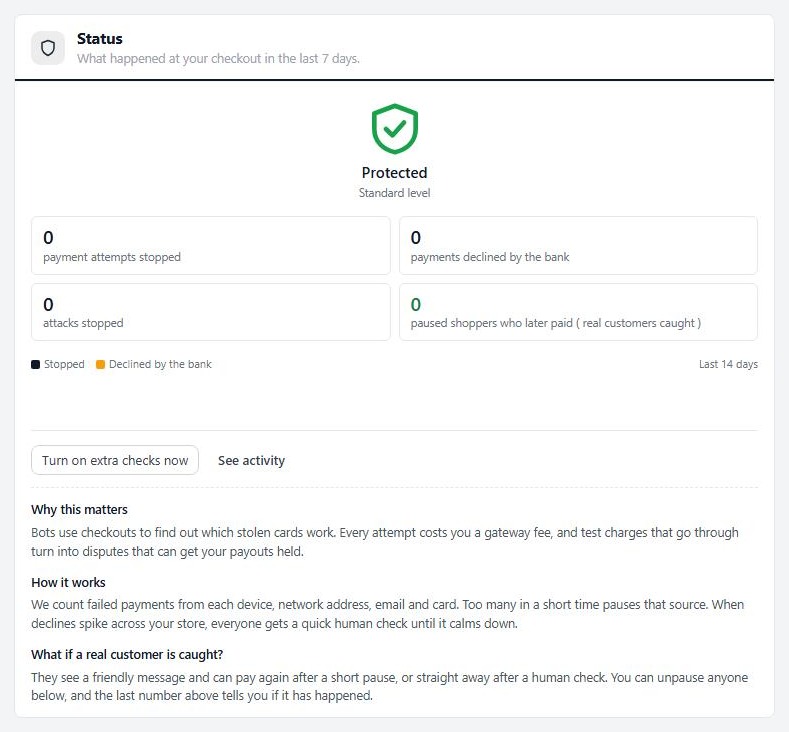
no stored settingsOpen EasyCart › Settings › Checkout protection. The Status card shows a shield for the last seven days:
Protected with your level, such as Standard level.
Under attack with the time extra checks run until.
Watching only or Not protected if you chose those levels.
Four figures sit beside it: payment attempts stopped, payments declined by the bank, attacks stopped, and paused shoppers who later paid. The last one is the number to watch. It counts real customers your limits caught. A zero is good.
Buttons let you turn extra checks on, end them, or keep them on for 24 hours. Diagnostics also shows a row when protection is off, only watching or waiting for its database table.
Step 2. Choose a protection level
Standard suits almost every store
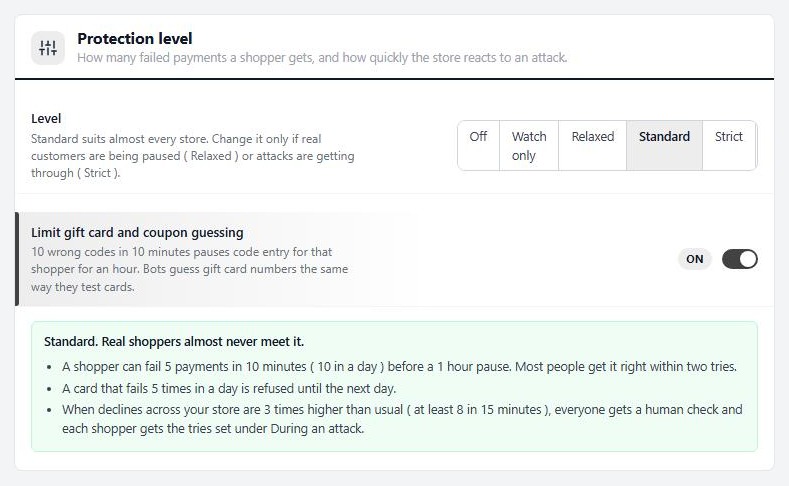
no stored settingsThe Level pills in the Protection level section are Off, Watch only, Relaxed, Standard, Strict and Custom. A note under them spells out the numbers for the level you pick.
Standard ( the default ): a shopper can fail 5 payments in 10 minutes, 10 in a day, before a 1 hour pause. A card that fails 5 times in a day is refused until the next day. Real shoppers almost never meet it.
Relaxed: 8 failures in 10 minutes, 20 a day, a 30 minute pause. For stores where many shoppers share one network, such as a school or an office.
Strict: 3 failures, 6 a day, a 24 hour pause, and a payment from a session that never opened your checkout page gets a human check. For stores that have been attacked or sell cheap items bots like.
Watch only stops nothing and records what Standard would have stopped, so you can see it before you switch on. Off removes all limits and is not recommended.
Custom lets you set failed payments per shopper, the time window, the pause, failures per card per day and the attack trigger.
Limit gift card and coupon guessing is on by default. Ten wrong codes in ten minutes pauses code entry for that shopper for an hour. Bots guess gift card numbers the same way they test cards.
Step 3. Add the human check
Cloudflare Turnstile or Google reCAPTCHA v2
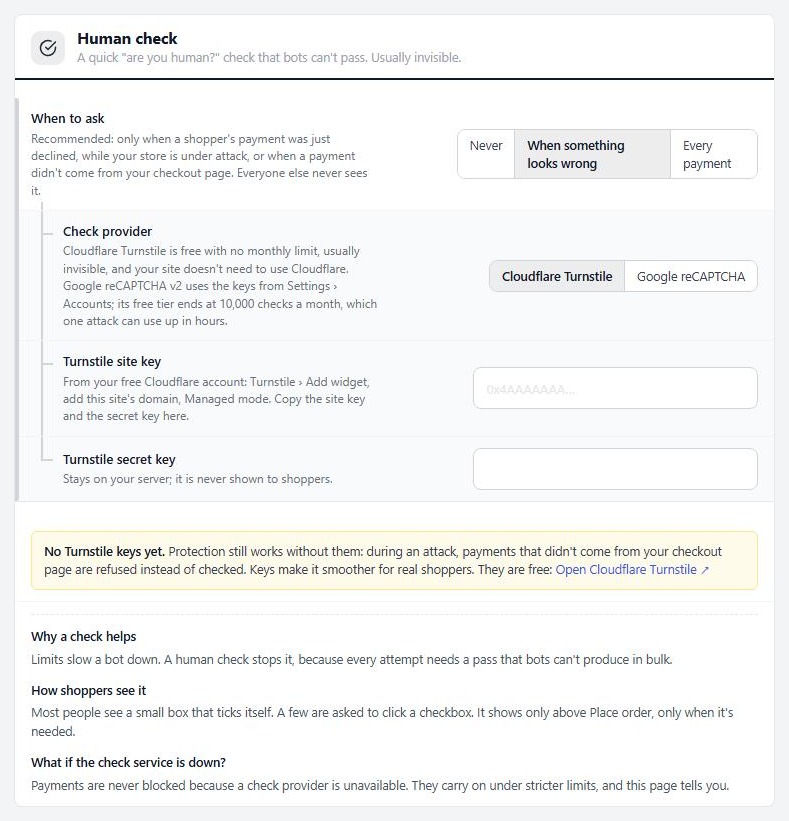
no stored settingsLimits slow a bot down. A human check stops it, because every attempt needs a pass that bots cannot produce in bulk. Most people see a small box that ticks itself. A few are asked to click a checkbox. It only shows above Place order, and only when needed.
In the Human check section, When to ask has three choices: Never, When something looks wrong ( recommended, and the default ), and Every payment. The middle one asks only after a decline, during an attack, or when a payment did not come from your checkout page.
Check provider. Choose Cloudflare Turnstile, which is free with no monthly limit and usually invisible, and works even if your site does not use Cloudflare. In your free Cloudflare account, open Turnstile, add a widget, add this site’s domain and choose Managed mode. Paste the Turnstile site key and the Turnstile secret key. The secret stays on your server.
Or choose Google reCAPTCHA. It uses the reCAPTCHA v2 checkbox keys from Settings › Accounts. Its free tier ends at 10,000 checks a month, which one attack can use up in hours, so Turnstile is the better choice.
Under Test your keys, press Show a test check to see the check exactly as shoppers get it and confirm your secret key with the provider. If the provider is down, payments are never blocked. They go on under stricter limits, and the page tells you. Without keys, protection still works: during an attack, payments that did not come from your checkout page are refused rather than checked.
Step 4. Decide what happens in an attack
Alerts, extra checks and flagged orders
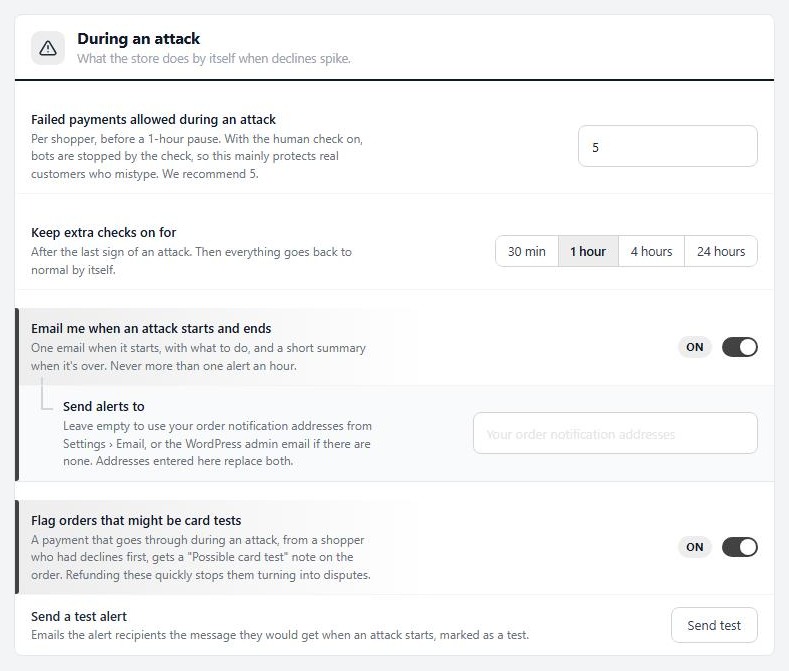
no stored settingsThe During an attack section controls the store’s automatic reaction. At Standard, an attack is 8 declines across the whole store within 15 minutes, at least 3 times your usual rate over the last 30 days, so a busy store does not trip it on a normal day.
Failed payments allowed during an attack ( default 5 ): per shopper, before a 1 hour pause. With the human check on, bots are stopped by the check, so this mainly protects customers who mistype.
Keep extra checks on for: 30 minutes, 1 hour, 4 hours or 24 hours after the last sign of an attack. Then everything goes back to normal by itself.
Email me when an attack starts and ends ( on ): one email when it starts, with what to do, and a summary when it is over, never more than one an hour. Send alerts to takes other addresses. Left empty it uses your store notification addresses, or the WordPress admin email. Press Send a test alert to see one.
Flag orders that might be card tests ( on ): a payment that goes through during an attack, from a shopper who had declines first, is tagged Possible card test.
While an attack is on, a red banner runs across every WP EasyCart screen with buttons to see what is happening, keep extra checks on for 24 hours, or end them now.
What to do during an attack
A short checklist
no stored settingsProtection is already working. You do not need to do anything right now. If you want to help it:
1. Open Checkout protection and read the Status card. Press Keep extra checks on for 24 hours if the attack looks set to continue.
2. Check that the human check has working keys. Press Show a test check. An attack without keys is handled by refusing suspect payments, which is harsher on real customers.
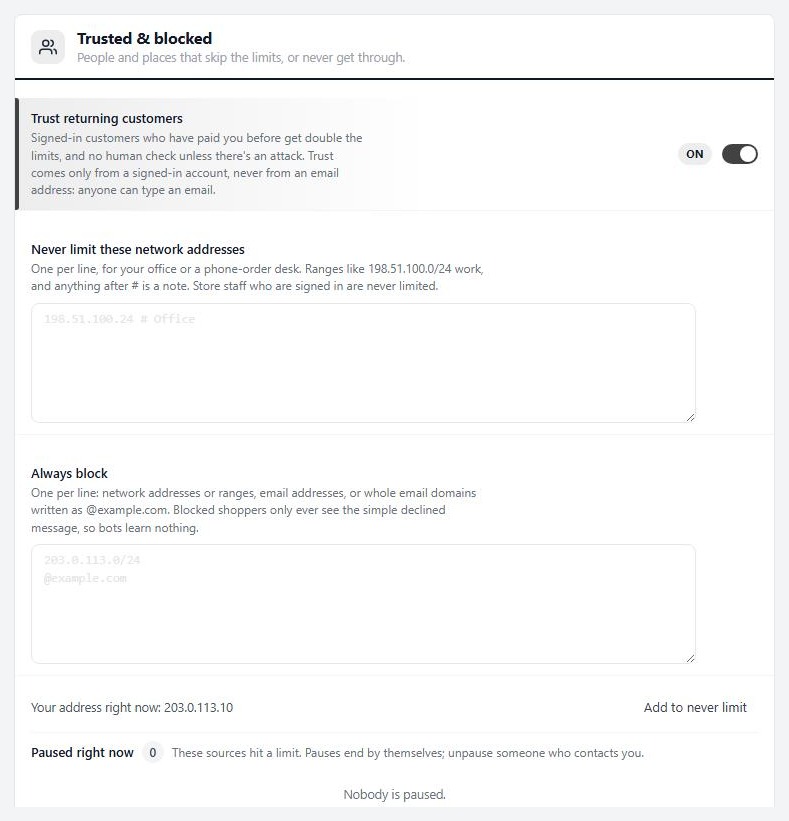
3. Open Activity and filter to Declined, Stopped or Attacks. Each row shows what happened, where, and a shortened form of the shopper. Press Block on a source, or add network addresses, addresses and email domains such as @example.com to Always block in the Trusted & blocked section. Blocked shoppers only ever see the simple declined message.
4. Review the Card tests tile and refund what you do not recognise.
5. Look at your payment processor’s dashboard. Stripe, Square and PayPal all screen payments on their side, and their fraud tools, such as Stripe Radar and security-code and address checks, add a second layer. Ask your processor what it recommends if fees are rising. Leave the WP EasyCart webhook working, so declines in the payment form reach the Activity list.
6. Raise minimums. The page warns you when a donation product has a minimum under 5. Bots love $1 donations, and a higher minimum makes your store a poor target.
7. Afterward, look at paused shoppers who later paid. If it is not zero, consider Relaxed.
Ready to run your store on WP EasyCart?
Everything in this guide works with the free plugin. PRO and Premium add subscriptions, memberships, wholesale pricing and more. Try every PRO feature free for 14 days.
