How to Setup Google Analytics in WordPress

1 min read

Tracking & Data

Google Analytics Setup

Connect WP EasyCart to Google Analytics and start tracking real eCommerce data — conversions, purchases, and per-product performance — not just page views. A few settings is all it takes.

Two Kinds of Google Analytics

Before you connect anything, know the difference — they track completely different things.

  • Google Page Analytics: The method most people already know — a script pasted into WordPress that tracks page clicks and views across your entire site, EasyCart pages included. Plugins like Google Site Kit make this a one-click add, and many themes support it natively too.
  • Google eCommerce Analytics: Builds on your existing analytics to show conversions and purchases — per product, per user, and across the entire visit. See where shoppers come from, how they navigate your site, and exactly what they bought.

WP EasyCart sends your eCommerce data to Google after every confirmed order. Enter a few settings below and start collecting.

Step 1 — Set Up Google Analytics

Get your Google account ready to receive data before touching any EasyCart settings.

1

Create Your Analytics Account

Start with an actual Google account for analytics — sign up here. This gets you page viewing and basic web analytics running. Then install the free Google Site Kit plugin — it’s free and easy to use.

Step 2 — Add Your Code to EasyCart

With page tracking working, it’s time to link your Google code to EasyCart’s order data.

2

Paste Your Code into Third Party Settings

Visit WP EasyCart › Settings › Third Party in your WordPress admin and add your Google code there. From that point on, every confirmed order sends its eCommerce transaction data straight to Google.

WP EasyCart — Google Analytics Third Party Settings
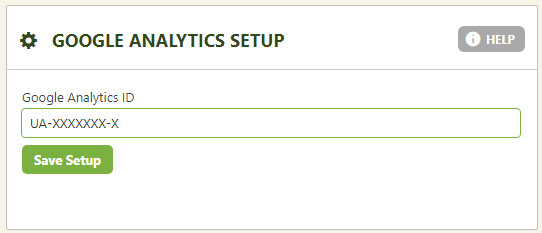
WP EasyCart third party settings with Google Analytics code field

Step 3 — Enable eCommerce Reporting in Google

One last flip of a switch on Google’s side and eCommerce data starts flowing in.

3

Turn On Ecommerce & Enhanced Ecommerce

In your Google Analytics admin account, open the ‘Ecommerce Settings’ section and enable both eCommerce and Enhanced eCommerce reporting. That’s it — you’re ready to start collecting eCommerce transactions into your regular analytics account.

Google Analytics — Ecommerce Settings
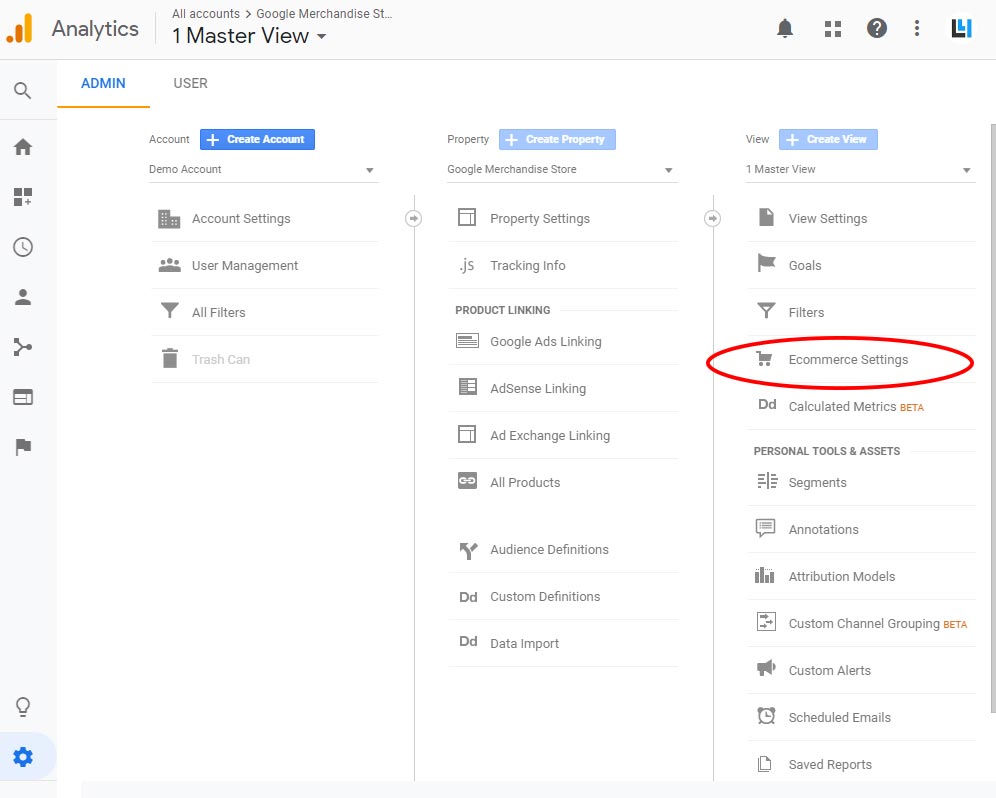
Google Analytics Ecommerce Settings section

Google Analytics — Enable Ecommerce & Enhanced Ecommerce
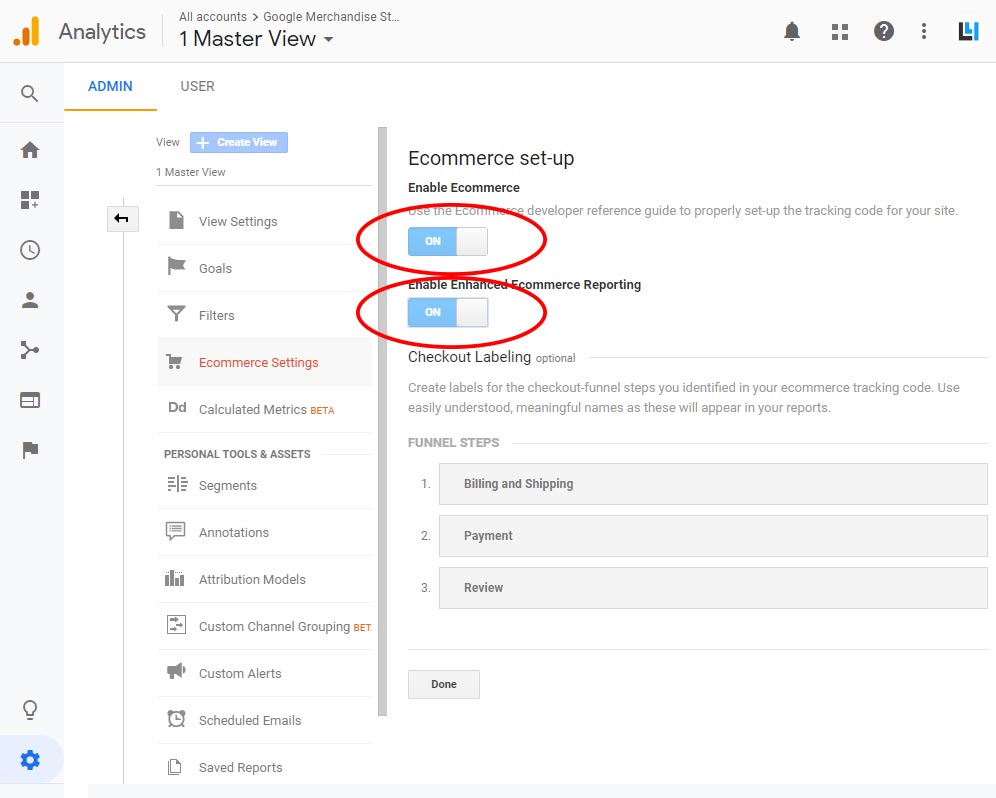
Google Analytics toggles to enable Ecommerce and Enhanced Ecommerce reporting

Where to Find Your eCommerce Data

Once orders start coming in, here’s exactly where to look.

In Google’s analytics interface, go to ‘Conversions’ › ‘Ecommerce’ › ‘Overview’ to watch your data start rolling in.

Google Analytics — Ecommerce Overview
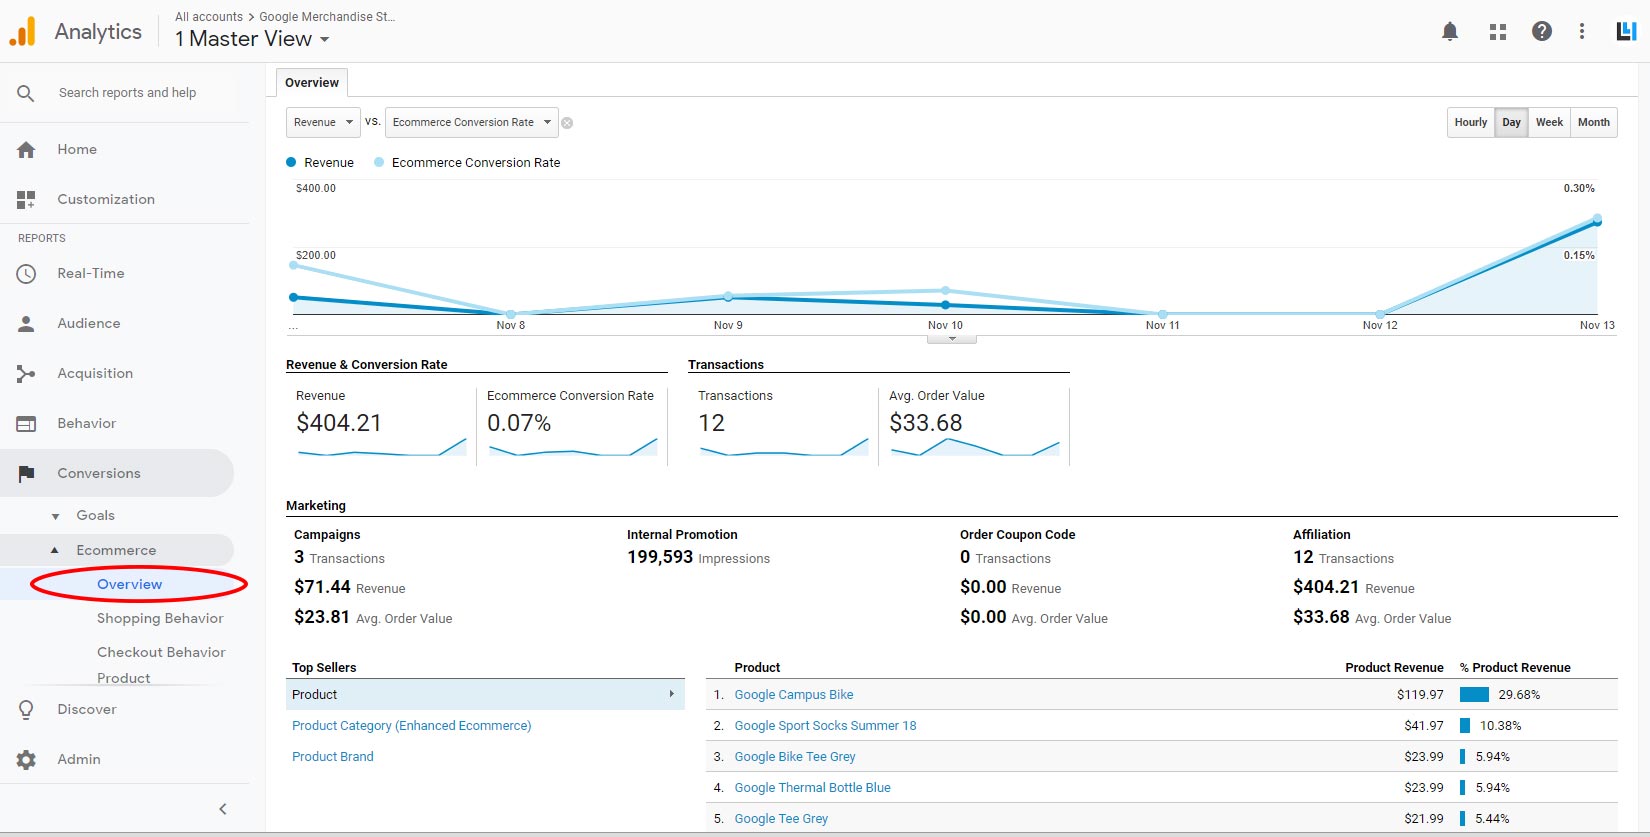
Google Analytics Ecommerce Overview showing conversions and purchase data

Ready to See Real Sales Data?

Stop guessing which products convert. Connect Google Analytics today and watch every order feed straight into your reports.

Updated on July 20, 2026
