Third Party
Multi-Language Setup with WPML
WPML is a popular plugin for turning a WordPress site into multiple languages. Pair it with WP EasyCart and you can sell internationally — every product, category, and cart page matched to the language your shopper picks.
Set Up Your Language Files
Three quick checks before WPML and EasyCart start talking to each other.
Ensure Language Files Exist
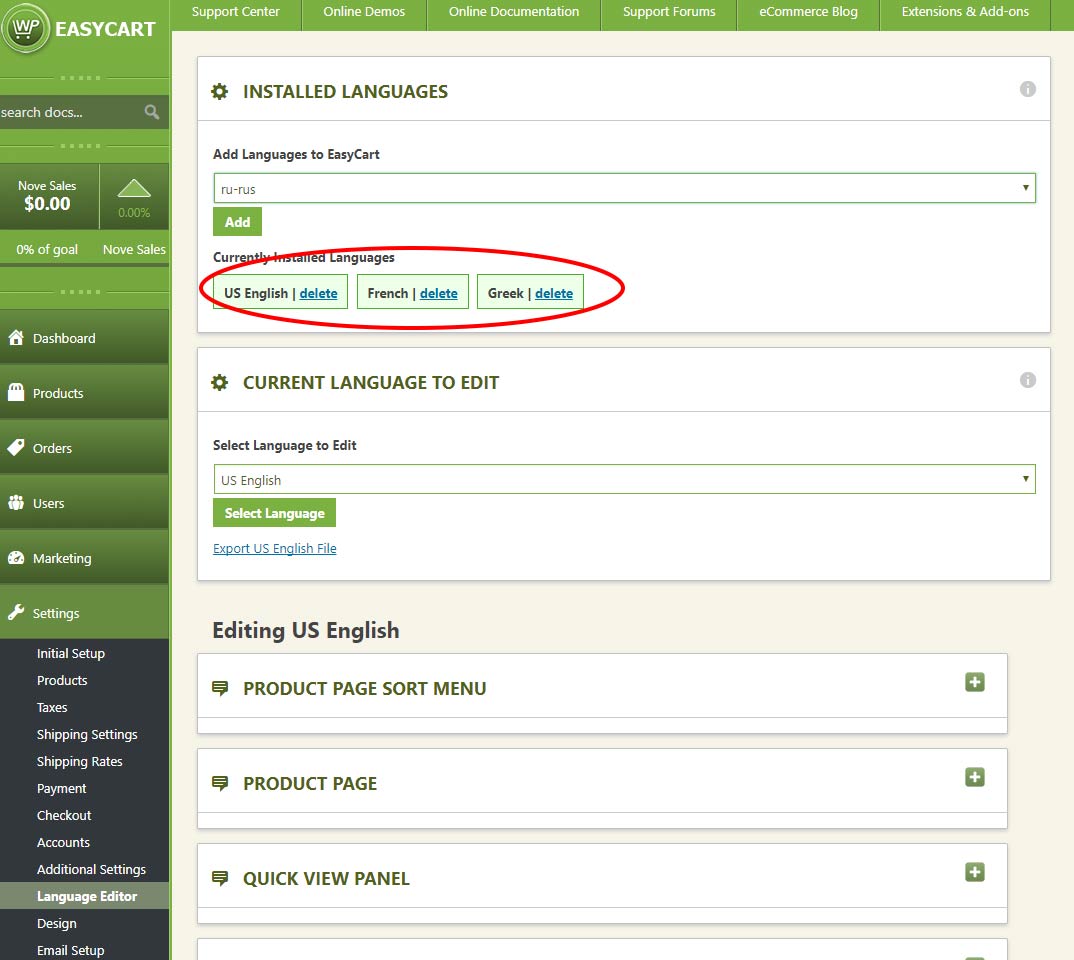
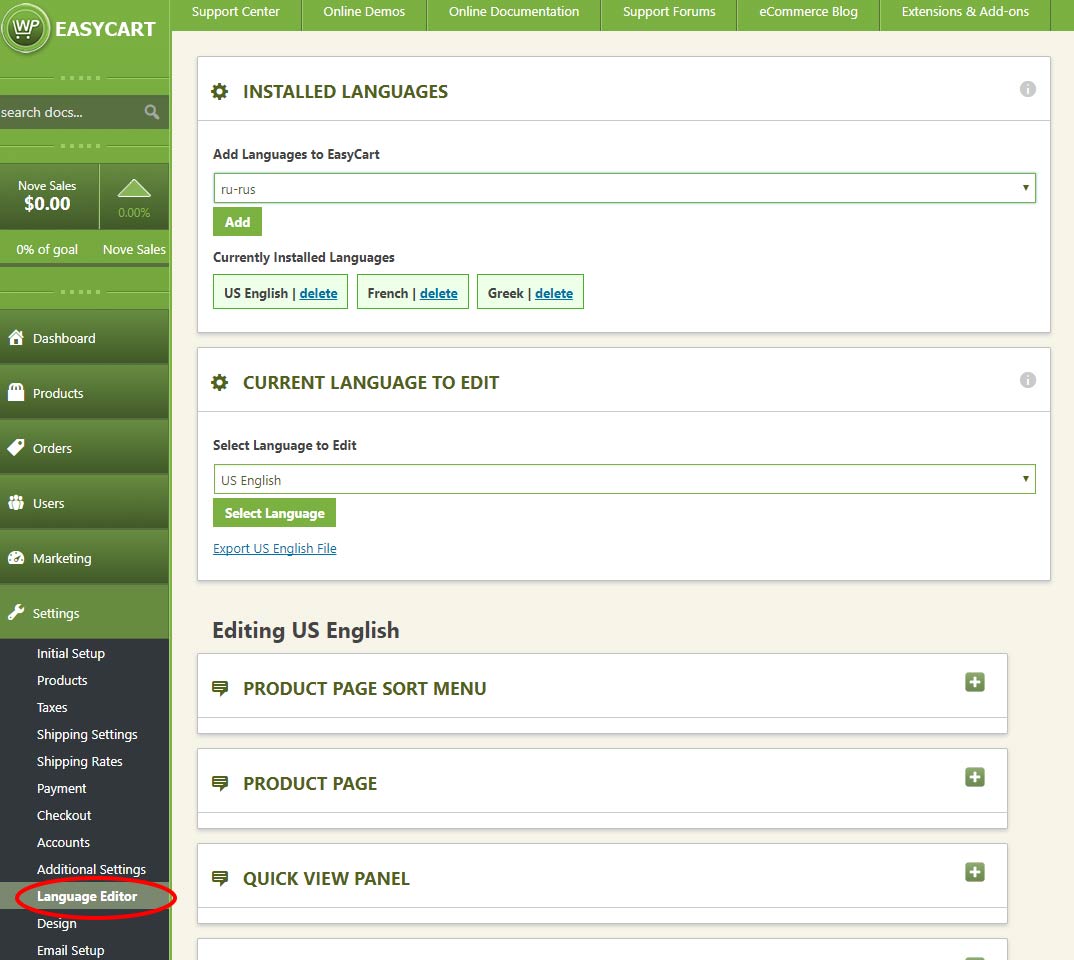
Visit WP EasyCart › Settings › Language Editor and confirm your language files are there. Need one that isn’t? See the “Add a New Language File” section below.
WP EasyCart — Language Editor Menu
Add Languages As Needed
Add or delete language packs so EasyCart matches exactly which languages you’re supporting in WPML.
WP EasyCart — Add Language Packs

Choose Your Default Language Pack
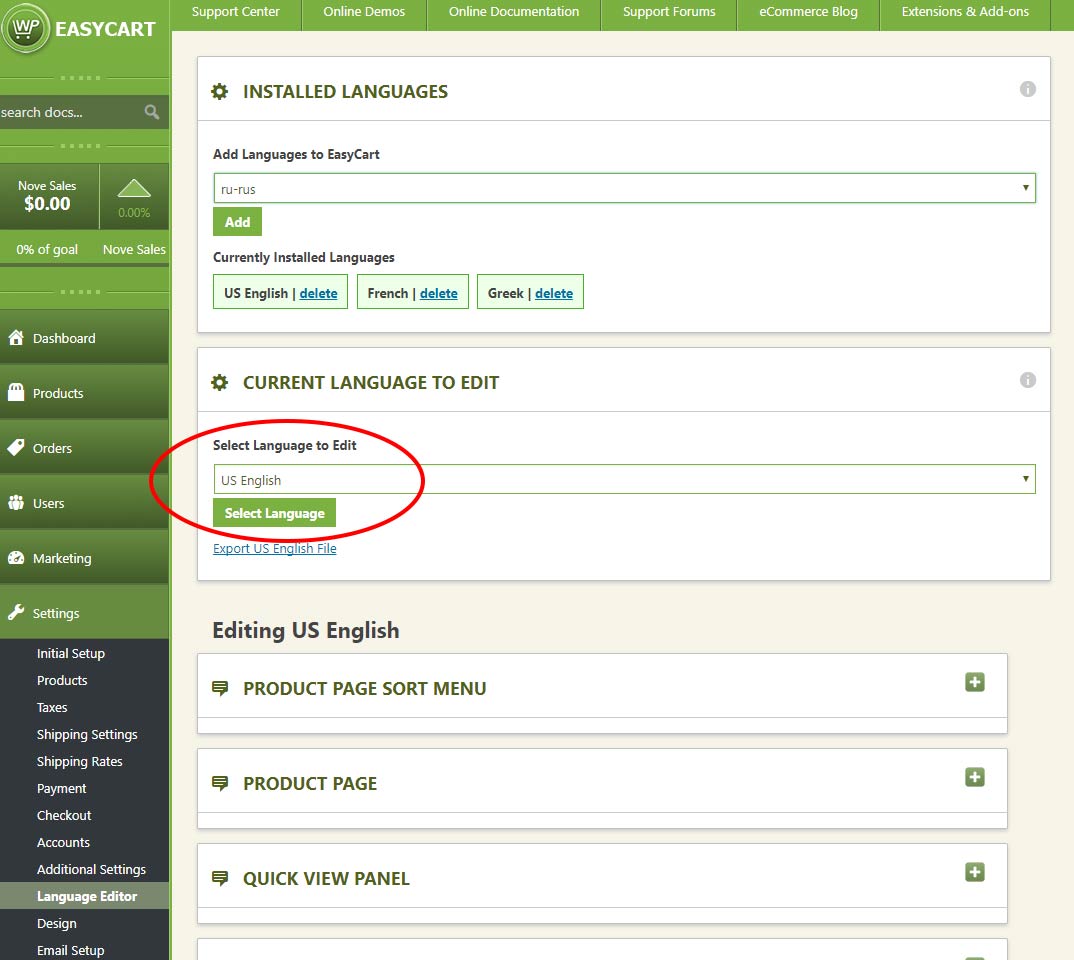
Select whichever language should be active on your site by default. You can still open and edit any other language pack by selecting it — whichever you select here is what stays default.
WP EasyCart — Current Default Language to Edit
Match Language Codes & WPML Settings
Two settings checks that quietly break the integration when they’re skipped.
Make the Language Codes Match
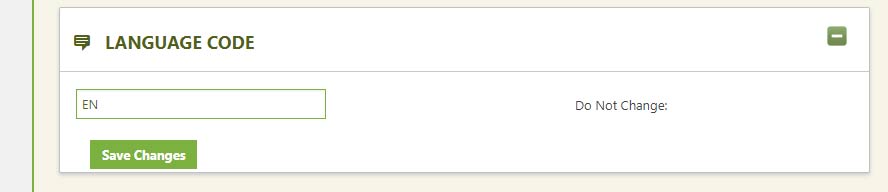
Scroll to the bottom of each language page and check its code. WPML uses ES for Spanish, while EasyCart defaults to SP — resave each one so the codes match exactly what WPML uses.
WP EasyCart — Language Code Field

Confirm Your WPML Settings
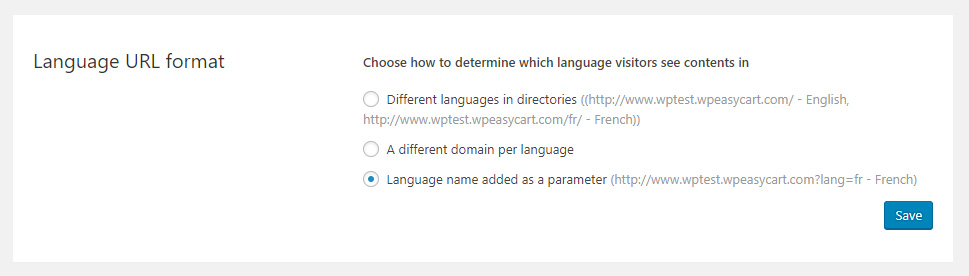
Stick with WPML’s basic installation, and make sure URL linking is set to the URL linking variable method. Other linking methods aren’t recognized by EasyCart.
WPML — Language URL Format Setting

Build a Store, Cart & Account Page for Each Language
WPML needs its own core pages per language — here’s the pattern.
Add a Store, Account & Cart Page for Each Language
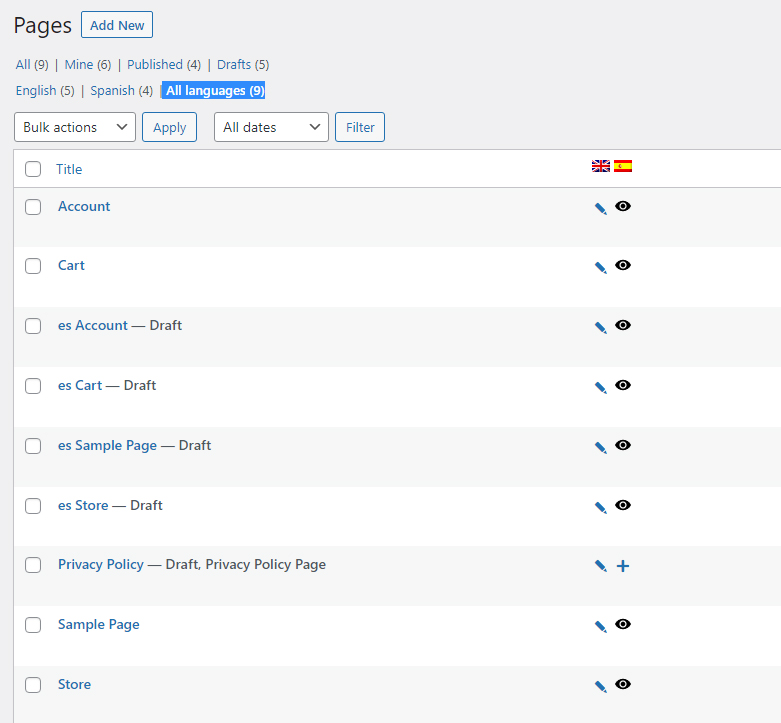
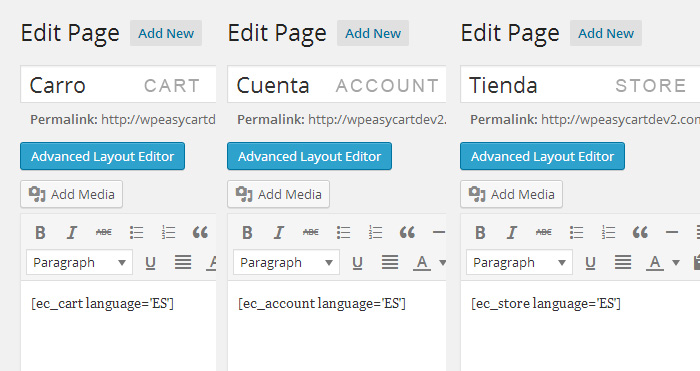
Visit your Pages section in WordPress. You should see a Store, Cart, and Account page available for every language you’ve added — for example, English and Spanish versions of each.
WordPress — Pages Per Language

Add the Language Parameter to Every Page
Every language page needs the language parameter in its shortcode. For a Spanish translation: [ec_store language="ES"], [ec_cart language="ES"], and [ec_account language="ES"]. Your default pages need the same treatment — for English: [ec_store language="EN"], [ec_cart language="EN"], and [ec_account language="EN"].
WordPress Editor — Language Shortcode Example
Turn Off SEO Friendly Links
One global setting flips EasyCart over to the URL variables WPML needs.
This changes every store URL sitewide
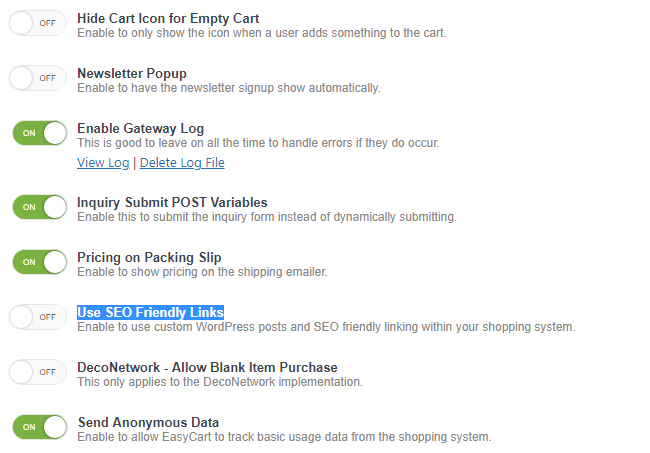
Head to Settings › Additional Settings and turn OFF Use SEO Friendly Links. This switches EasyCart to URL variables instead of custom post type links for pages and product displays — required for WPML’s language switching to work correctly.
WP EasyCart — Turn Off SEO Friendly Links
View & Translate Your Store
The last two steps: confirm the switcher works, then translate each product.
View Your Pages
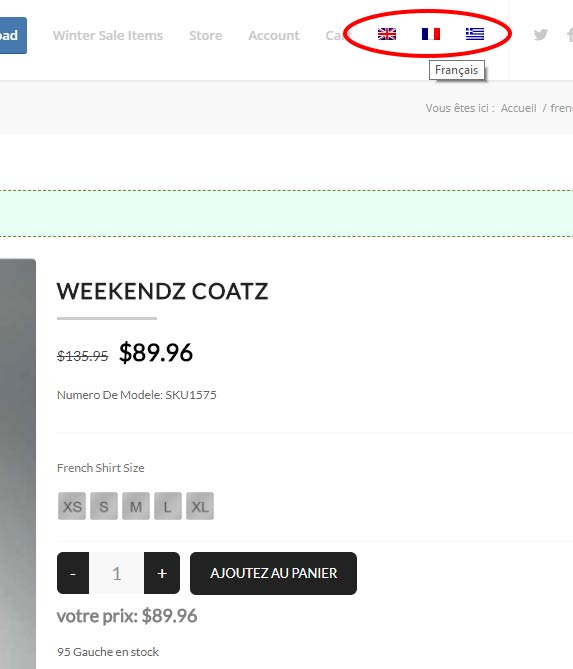
Open your store, account, or cart page and switch languages using the WPML flags or dropdown. Basic store data — add to cart buttons and phrases — all adjusts based on the language pack in Settings › Language Editor. With English, French, and Greek flags active, switching to French shows the French product title, French model number, and French add-to-cart button.
WPML — Store Switched to French

Translate Your Products
Throughout product setup, force a translation for any field by entering each language’s version wrapped in its own tag. For example, to give a product a different English and German title: [EN]English Title[/EN][DE]German Title[/DE]. The store translates automatically based on the WPML language selected.
WP EasyCart — Per-Language Title Field
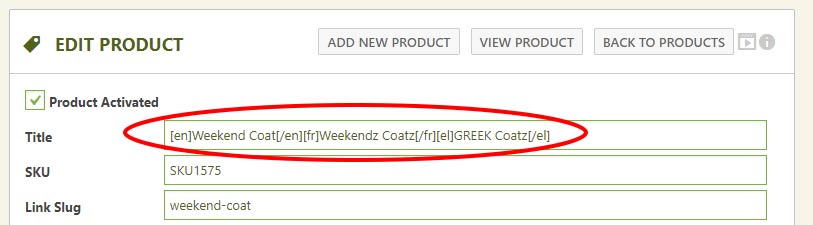
WP EasyCart — Product Admin Example

Developer Feature
Fix the Language Switcher Inside a Product Page
Want shoppers to switch languages while they’re already viewing a single product? Add this snippet to your theme’s functions.php file so the language switcher carries the current product’s model number along with it.
add_filter('icl_ls_languages', 'wpml_ls_filter');
function wpml_ls_filter($languages) {
if ( isset( $_GET['model_number'] ) ) {
global $sitepress;
foreach ( $languages as $lang_code => $language ) {
$languages[$lang_code]['url'] = $languages[$lang_code]['url'] . '&model_number=' . $_GET['model_number'];
}
}
return $languages;
} Add a New Language File
Only needed if you want to add a language EasyCart doesn’t already ship with.
💡 Once imported, edit it in the app, not the file: Language data is stored in your database after import, so upgrades don’t overwrite your changes. That means once you’ve added a language file and opened the Advanced Language page, you can no longer make changes to the file directly.
Copy an Existing Language File
Copy any of the existing text files located in wp-content/plugins/wp-easycart/inc/language/ and rename it to something that makes sense.
Edit the File Carefully
Make your changes — JSON formatting is very specific, and any mistake results in an error. Run the file through jsonlint.com before uploading it to your server.
Complete the Import
Go to EasyCart Admin › Store Setup › Advanced Language to finish adding the new language.
Fix Errors on the Advanced Language Page
If you find mistakes in the translation, correct them on the Advanced Language page — not the uploaded text file. Want your translation folded into the core EasyCart plugin? Reach out through your account and share the file — we’ll add it in.
Ready to Go Global?
Pair WPML with WP EasyCart and sell confidently in every language your shoppers speak. Our support team is ready if any step needs a second set of eyes.