
Creating a Category Template

1 min read

Elementor Page Builder

Creating a Category Template

Design your EasyCart category pages visually with Elementor. Build one template that covers every category — or craft a fully custom page for each one. If no template is applied, EasyCart simply uses our default styling.

Step 1 — Build a Template in Elementor for Categories

One template, reused design-wise across your entire EasyCart store system. You may attach it to all categories or specific categories — we’ll teach you how!

1

Open Templates › Theme Builder

To get started, you should have WP EasyCart installed as well as Elementor page builder. Start by clicking the Templates › Theme Builder menu on your WordPress menu.

Beginning Note — flip this switch first

You must go to WP EasyCart › Settings › Design and turn ‘Enable Custom Post Template’ to ON. Without it, your template will never apply.

WordPress — Templates › Theme Builder Menu
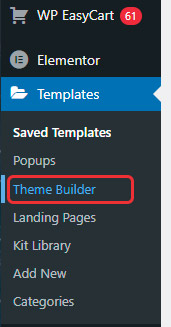
WordPress admin menu showing Templates and Theme Builder options

Step 2 — Select a Single Post Style Template

Categories in EasyCart are custom posts — so a Single Post template is the one you want.

2

Choose Single Post

Because we are working with categories, every single category you add to your WP EasyCart becomes a custom post within your system with its own unique URL and post. So select to create a Single Post template — either from the side menu or the main screen selection.

💡 Note: You may get a popup here asking you to pick from some predefined templates — go ahead and close that window if needed!

Elementor — Single Post Template Selection

Elementor Theme Builder screen with Single Post template type selected

Step 3 (Basic) — Create Your Design Template

One template for every category at once. This part of the process is somewhat limited — you should design around the category display.

3

Design Around the Post Content Element

If you are building a template for all categories at once, you must use the ‘Post Content’ element to display the category itself. Build your surrounding design around it — you will assign this template in Step 4.

Elementor — Category Template with Post Content Element
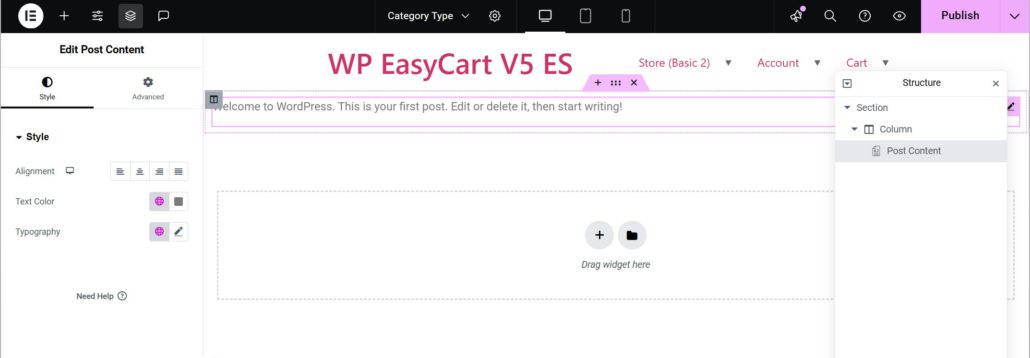
Elementor category template design using the Post Content element to display the category

Step 3 (Alternate) — Build a Template for Each Category

The alternate approach: a dedicated template per category. Add header content, footer content, and more — you can completely customize the display using this technique.

Build your content for the category, then slide out the WP EasyCart Products element and select the category. The screenshot below shows an example of building a custom category page: build your hero content, then add WP EasyCart Products below. In the settings, select your category — in this case we also added extra products. You will assign the template in Step 4.

Elementor — Custom Category Page with WP EasyCart Products Element
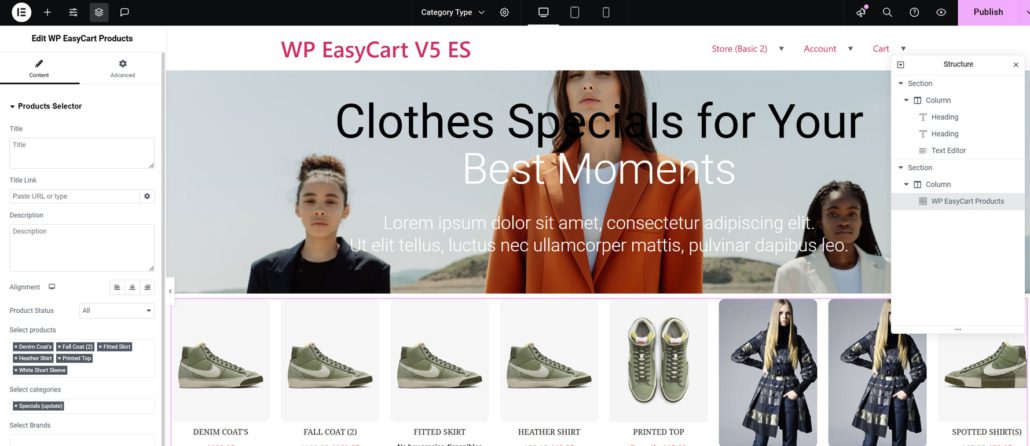
Elementor custom category page with hero content and the WP EasyCart Products element set to a specific category

Step 4 (Basic) — Assign Your Design Template

Assign the basic, all-categories template with your display conditions as shown below.

Elementor — Assigning the Template to All Categories
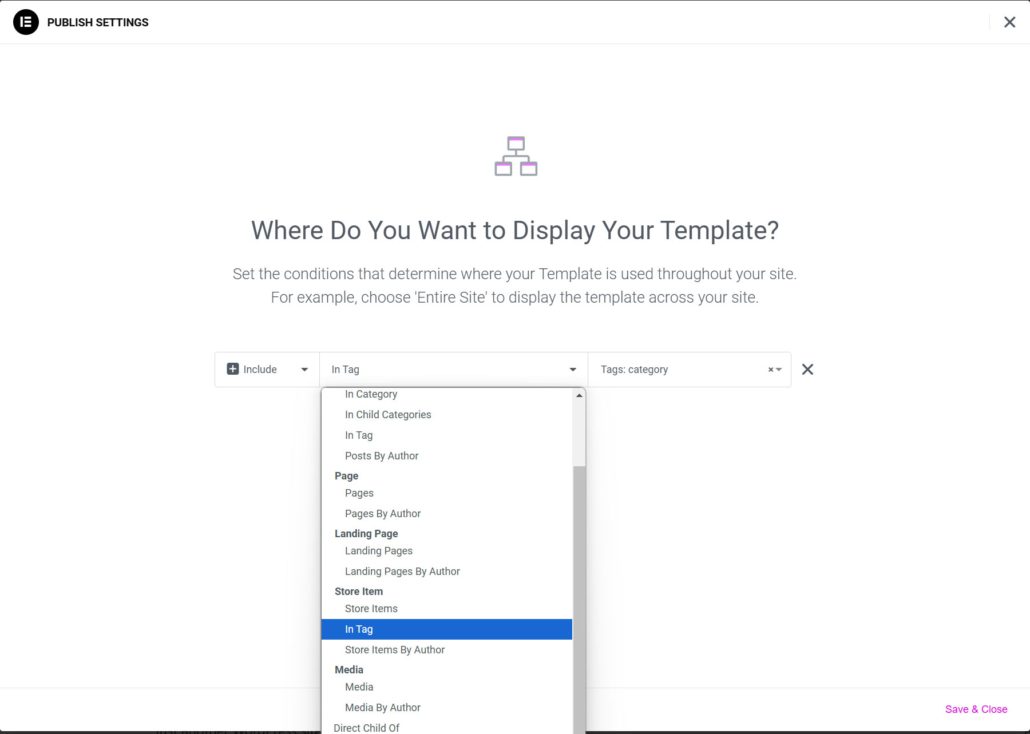
Elementor display conditions assigning the design template to all categories

Step 4 (Alternate) — Assign Your Design Template

For a per-category template, set the condition to Include › Store Items › {Choose your category}.

Elementor — Assigning the Template to a Specific Category
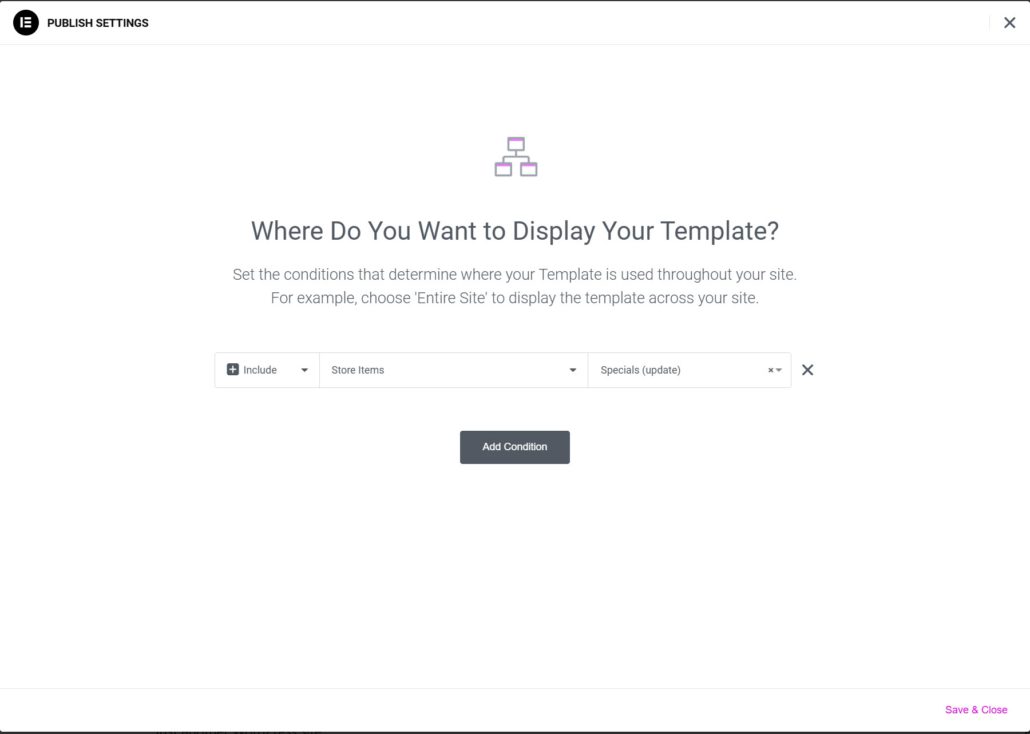
Elementor display conditions including a specific store category for the template

That’s It!

Although the alternate version gives you more options, it is time consuming if you have lots of categories. The basic approach may work for you as well, but limits your design options.

💡 Our recommendation: Build one category the alternate way, then save your design as a template. This allows you to quickly build a second, third… template using the same design.

One Design. Every Category.

Whether you template every category at once or craft each one by hand, Elementor plus EasyCart keeps you in full control. Need a hand with conditions? We’re here.

Updated on July 20, 2026