The EasyCart system requires 3 pages be setup with simple shortcode placed on each. The products, cart, and account pages are the main pages that run the entire shopping system and must be connected by selecting what page is designated for each section.
Installing the Free Edition
Download the free plugin from WordPress. It takes 5 minutes to walk through the 5 step wizard and be up and running with full eCommerce shopping cart in your WordPress today.
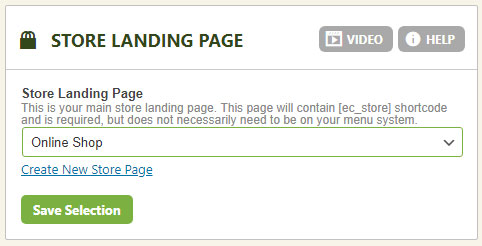
Store Landing Page
This page should have the shortcode [ec_store] on it. You may press ‘Create New Store Page’ and it will automatically add a new WordPress page with the shortcode, or you may do it manually and select your page.

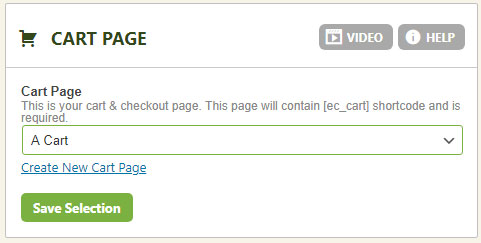
Cart Display Page
This page should have the shortcode [ec_cart] on it. You may press ‘Create New Cart Page’ and it will automatically add a new WordPress page with the shortcode, or you may do it manually and select your page.

Account Display Page
This page should have the shortcode [ec_account] on it. You may press ‘Create New Account Page’ and it will automatically add a new WordPress page with the shortcode, or you may do it manually and select your page.

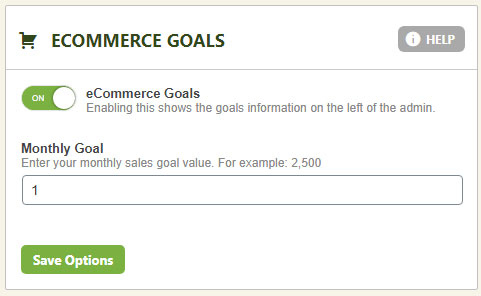
eCommerce Goal Setup
Setting up goals is a matter of establishing a monthly value you wish to reach in total sales – minus any refunds. This displays in your left sidebar of EasyCart. If you wish to disable this feature, simply set enabled to NO.

Installing/Uninstalling Demo Data
We offer a quick way to install demonstration data into EasyCart, which includes sample products and orders so that you can quickly evaluate and see the system operate.
*Note: Uninstalling demo data will remove all products and orders, so be sure you want to complete this step. If you have added products and want to keep them, simply delete demo products and orders individually.

Currency Setup
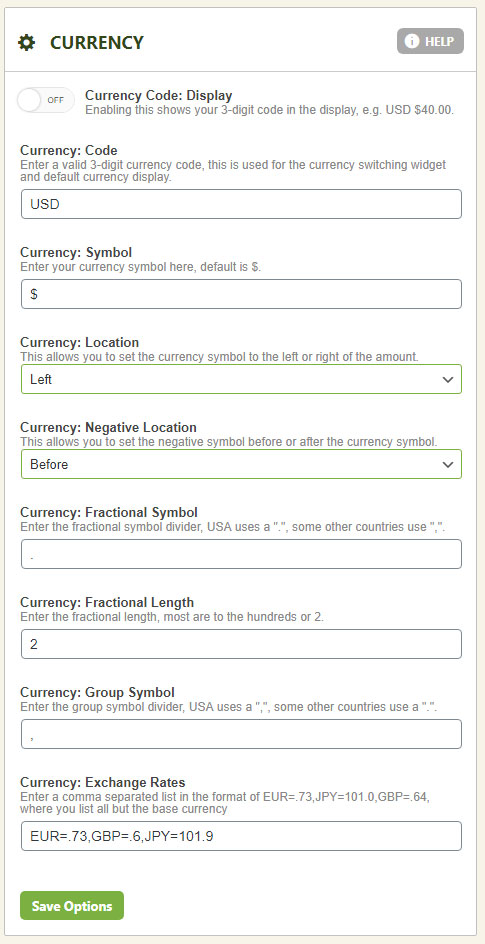
EasyCart allows you to completely configure currency display. The visual appearance of currency is what this section handles, while your payment provider and gateway decide what currency you are actually processing transactions in.
- Currency Code: A valid 3 digit currency code.
- Show Currency Code: Allows you to show currency code next to each display of money.
- Symbol: What symbol to display next to each display of money.
- Symbol Location: Show the symbol to the right or left of each display of money.
- Negative Location: For negative prices, such as discounts and coupons, where to show the – negative symbol.
- Decimal Symbol: What the decimal symbol should display. Usually a period or comma depending on country.
- Decimal Length: How many units of cents should be shown. Usually 2 or 3 depending on country.
- Grouping Symbol: This is the thousands separator and can be configured. Usually a comma, but depends on country.
- Currency Exchange Rates: Valid 3 digit currency codes separated by a comma allow you to add exchange rates when using the multi-currency widget. This allows customers to switch visible rates on the store while shopping, but processing still occurs according to your payment gateway provider. (Example: EUR=.73,GBP=.6,JPY=101.9)

