EasyCart Cloud Services
Text Messaging Cloud Service
WP EasyCart’s cloud-based texting service lets customers add their mobile number after they place an order and receive automated text alerts whenever their order changes — shipping updates, status changes, and other alerts sent straight to their phone. EasyCart handles all the technical work through our cloud service.
Quick Start
Up and running in three steps
Purchase the service
Buy the Text Notification cloud subscription to get your sending credits.
Connect to EasyCart
Link the cloud service to your registered EasyCart site from your account.
Configure triggers
Set up your welcome message and order/shipping triggers in the Checkout panel.
Watch the Setup Walkthrough
Prefer to watch? This short video walks through the entire text messaging setup in just a few minutes.
Set Up Text Notifications
Watch as we set up the text notification service in the same three easy steps outlined on this page.
Setup Guide
Setting it up, step by step
Step 1 — Purchase cloud service credits
Text alerts are a paid service that send messages to your customers. Each text costs a few cents, and EasyCart manages all the delivery through our cloud service. Current pricing is on our website, and if you ever need more credits, contact our support team and we’ll set you up on the right plan for your volume.
Step 2 — Connect the cloud to your EasyCart
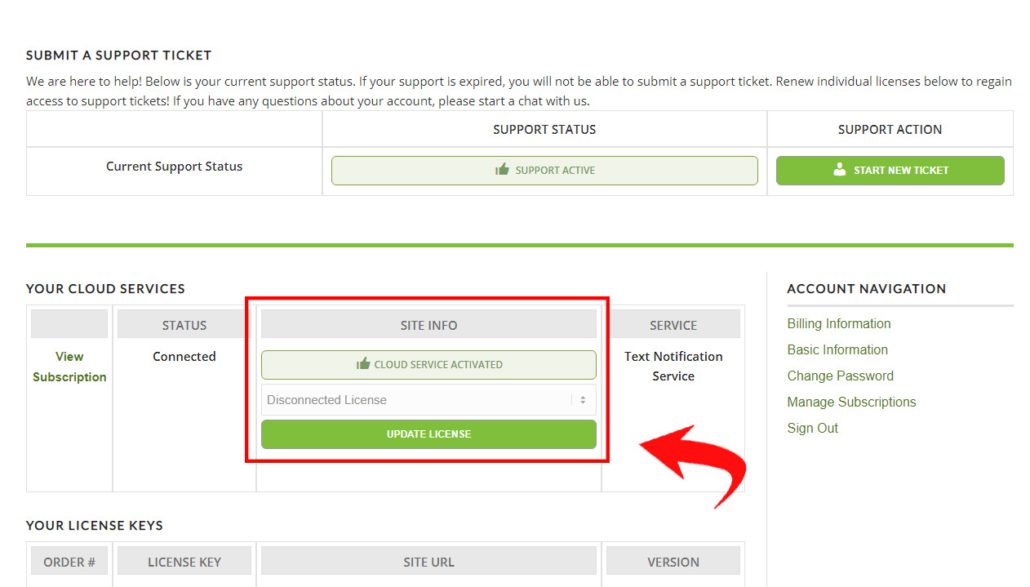
Once you’ve purchased a subscription, visit your account at wpeasycart.com/my-account and connect the cloud service to a specific EasyCart site. Use the pulldown, select your registered EasyCart site, and update.
Note: You can manage your cloud subscription using the Manage Subscription button on the side if you ever need to update the credit card on file for these services.
Connecting the cloud service
Step 3 — Configure texting triggers
Once connected, log into WordPress Admin → WP EasyCart → Settings → Checkout. This is where you build your custom welcome message, your ongoing order-status and shipping triggers, and any custom values you want to send. In the example below we set up the first notification — an On New User Notification Signup — which fires when a customer enters their phone number on the order confirmation page to opt in to alerts.
- Set Default Country: pick a commonly used default country for sign-up users.
- Select Preferred Country: push two or three of your most popular international countries to the top of the checkout list, making the right country code easier to find.
- Choose a Trigger: select the goal of the text you’re creating. Use as many or as few as you like. Aside from the new-user signup, every trigger reacts to order-management changes — editing an order in your order panel fires a text if a matching trigger is set up.
- Trigger on All Order Status: the default. You can narrow which statuses a trigger reacts to — for example, only firing the shipping-tracking trigger on an Order Shipped status. Leaving this on All Order Statuses and just adjusting triggers is fine.
Note: Triggers send a text every time you edit an order in that trigger area. If you change a customer’s order status five times, they receive five separate text alerts.
Trigger setup in the Checkout panel

A note about spam filtering
The EasyCart cloud system can send custom messages, but many US carriers block or filter messages they read as “spammy.” While testing it’s easy to trigger several texts to the same number, or send the same message repeatedly — both of which can get your messages blocked even though they still count as sends.
Tier 1 carriers such as AT&T, T-Mobile, and Verizon filter heavily. Start with short messages like “Thank you for your order!” or “Your order has shipped!”, then customize further once you know it’s landing. If EasyCart sends but the carrier filters, the credit is still used.
It’s easy to get yourself blocked while testing — but real customers will still receive their messages, since those contain genuine new-number sign-ups.
Personalization
Message customization tags
Drop these tags into any message and EasyCart injects the real order data when the text is sent — so every alert is personalized to the customer.
Example: “Thank you for your recent order. We’re happy to let you know an item has shipped via {shipping_carrier} with tracking {tracking_number}.”
All Triggers
{order_id}Order Status UpdatedAs of version 5.7.8
{order_date}{restaurant_date}{restaurant_time}{pickup_date}{pickup_time}{grand_total}Shipping Tracking Updated
{shipping_method}{shipping_carrier}{tracking_number}Order Note Updated
{order_customer_notes}Shipping Address Updated
{shipping_first_name}{shipping_last_name}{shipping_company_name}{shipping_address_line_1}{shipping_address_line_2}{shipping_city}{shipping_state}{shipping_country}{shipping_zip}{shipping_phone}Billing Address Updated
{billing_first_name}{billing_last_name}{billing_company_name}{billing_address_line_1}{billing_address_line_2}{billing_city}{billing_state}{billing_country}{billing_zip}{billing_phone}Line ItemAdded / Updated / Deleted
{title}{model_number}{quantity}{unit_price}{total_price}{giftcard_id}{gift_card_email}{gift_card_from_name}{gift_card_to_name}{gift_card_message}{optionitem_name_1}{optionitem_name_2}{optionitem_name_3}{optionitem_name_4}{optionitem_name_5}For Your Customers
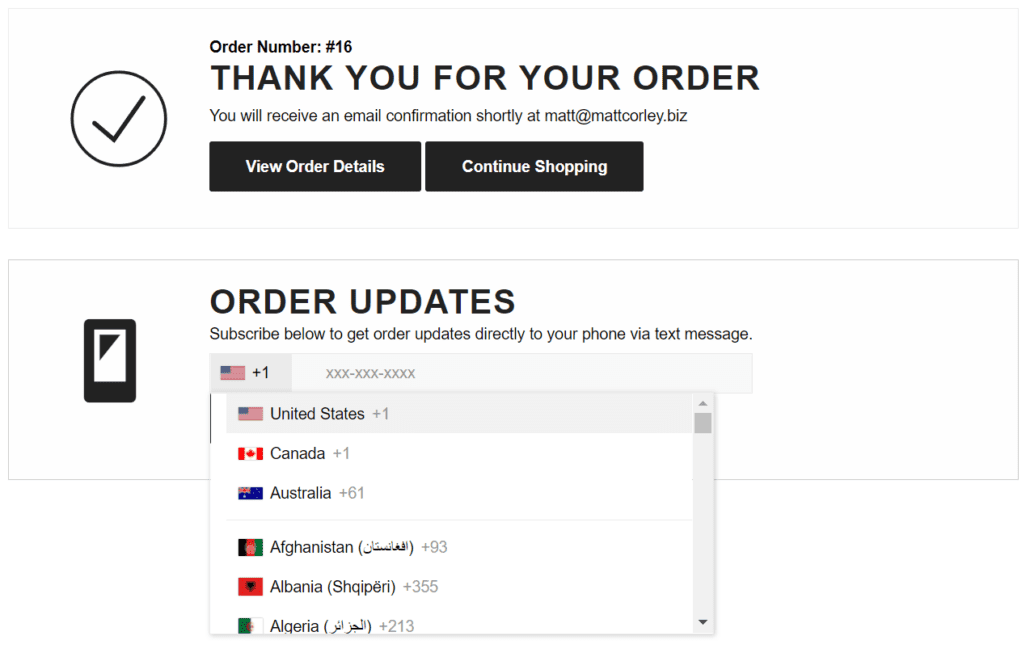
The user signup process
For customers, the process is seamless and already built into your thank-you page. After every order, they can choose to enter their phone number and sign up for text alerts — that’s it. If you have a welcome trigger set up, they get a quick welcome text right away; otherwise any qualifying order update you make as an administrator sends them an alert about the change.
Cloud service credits
All text alerts run through the EasyCart Cloud service, so each purchase comes with a set number of credits. Monitor them anytime under WP EasyCart → Store Status. If you run low and want a higher sending limit, our support team can help.