This plugin is built to work in combination with Quickbooks (desktop software) and the WP EasyCart plugin for WordPress. This plugin is built to only work with ONE Quickbooks company file at a time. The best way to do multi-user Quickbooks management with your EasyCart store is to share the data online and only connect via the web connector with a main Quickbooks account (a master account).
Requirements
- WordPress website installed and setup
- Quickbooks 11 or higher available for download/install (PC versions offer web connector capabilities, check with quickbooks about Mac web connector?)
- A valid SSL Certificate for your site (Quickbooks will NOT connect to a server that does not have a valid SSL Certificate)
- WP EasyCart installed and registered on your WordPress site
- WP EasyCart Premium and the Quickbooks Extension downloaded and installed.
Watch a full installation video here. Click to watch Installation video
Download and Installing an EasyCart Extension
First, you must install all EasyCart extensions as new plugins. This is a very easy task with WordPress and we have a short guide here to get you started. Click Here to learn how to install a WordPress plugin and EasyCart Premium extensions.
Setup Guide
This setup assumes you have installed Quickbooks 11 or higher, you have installed a valid SSL Certificate on your server, you have a WordPress site setup on your server, and you have setup the WP EasyCart plugin. If any of this has not been completed, please complete before attempting Quickbooks setup for the WP EasyCart.
- Purchase the WP EasyCart Premium, if you have not already, which includes the Quickbooks plugin at www.wpeasycart.com.
- Once a purchase is complete, download the WP EasyCart PRO and WP EasyCart Quickbooks plugin from your account here. Just click download for each plugin and it will begin the download of a zip file for the plugin.
- Go to the WordPress admin of your site. Click ‘Plugins’ -> ‘Add New’, then select ‘Upload’ from the top of this page. Click ‘Choose File’ and select the freshly downloaded zip from the last step. Then click ‘Install Now’. Once the plugin installs, click activate.
- A new menu item will now be available on the left called ‘Quickbooks’, click this link to go to the ‘Setup’ page.
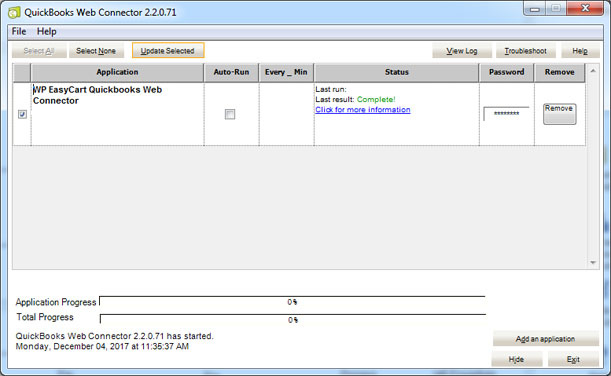
- Start by downloading the QWC and save somewhere for later. Please take note of the password shown on this page for later.
- If you haven’t installed yet, download and install the Quickbooks Web Connector Add-On from Intuit for your Quickbooks installation. This is available here: Quickbooks Web Connector Add-On. Download and install this and continue on once complete.
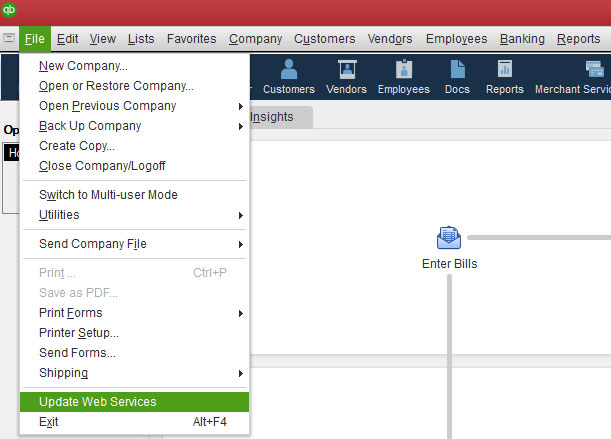
- Now you are ready to add your Quickbooks Web Connector file (QWC), which was downloaded in step 5, to Quickbooks. This will allow your Quickbooks application to connect to your WP EasyCart and automatically download new data. This can be done by opening Quickbooks, clicking ‘File’ -> ‘Update Web Services’. Next click ‘Add an Application’, select the downloaded QWC file. If you would like to learn more about the process of sending data to Quickbooks, view our blog post article here on the topic.
- When prompted to authorize the new web service, click ‘OK’.
- (Optional by QB version): When prompted to check the application certificate, select ‘Yes, whenever this QuickBooks company file is open’ and click ‘Continue…’, then ‘Done’ when prompted.
- Now enter the password from the WP EasyCart Quickbooks Setup menu page from your WordPress admin in the provided password box. Press enter and ‘Yes’ when prompted to save the password.
Now you are ready to begin transferring data. We recommend turning off auto-updates for now as there is more we should do before importing data.
Exporting Quickbooks Data
In order to have minimal conflicts and issues during your use of this plugin, you need to make a lot of initial connections between EasyCart and Quickbooks. To begin this:
- Click ‘Import Data’
- On your Web Connector, check the box next to the web connector and ‘run selected’.

- This will complete the import, now return to the setup page or refresh that page in your browser to continue.
Import Default Payment Methods
Any payment type you collect needs to be connected to a valid payment method. This means if you collect third party payments (PayPal, Dwolla, etc…), Visa, MasterCard, Discover, etc… You must connect each of them. If you do not have these payment methods created you can quickly do so by:
- Click ‘Export Payment Methods’
- On your Web Connector, check the box next to the web connector and ‘run selected’.
- This will complete the import, now return to the setup page or refresh that page in your browser to continue to the final setup step.
Account Setup Options
The final setup step is to connect various accounts, items, tax items, and payment methods. Each will be listed here below for your reference. There are many optional setup and ways to do this and you should consult an accountant if you are unsure how to organize your business accounts.
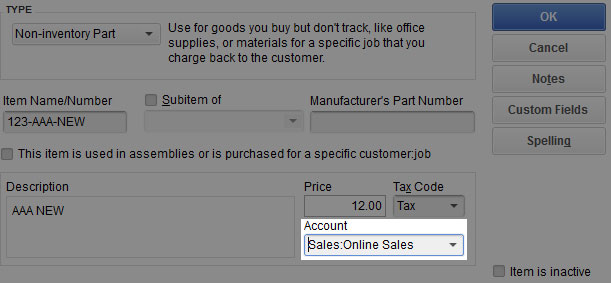
- Default Product (Non-Inventory) Account: This type of product means you are not tracking inventory and are kept separate from regular Inventory Items. This also is the default product type if you have not enabled Inventory Items. Please read below for enabling inventory items if you choose to us this feature. This is the account products that are imported from WP EasyCart to Quickbooks will be categorized.
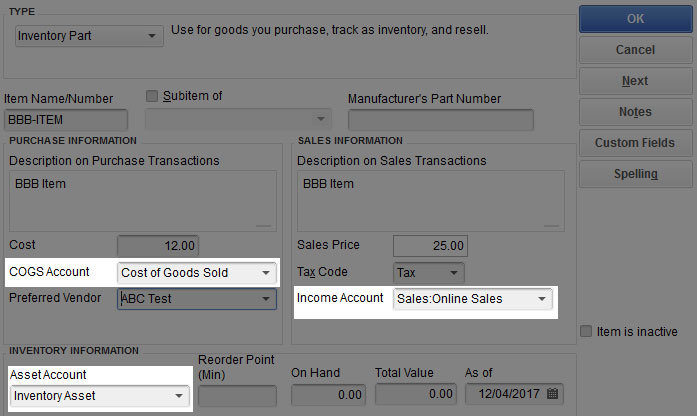
- Default Product (Inventory) Income Account: This only applies if you have enabled Inventory Items in your company preferences. Please refer to enabling inventory items below. If you do not select the three inventory accounts, EasyCart will assume all products are non-inventory items.This product type tracks quantity on the store and means you have a specific quantity to sell.
- Default Product (Inventory) COGS Account: This only applies if you have enabled Inventory Items in your company preferences. Please refer to enabling inventory items below. If you do not select the three inventory accounts, EasyCart will assume all products are non-inventory items.This product type tracks quantity on the store and means you have a specific quantity to sell.
- Default Product (Inventory) Assets Account: This only applies if you have enabled Inventory Items in your company preferences. Please refer to enabling inventory items below. If you do not select the three inventory accounts, EasyCart will assume all products are non-inventory items.This product type tracks quantity on the store and means you have a specific quantity to sell.
- Fees Account: This account is where your merchant services fees will be added. This option will be added in the future with deposits (Stripe only).
- Bank Account: This is the account in which your deposits are made. This option will be added in the future with deposits (Stripe only).
- Discount Item: This is the item that discounts will be logged under (coupons and promotions). You should setup a default discount item and import it under the ‘Quickbooks’ => ‘Discount Items’.
- Shipping Item: This is the item that shipping totals will be logged under. If you have not set this up, do so now as an ‘Other Item’ and import via the ‘Quickbooks’ => ‘Other Items’.
- Default Tax Item: This is an other item that is imported to Quickbooks as a line item in your Invoice or Sales Receipt. Please refer to the taxes section to learn more about tax setup with Quickbooks.
- Duty Item: This is an other item that is imported to Quickbooks as a line item in your Invoice or Sales Receipt.
- VAT Item: This is an other item that is imported to Quickbooks as a line item in your Invoice or Sales Receipt.
- State Tax: State Code: This is a ‘Sales Tax Code’, which is setup in your account preference. You can connect a different state tax to each state. Refer to the Taxes section below for more info.
- Taxable Code: This is REQUIRED! Default setup is TAX, but can be edited in your Quickbooks account. By connecting this you can make any change without consequence.
- Non-Taxable Code: This is REQUIRED! Default setup is TAX, but can be edited in your Quickbooks account. By connecting this you can make any change without consequence.
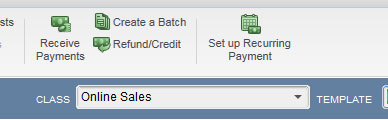
- Invoice Class: This is the class shown on the invoice upon import.
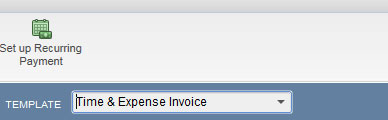
- Invoice Template: This is the template shown on the invoice upon import.
- Invoice Rep: This is the rep shown on the invoice upon import.
- Invoice Bill Month: This is the value under billing month (see above).
- Various Payments: This includes Visa, Discover, AMEX, Third Party Payments, etc… These are enabled via the WP EasyCart ->Settings -> Payments and then MUST be connected to a payment method. You can import these following the instructions on this page OR create your own and import on the Quickbooks ->Payment Methods panel.

Additional Setup Options
- Customer Name Format: This is the format of customer names that will be imported to Quickbooks. We support First Last and Last, First.
- Order Type: Many prefer Invoice format, which shows an invoice and a payment separately, but others prefer to have a simple sales receipt. Choose whatever is best for your company.
- Invoice Extension: This is important for preventing conflicts if you already have orders in your Quickbooks file. This will make all orders unique for the EasyCart. For example, order numbers with a ‘-wp’ will show in Quickbooks as ‘4001-wp’ and will not conflict with an existing order numbered 4001 in Quickbooks.
Taxes
Taxes can be handled by the default system or as a line item attached to an ‘other item’ account. If you collect taxes from multiple states, you should enable and setup sales tax:
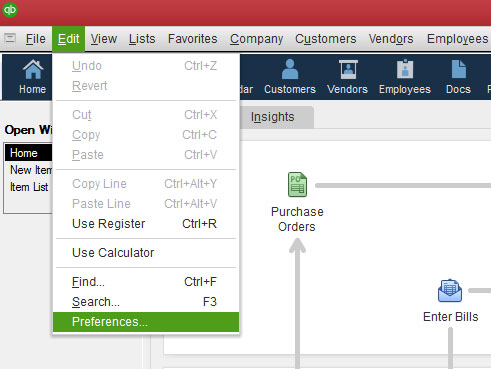
- Edit -> Preferences
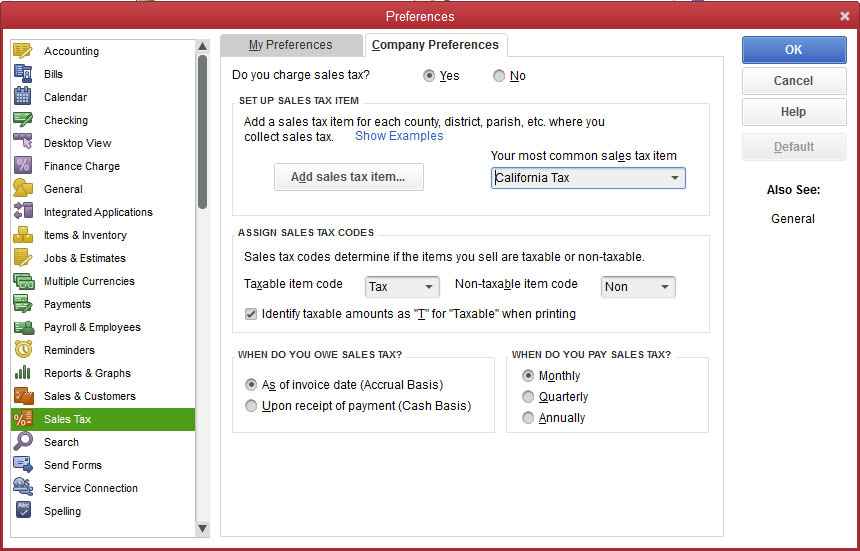
- Select Sales Tax -> Company Preferences and choose ‘Yes’ to enable sales tax. Once enabled you need to add a sales tax item for each possible rate you will be charging.
- You can change the Tax and Non on this screen as long as you have this connected in the accounts setup, Taxable Code and Non-Taxable Code.
- You must provide a default tax item for users that checkout in an un-taxed state otherwise Quickbooks will always assume your default tax option and show invalid totals in your invoice. Each state must also have its own rate or the same problem will arise.
- NOTE: Quickbooks calculates tax on the invoice, WP EasyCart does NOT import that amount. This can cause issues if products are set to not taxable or taxable incorrectly OR tax rates change in one place and not the other OR a user is setup to be tax-exempt. In cases where you find this is causing issues, try using our line item based system shown next.
Line Item Based Sales Tax: In many cases the sales tax method in Quickbooks cases more issues than it solves. We recommend that you create an ‘other item’ for tax and allow EasyCart to add a line item for tax totals, which will guarantee the invoices imported match the actual payment within the cart. This is done by connecting the Default Tax Item, Taxable Code, and Non-Taxable Code. That is all you need and the cart will do the rest.
Shipping & Discounts
Shipping and discounts are connected to an account in the setup and shown as a line item on the invoice or sales receipt.
Inventory Items – Enable Inventory and Purchase Orders
- Go to edit -> preferences…
- Enable ‘Inventory and purchase orders are active.’. This is in the Items & Inventory -> Company Preferences tab.
How to Leverage The Plugin with Manual Payments
You can leverage Quickbooks, the Quickbooks plugin for WP EasyCart, and the WP EasyCart plugin with manual payments to bill customers directly from Quickbooks. This can be done by having users checkout with manual payments. When an order comes into Quickbooks it will be an Invoice. You can then send the invoice out to the customer to request payment. If the user adds their credit card information and you are setup to process credit cards, you can actually process that information on the order to complete the transaction. Once the payment is received you will see it in received payments.
Troubleshooting Your Plugin
Check your Quickbooks -> Queue for error information. If a call is successful it will be removed from the queue, but if it fails it will be left for you to view. NOTE, not all messages are errors, for example, a query that has no results will tell you nothing found, but is left in the queue for your reference and can be deleted at any time. This is your best resource for troubleshooting.