
Connection
The Meta business this store sends its products to
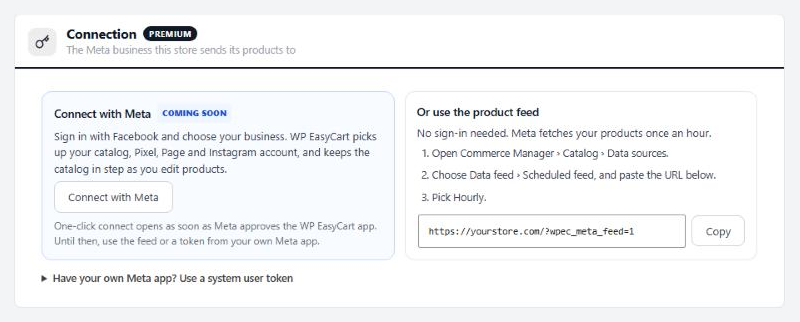
no stored settingsNot connected yet, the section offers the ways in. For the feed, open Commerce Manager › Catalog › Data sources, choose Data feed › Scheduled feed, paste the feed URL shown there and pick Hourly.
With a token. In Meta Business Settings › Users › System users, give a system user your catalog, Pixel and Page, then generate a token for your app with catalog_management, business_management, ads_management and pages_read_engagement. Open Have your own Meta app?, paste the token ( the app secret is optional ) and press Check token. Pick the business portfolio, the catalog, or Create a new catalog named after your store, the Pixel and the Facebook Page, then Connect. The token is stored encrypted. A token without catalog_management still connects, but products go by the feed.
Connected, the section shows the business, catalog, Pixel, Page, the Instagram account linked to that Page, and whether the access expires.
Test connection: checks the token, counts the catalog’s items and says when the Pixel last received an event.
Change: picks other assets with the same token.
Disconnect: keeps the items in the catalog, or removes this store’s items first. Removing a large catalog takes a few minutes; disconnect again once Activity says every item was removed. The feed keeps working either way.
Catalog
How your products reach Meta
5 settingsKeep Meta up to date
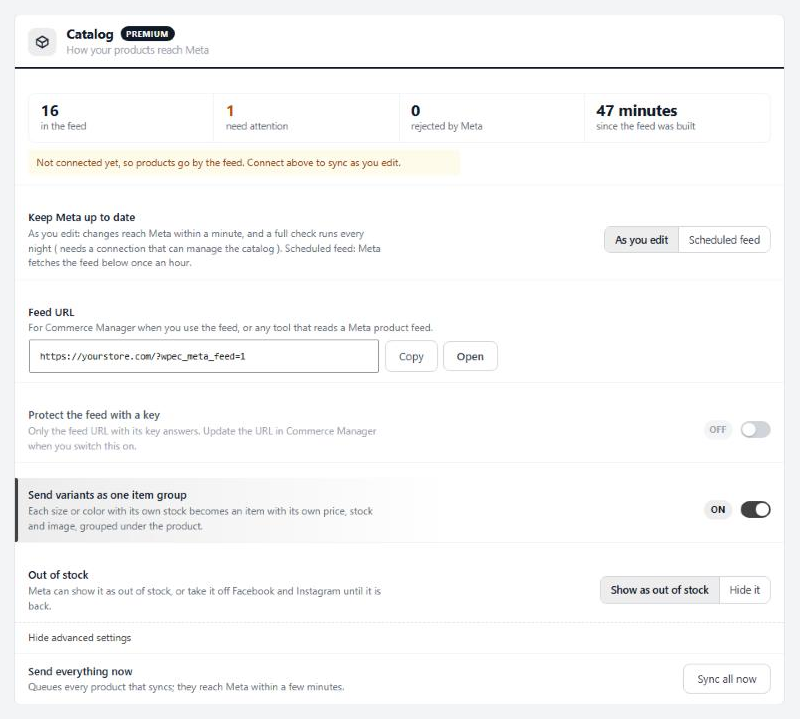
As you edit: a changed product reaches your Meta catalog within a minute, and a full check runs every night around 3 a.m. store time, sending anything that differs. It needs a connection that can manage the catalog. Scheduled feed: Meta fetches your feed once an hour. The Catalog status row above shows how many items are on Meta or in the feed, how many need attention or were rejected, and how long since the last sync. If As you edit cannot run, products go by the feed and the status row says why.
Protect the feed with a key
Only the feed address carrying its key answers. The Feed URL row shows the address with Copy and Open buttons; when you switch this on it gains the key, so paste the new address into Commerce Manager or Meta’s fetches fail. The old feed addresses from the 1.x extension keep working and need the key too.
Send variants as one item group
A product that keeps stock per option combination sends each combination as its own item, with its own price, stock and image, grouped under the product. Off, the product goes as one item with the combinations’ stock added up.
Out of stock
Show as out of stock keeps the item on Facebook and Instagram, marked out of stock. Hide it takes it off until stock is back: with As you edit it is archived on Meta, keeping its history, and returns as it was; with the feed it drops out of the feed. Preorders and backorders count as in stock.
Send everything now
Sync all now queues every product that syncs, and they reach Meta within a few minutes. It also releases changes that were waiting on a connection problem, so press it after you fix one. With the feed, it rebuilds the feed and Meta picks it up at its next hourly fetch.
What syncs
Every product switched on in your store, except what you leave out here
4 settingsLeave out these categories
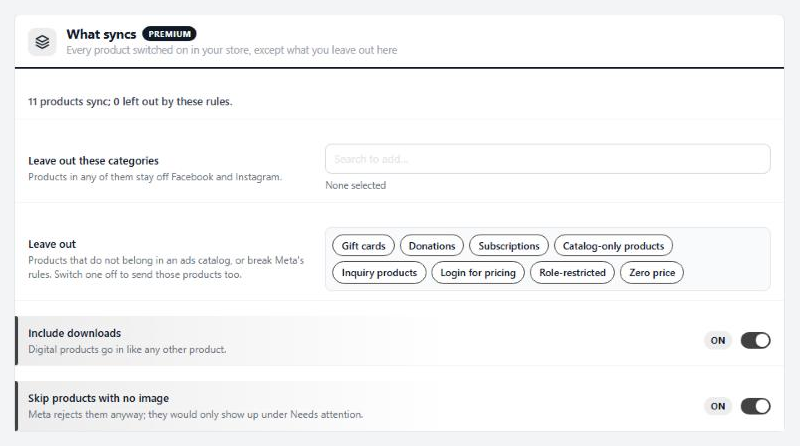
Products in any category you pick, or in its subcategories, stay off Facebook and Instagram. Those categories get no product set either.
Leave out
Products that do not belong in an ads catalog, or break Meta’s rules: gift cards, donations, subscriptions, catalog-only and inquiry products, products whose price shows only after sign-in or to some customer roles, and products with no price. All are left out to start. Switch one off to send those products too. The line at the top of the section counts what syncs and what these rules leave out.
Include downloads
Digital products go in like any other product. Switch it off to keep downloads off Meta.
Skip products with no image
Meta rejects items without an image, so they would only land under Needs attention. Switch it off to send them anyway.
Product details
Defaults for every product; a product can change them on its Facebook & Instagram card
8 settingsBrand
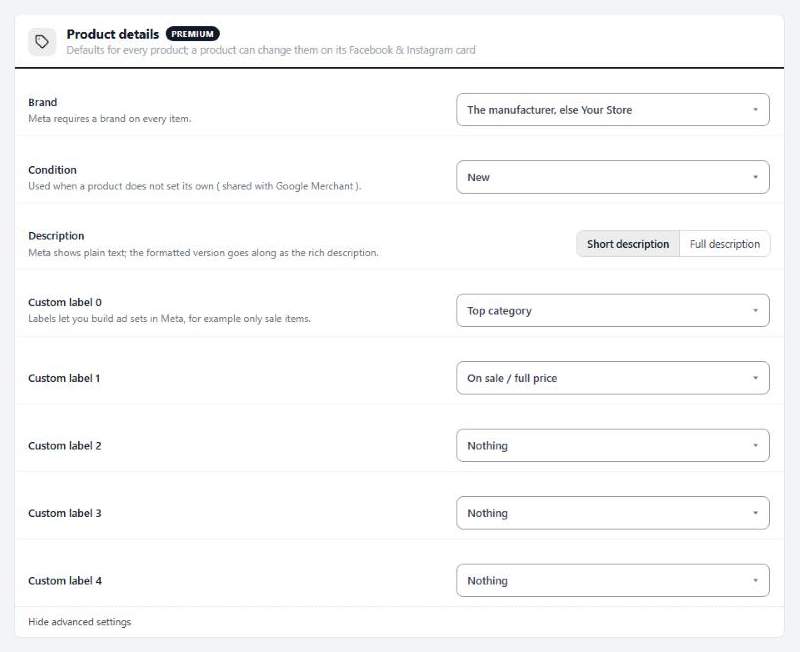
Meta requires a brand on every item. Send the product’s manufacturer, falling back to your store name, or always your store name.
Condition
New, refurbished or used, for products that do not set their own. The value is shared with Google Merchant, so a condition set on a product’s Google Merchant card wins.
Description
Which of the product’s descriptions goes to Meta. Meta shows plain text; the formatted version goes along as the rich description. A description typed on the product’s Facebook & Instagram card wins.
Custom label 0
Labels let you build ad sets in Meta, for example only sale items. Each label can carry the product’s top category, On sale or Full price, its manufacturer, or nothing. A product can type its own on its card.
Custom label 1
Sends On sale when the product has a sale price, and Full price when it does not.
Custom label 2
A third label, empty to start.
Custom label 3
A fourth label, empty to start.
Custom label 4
A fifth label, empty to start.
Shops & Instagram
Selling from your Facebook and Instagram Shop
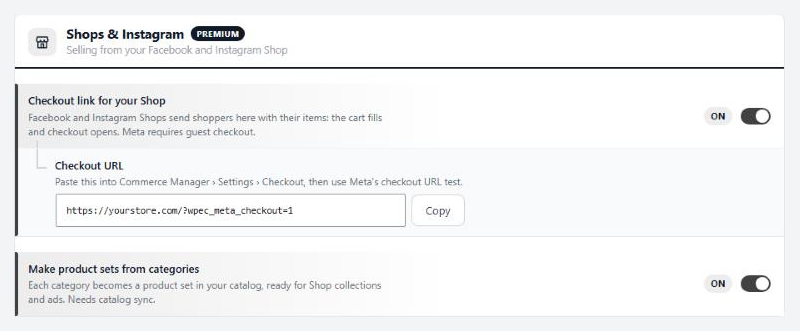
2 settingsCheckout link for your Shop
Facebook and Instagram Shops send shoppers to your store with the items they picked. The cart is emptied and filled, a coupon from the Shop is applied when it is valid, and checkout opens. Copy the Checkout URL shown below the switch into Commerce Manager › Settings › Checkout, then run Meta’s checkout URL test. Items a link cannot add, such as subscriptions, gift cards or products that need options chosen, are skipped with a note to the shopper. The order gets a staff note saying which Shop it came from.
Make product sets from categories
Each active category with products becomes a product set named after it, its subcategories’ products included, ready for Shop collections and ads. Categories you leave out get none. Sets need As you edit syncing and are refreshed with the nightly check.
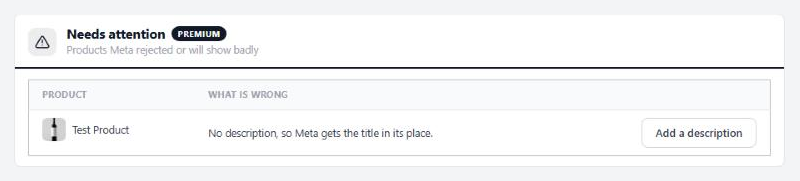
Needs attention
Products Meta rejected or will show badly
no stored settingsA list of products with what is wrong and a button to fix it, which opens the right section of the product. Three things put a product here:
Meta’s answer. About a minute after each send, the extension asks Meta how it went and records items Meta rejected or accepted with a warning, in Meta’s words.
The extension’s own checks. No image, a main image under 500 × 500 px, no price, no brand, no description, a title over Meta’s 200 characters, or a GTIN that is not 8 to 14 digits and so is not sent.
Details from 1.x. A product whose old Facebook title, description or images differ from the product today. Keep it keeps them on its card; Use the product’s drops them.
When the list is empty it reads Nothing needs attention.
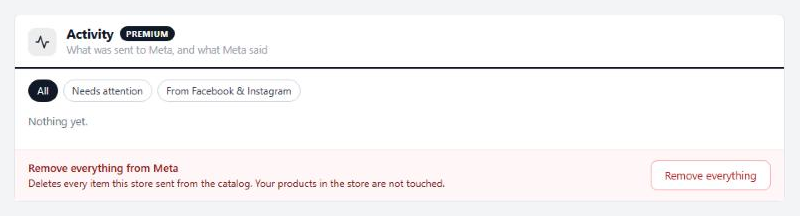
Activity
What was sent to Meta, and what Meta said
1 settingRemove everything from Meta
Remove everything deletes every item this store sent from your Meta catalog, after you confirm. Your store’s products are not touched, but Shops and catalog ads stop showing them until you send them again with Sync all now. It needs a connection that can manage the catalog. With the feed, delete the data source in Commerce Manager instead.
Ready to run your store on WP EasyCart?
Everything in this guide works with the free plugin. PRO and Premium add subscriptions, memberships, wholesale pricing and more. Try every PRO feature free for 14 days.
