
Before you start
What the extension needs, and where its screens are
no stored settingsStamps.com buys and prints USPS, UPS, FedEx and DHL Express labels with your own Stamps.com account and postage, one order at a time or many at once. Tracking comes back to each order on its own.
What you need. A Premium license, with Stamps.com installed from EasyCart › Extensions, which also installs WP EasyCart Premium. A Stamps.com account on a plan that allows integrations, with postage on it. Rates at checkout also need WP EasyCart PRO.
Where things are. Everything is at EasyCart › Extensions › Stamps.com, in four tabs: Ship, Labels, SCAN forms and Settings. Until Stamps.com is connected the menu entry opens Settings; after that it opens Ship. The Ship tab’s number is how many orders need a label, and the SCAN forms tab’s number is how many of today’s labels are not on a SCAN form yet. Single labels are bought on the order screen.
Connect in one click
Sign in on Stamps.com’s own page and come straight back
no stored settingsIn the Settings tab, under Stamps.com account, press Connect Stamps.com. Until you connect, the Ship, Labels and SCAN forms tabs show a Connect Stamps.com button that brings you there. You sign in on Stamps.com’s own page and come back to the settings with Stamps.com is connected. You never type your Stamps.com username or password into the store, and the store never sees or keeps your password. Connecting needs your Premium license key under EasyCart › Registration.
Once connected. The top of the card reads Connected, with Signed in as your Stamps.com username and the date, and a Disconnect button. Disconnecting asks first: labels already bought stay on their orders, but you can’t buy, void or reprint labels until you connect again.
Postage balance. The card shows your balance, amber when it is under your warning amount. Pick $25, $50, $100, $250 or $500 and press Add postage; it asks first, and Stamps.com charges the payment method on file for your Stamps.com account. When your account adds postage only in Stamps.com, the button is Add postage in Stamps.com instead.
In your Stamps.com account. Once connected, buttons open your Stamps.com account at Payment methods, Automatic postage reload, UPS, FedEx and DHL Express, Label printing preferences, Logo on labels, Refunds, SCAN forms and Print history, plus Insurance claims when your account has ParcelGuard. Whether labels show the postage amount is one of the printing preferences.
Other things the card can say. Coming soon with a greyed-out Connect button: connecting through WP EasyCart is not open for your store yet. Check again asks at once, and the store asks again every hour. Connect again: Stamps.com stopped accepting the sign-in ( it was ended in Stamps.com, the password changed, or it expired ). Copy of the store: see the note below. Cannot connect here: PHP on your server has neither OpenSSL nor Sodium, so the sign-in cannot be kept safely; ask your host to enable one.
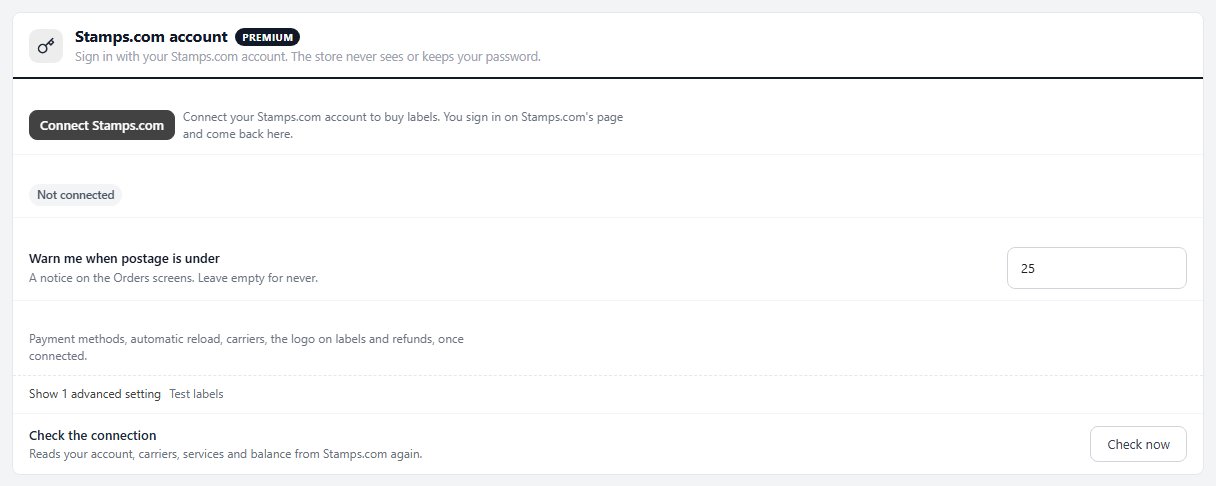
Stamps.com account
Sign in with your Stamps.com account. The store never sees or keeps your password.
3 settingsWarn me when postage is under
When your Stamps.com postage drops below this amount, the Orders screens and the Stamps.com tabs show a warning with an Add postage link. Leave it empty to never warn.
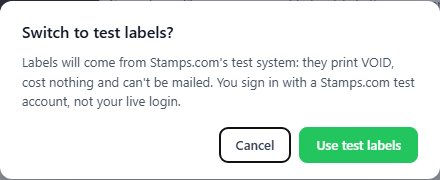
Test labels
An advanced setting, only for trying the extension before you ship for real. Labels come from Stamps.com’s test system: they print VOID, cost nothing and can’t be mailed, and their tracking is never checked on its own. Switching asks first, then the page reloads. The test system has its own sign-in, so press Connect test account with a Stamps.com test account. Your live account is set aside, not deleted, and is used again when you switch Test labels off, unless you connect a test account, which signs the live one out.
Check the connection
Check now reads your account, carriers, services and postage balance from Stamps.com again and shows them on the page, such as Connected as … Carriers: USPS. Postage: $…. Use it after adding a carrier or accepting ParcelGuard’s terms in Stamps.com.
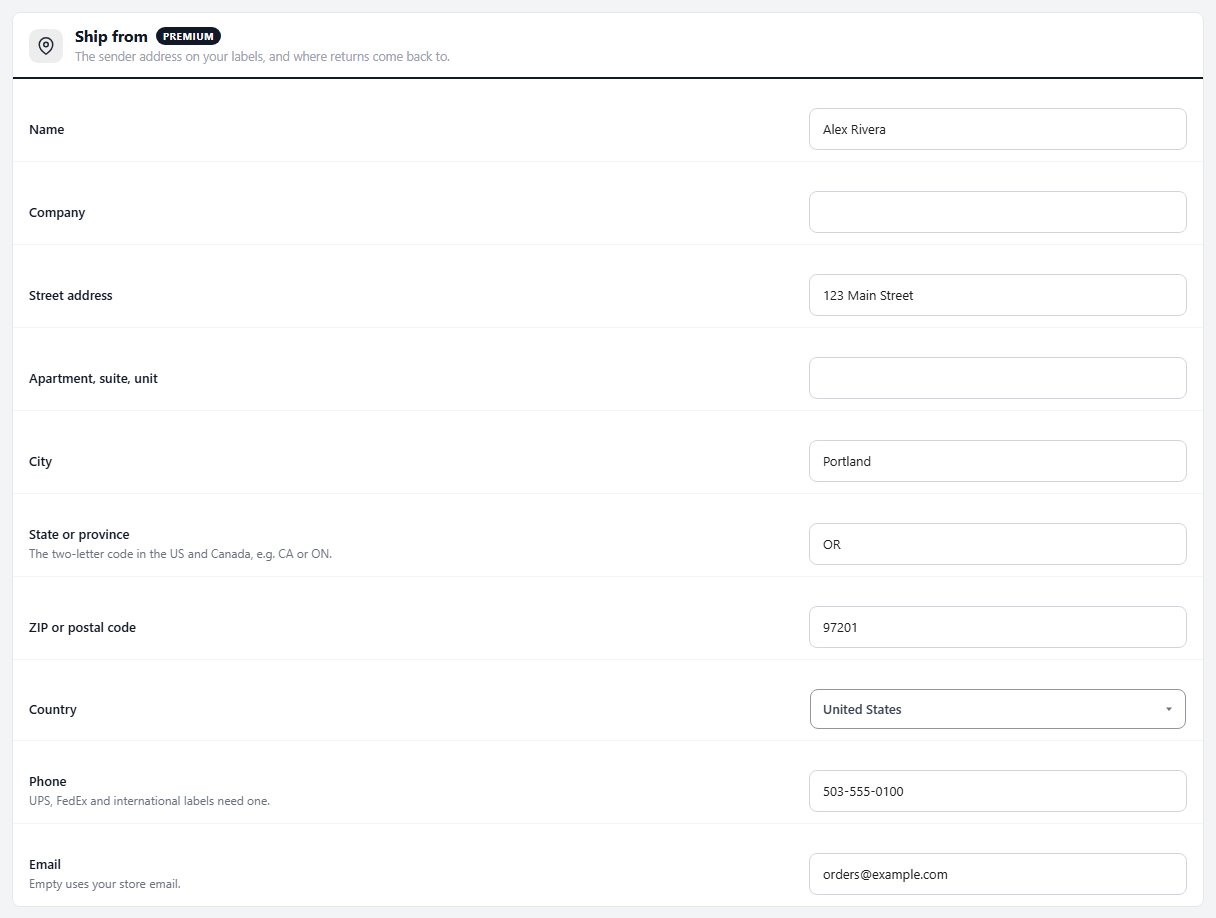
Ship from
The sender address on your labels, and where returns come back to.
10 settingsName
The sender name printed on every label.
Company
Optional. Printed with the name when filled in.
Street address
The street address labels ship from. Return labels come back here too.
Apartment, suite, unit
Optional second address line.
City
Your city.
State or province
The two-letter code in the US and Canada, such as CA or ON.
ZIP or postal code
Your ZIP or postal code. Rates at checkout are priced from it, so they need it.
Country
The country you ship from. The Ship tab’s In the country and Abroad filters go by it.
Phone
UPS, FedEx and international labels need a phone number.
Leave it empty to use your store’s email.
The Ship tab
Pick the orders to ship, check every rate, buy the labels together
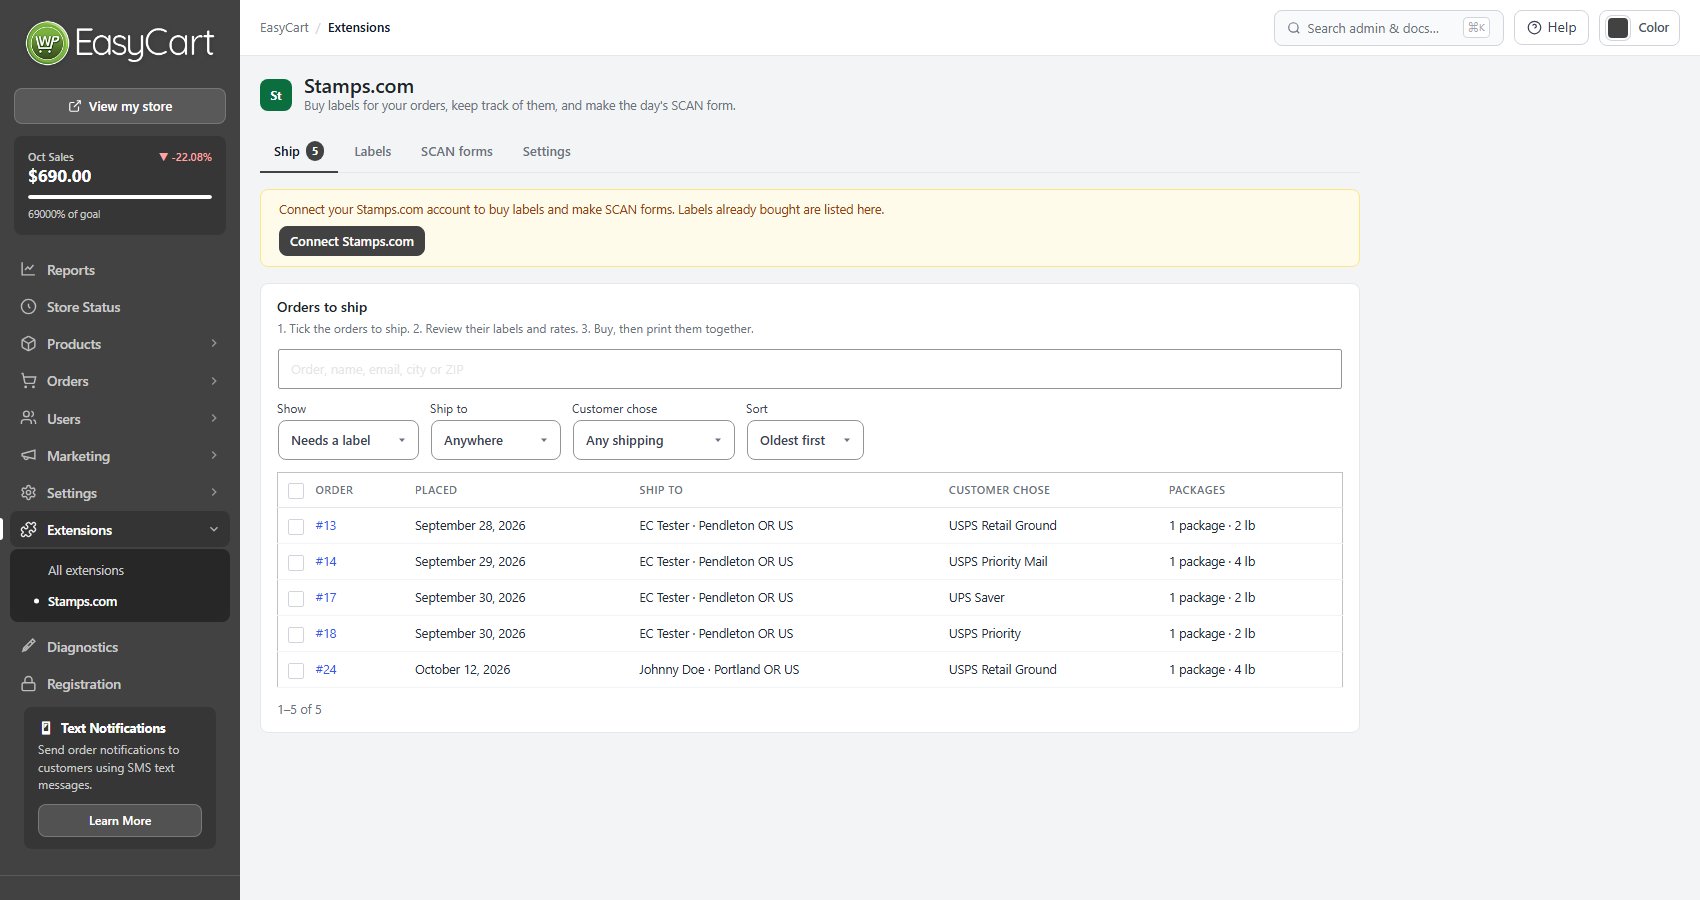
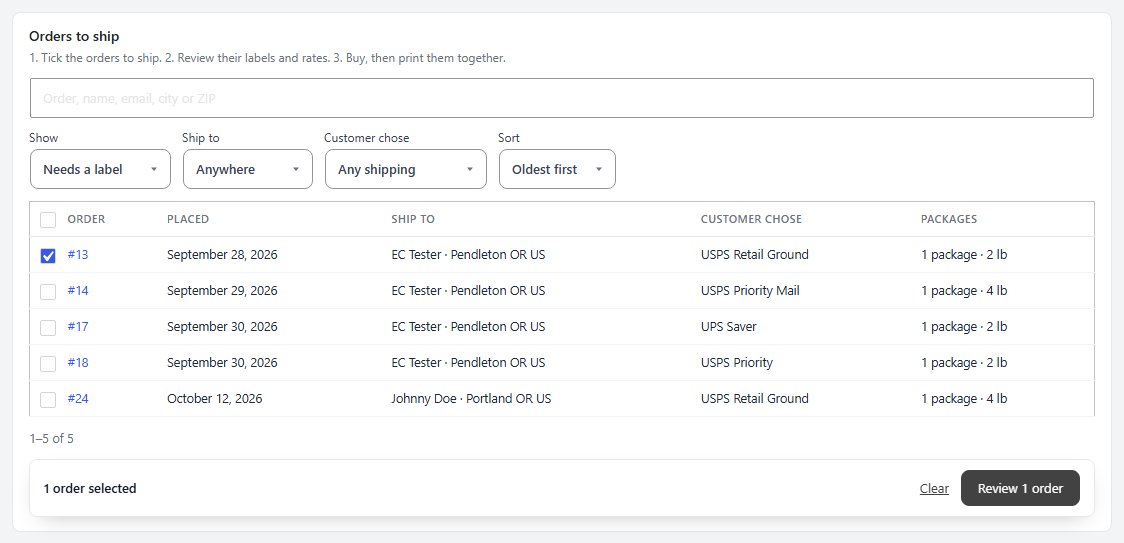
no stored settingsOrders to ship lists the orders WP EasyCart counts as not shipped yet: paid, with something to ship. Show starts on Needs a label ( a package still waiting for a label, or none packed yet ); Not shipped yet shows them all. Search by order number, name, email, city or ZIP, and filter by Ship to ( Anywhere, In the country, Abroad ), Customer chose ( the shipping the customer picked ) and Sort ( Oldest first, Newest first ). The Packages column gives each order’s packages and weight, with Weight needed when a package has none. An order a print-on-demand partner ships in full says so and cannot be ticked.
Tick the orders, up to 100. Ticks stay while you page, search and filter. Then press Review labels. On the Orders list you can also tick orders and choose Buy Stamps.com labels from the bulk actions: the Ship tab opens with them ticked, straight into the review.
The review panel. It gets rates for every package, order by order, and lists them under Labels, each with its own rate to change and Leave out ( Put back undoes it ). Pick each rate by sets them all at once: the service the customer paid for, the cheapest, the fastest, or one service. Under Label, pick the size and whether to Mark orders shipped and Email customers. Insurance and signatures follow your Labels settings. An order that cannot be quoted says why, with Open the order to fix it.
Buy. The button names how many labels and their total, and asks once more before buying. When your postage balance is too low for the batch, a notice says so, with an Add postage control for staff allowed to add it. Each label is bought in turn and shows a tick with its tracking and Print label; any that fail can be tried again. Then Print all labels opens them on one page, and Make the SCAN form appears when the batch had USPS labels.
The Labels tab
Every Stamps.com label: print, track, claim or void it
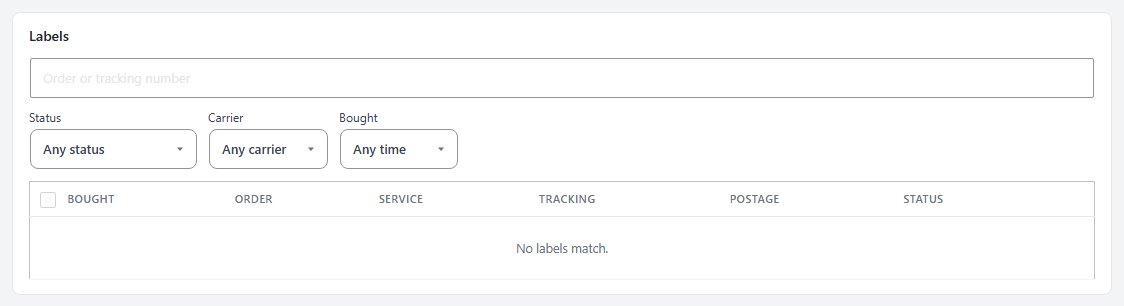
no stored settingsEvery label bought through Stamps.com, newest first, 20 to a page: when it was bought, the order, the service, the tracking number, the postage and its status. Return labels, test labels and labels on a SCAN form are marked. Labels already bought are listed even while Stamps.com is not connected.
Search by order or tracking number, and filter by Status ( Ready to ship, Shipped, Delivered, Problem or returned, Voided, Return labels ), Carrier and Bought ( Today, Last 7 days, Last 30 days ).
Each label has Print, Track ( asks Stamps.com for the latest status now ), Insurance claim when ParcelGuard insured it, and Void while it has not shipped. Tick several to Print selected on one page or Void selected; only the ones that can still be voided are.
The SCAN forms tab
The day’s USPS SCAN form, and the forms you have made
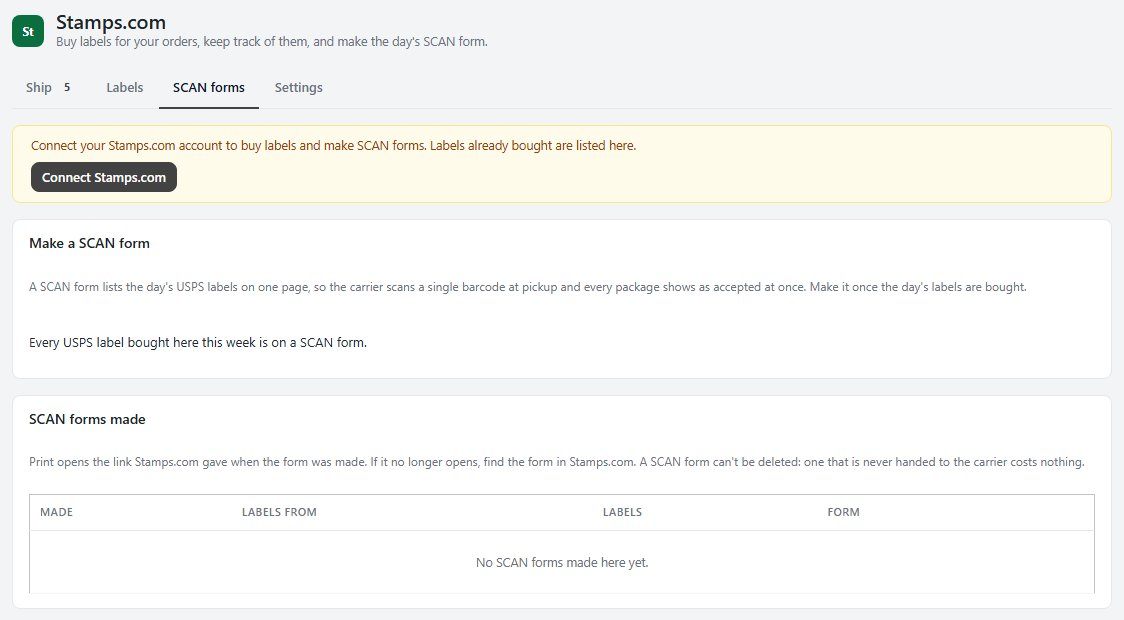
no stored settingsMake a SCAN form. A SCAN form lists the day’s USPS labels on one page, so the carrier scans a single barcode at pickup and every package shows as accepted at once. The card lists each of the last seven days that has USPS labels not on a form yet, by the day the label was bought, with Create SCAN form. Make it once the day’s labels are bought. With Test labels on, SCAN forms take test labels only.
SCAN forms made lists each form, newest first: when it was made, the day its labels are from, how many labels, and the form number. Print opens the link Stamps.com gave when the form was made; if it no longer opens, Find in Stamps.com opens your SCAN forms there. Its labels opens the Labels tab with just that form’s labels. A SCAN form can’t be deleted, and one that is never handed to the carrier costs nothing.
Buying a label from an order
The label window: addresses, package, extras, rates
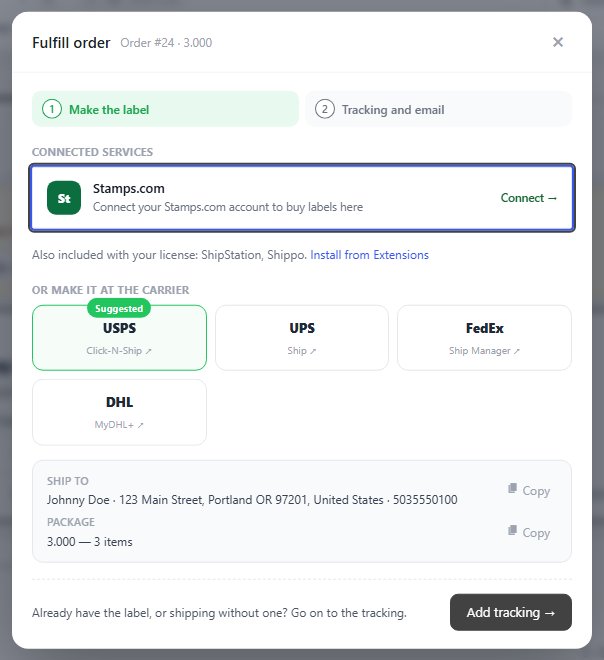
no stored settingsOpen an order. When Stamps.com is the only label service connected, Buy label is the main button where you ship the order. With more than one, Buy a label opens the Fulfill order window, where Stamps.com is listed under Connected services. Each package waiting to ship also has a Buy Stamps.com label button. Before you connect, the order’s Make a label link opens the Fulfill order window, and Stamps.com’s row offers Connect.
The label window works on one package at a time; an order packed in several boxes has a tab per package. From top to bottom:
Ship from and Ship to: the address check, with any correction to use.
Package: the items in it, the box ( your boxes from Settings › Shipping, or Your own box with its size ), the weight, and the ship date.
Customs: for a package leaving the country, what it contains and what to do if it cannot be delivered, with a warning naming any item without a 6-digit HS code.
Extras: insurance for an amount ( see Insurance and ParcelGuard ), No signature, Signature or Adult signature, and Saturday delivery.
Rates: fetched as soon as the window opens when the package has a weight and your ship-from address is set; otherwise press Get rates. Each carrier’s services with price and delivery time, the cheapest marked, and the one your Rate chosen for you rule picked marked Picked for you.
Label: size and file for this label, and whether to mark the order shipped and email the customer the tracking link.
The foot shows your balance, and the balance after this label. Buy label names the price. If something stops the purchase, it says so beside the button: enter the weight, choose a rate, or not enough postage, with Add postage right there for staff allowed to add it. A double click or a retry never buys a second label. Once bought: Print label, Print customs forms for international packages, Next package when another is waiting, and Done.
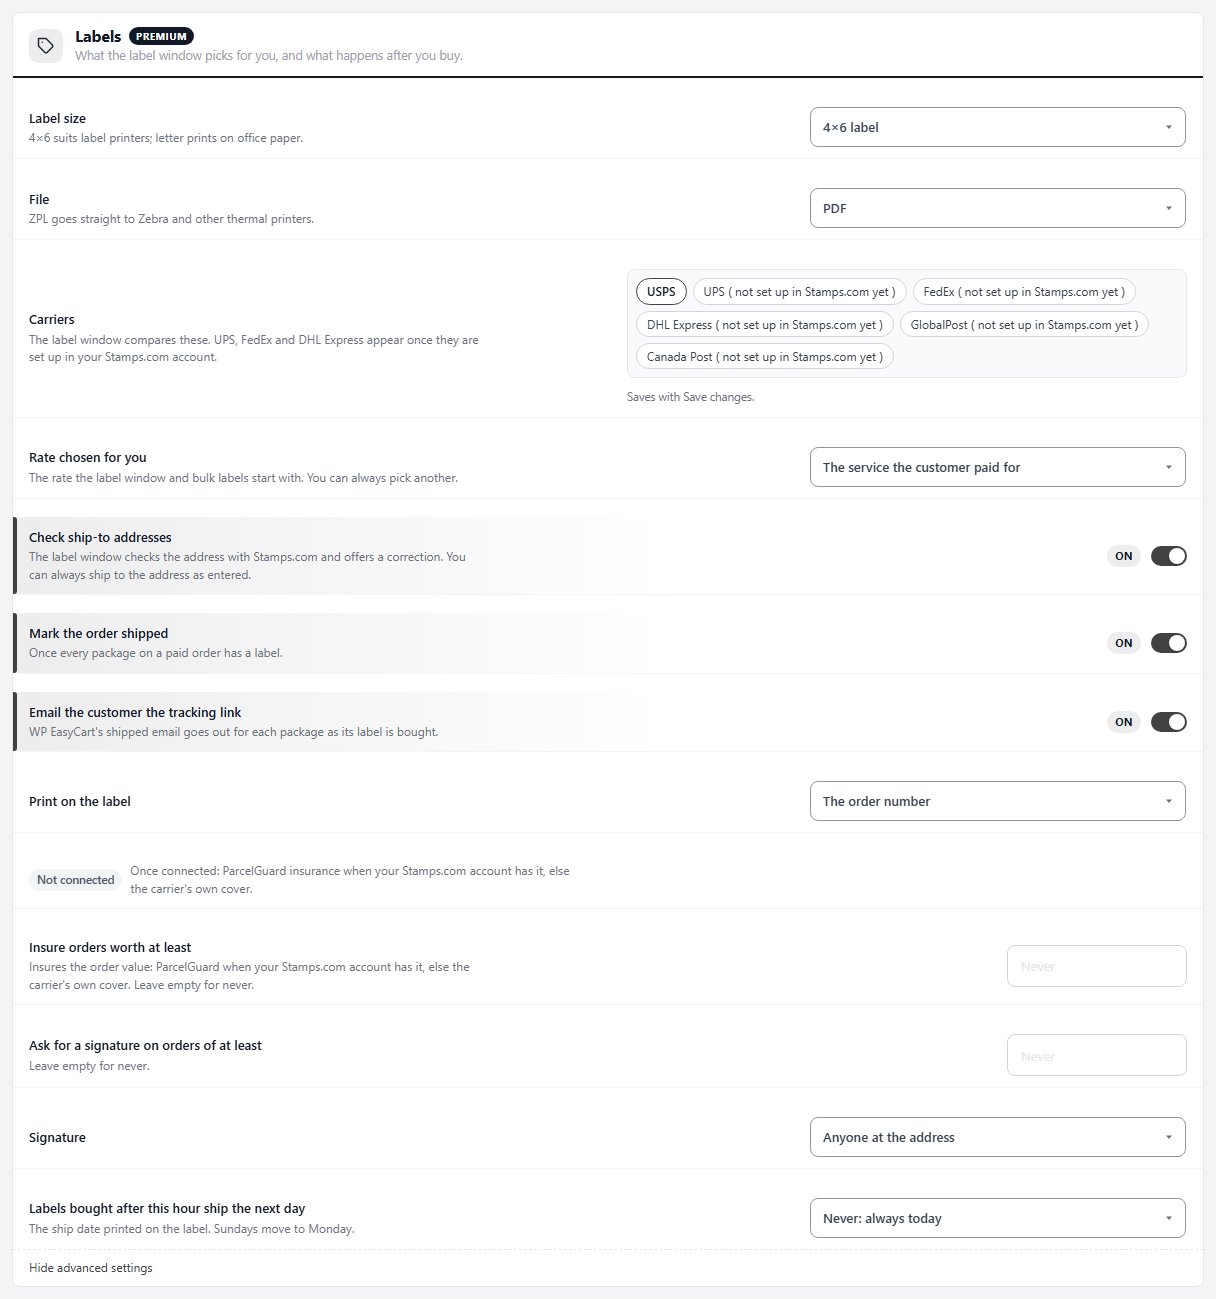
Labels
What the label window picks for you, and what happens after you buy.
13 settingsLabel size
4×6 label suits label printers. Letter paper prints on office paper. There are also 4×6.75 and 4×8.25 sizes with a doc tab. The label window and the review panel can pick another size for one label or batch.
File
PDF, PNG image, or ZPL ( thermal ), which goes straight to Zebra and other thermal printers. The label window can pick another for one label.
Carriers
The carriers the label window compares. USPS works on every account. UPS, FedEx, DHL Express, GlobalPost and Canada Post show not set up in Stamps.com yet until you add them in your Stamps.com account; then press Check now.
Rate chosen for you
The rate the label window and the review panel start on: The service the customer paid for, The cheapest, The fastest, or Always one service. It only preselects. You can always pick a different rate before you buy.
Service
Shown when Rate chosen for you is Always one service. A package that cannot use this service gets the cheapest rate instead.
Check ship-to addresses
The label window checks the ship-to address with Stamps.com. It says whether the address is verified, partly verified or could not be verified, whether it is residential, a business or a PO box, and offers Use this address when Stamps.com suggests a correction. You can always ship to the address as entered.
Mark the order shipped
Moves a paid order to Shipped once every package on it has a label. You can untick it in the label window for one order, or in the review panel for a batch.
Email the customer the tracking link
Sends WP EasyCart’s shipped email with the tracking link as each package’s label is bought. You can untick it in the label window or the review panel.
Print on the label
What prints on the label under the address: The order number, The order number and SKUs, or Nothing.
Insure orders worth at least
Orders worth this much or more come with insurance for the order value already filled in, in the label window and in bulk. Leave it empty to never add it. Above this row, a status line says who insures: ParcelGuard when your Stamps.com account has it, Carrier insurance when it does not, Terms needed with a link to accept ParcelGuard’s terms, or Not connected.
Ask for a signature on orders of at least
Orders worth this much or more ask for a signature on delivery. Leave it empty for never.
Signature
The signature to ask for: Anyone at the address, or An adult ( 21+ ).
Labels bought after this hour ship the next day
The ship date printed on the label. Pick an hour from 10 AM to 8 PM, in your store’s time zone, and labels bought after it carry the next day’s date. A Sunday date moves to Monday. Leave it on Never: always today to always use today.
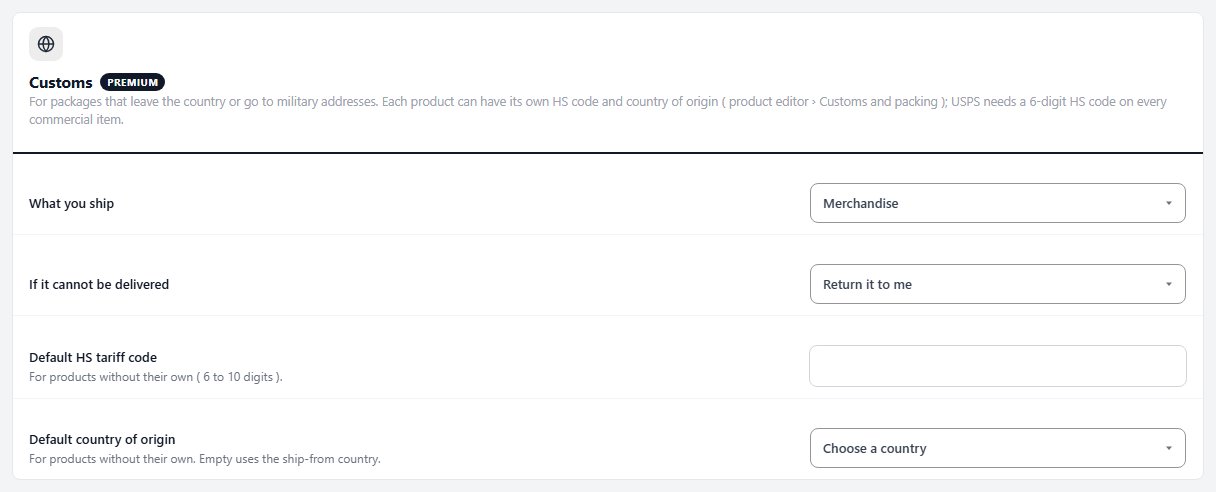
Customs
For packages that leave the country or go to military addresses. USPS needs a 6-digit HS code on every commercial item.
4 settingsWhat you ship
How the contents are declared on the customs form: merchandise, gift, sample, documents, returned goods or other. The label window can change it for one package.
If it cannot be delivered
What the carrier does with a package it cannot deliver: Return it to me, or Abandon it.
Default HS tariff code
The tariff code for products without their own, 6 to 10 digits. A product sets its own in the product editor’s Shipping section, under Customs. The label window and the review panel name any item that still has no 6-digit code.
Default country of origin
Where products without their own country of origin are made. Leave it empty to use the ship-from country.
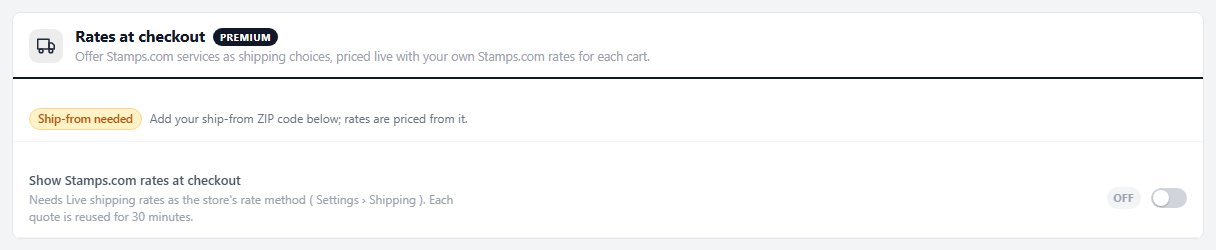
Rates at checkout
Offer Stamps.com services as shipping choices, priced live with your own Stamps.com rates for each cart.
2 settingsShow Stamps.com rates at checkout
Offers the services you pick below as shipping choices at checkout, priced live with your own Stamps.com rates. Needs WP EasyCart PRO, Stamps.com connected, your ship-from ZIP code, and Live shipping rates as the store’s rate method under Settings › Shipping. The line at the top of the card says Ready, Ship-from needed or Update needed. Each cart is priced as one package with its weight, and its size when the products have one. A quote is reused for 30 minutes.
Services to offer
Which Stamps.com services to offer. Each one becomes its own live rate. The service the customer picks is saved on the order, so the label window starts on that same service.
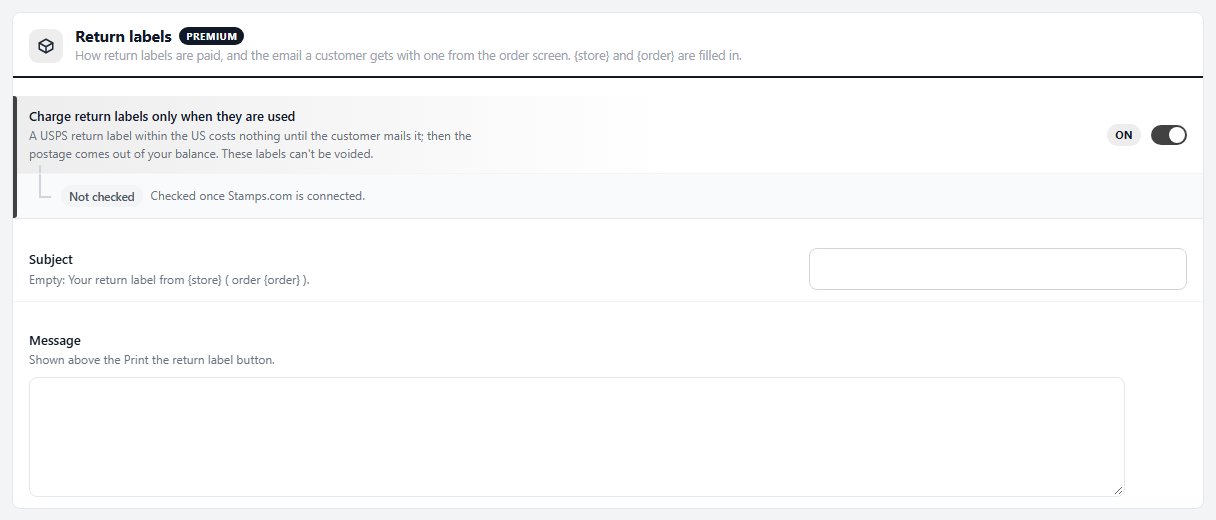
Return labels
How return labels are paid, and the email a customer gets with one from the order screen. {store} and {order} are filled in.
3 settingsCharge return labels only when they are used
On, a USPS return label within the US costs nothing when you make it. The postage comes out of your balance only if the customer mails it, and these labels can’t be voided. The line under the switch says what your account allows: On your account ( for any US return, or only for returns of labels bought here ), Not on your account ( return labels are paid when they print; ask Stamps.com to turn on USPS pay-on-use returns ), or Not checked before you connect. Off, every return label is paid when it prints.
Subject
The subject of the return label email. Leave it empty for Your return label from {store} ( order {order} ).
Message
Your words above the Print the return label button in that email. {store} and {order} are filled in. Leave it empty for a short line telling the customer to print the label, stick it on the parcel and hand it to the carrier.
Ready to run your store on WP EasyCart?
Everything in this guide works with the free plugin. PRO and Premium add subscriptions, memberships, wholesale pricing and more. Try every PRO feature free for 14 days.
