Extension Guides
MailChimp Extension
MailChimp is a great extension for sending powerful email campaigns and blasts to your users, as well as setting up automated email campaign rules so your customers get a truly customized email experience. Orders, users, and products are synced to MailChimp for use in campaigns and for setting unique email experiences based on MailChimp system rules.
This Plugin Has Been Discontinued
Due to changes on MailChimp, this plugin has been discontinued. The documentation below remains for existing installations and reference only.
Download, Install & the Setup at a Glance
First, you must install all EasyCart extensions as new plugins. This is a very easy task with WordPress, and we have a short guide to get you started. Click here to learn how to install a WordPress plugin and EasyCart Premium extensions. From there, the setup follows four steps:
- 1. Basic Settings: Connect with MailChimp and assign your MailChimp lists in the EasyCart.
- 2. Create & Connect Your MailChimp Store: Connect your MailChimp store so you can begin syncing with MailChimp.
- 3. Sync the EasyCart with MailChimp: Sync your entire store (products, users, orders) with MailChimp so you can begin collecting sales data in MailChimp.
- 4. Automated Campaigns: With products, users, and orders synced, start creating automated campaigns based on previous orders, abandoned carts, or retarget purchasing users with MailChimp.
Step 1 — Basic Connection Settings
The first step in working with the MailChimp plugin is connecting it with an API key.
Build an API Key in MailChimp
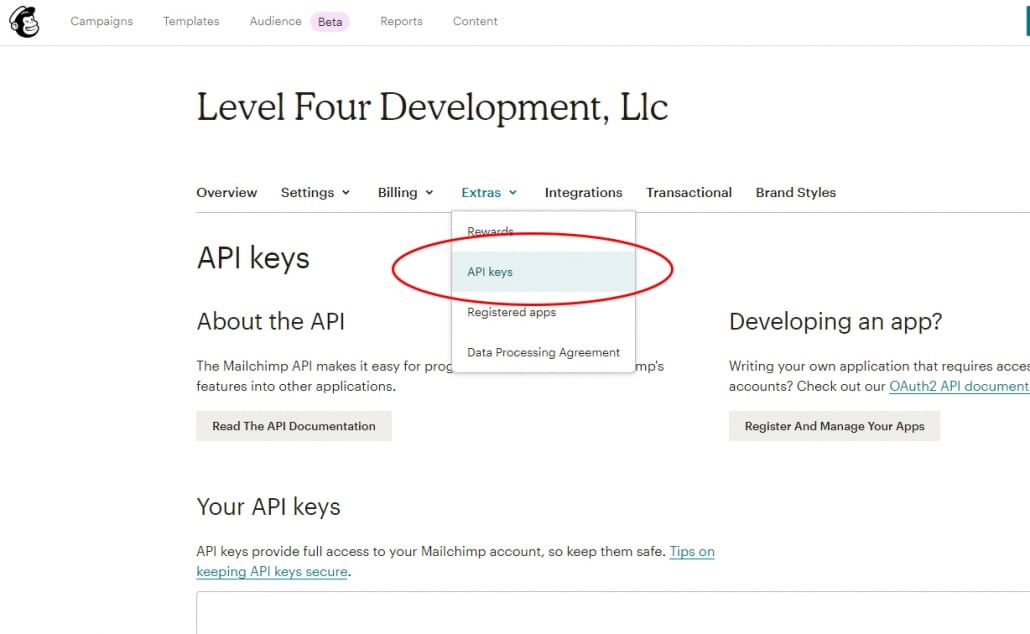
To locate an API key in your MailChimp account, go to Account & Billing, then look under the Extras › API Keys section. Give the API key a name and it generates a key you can copy and paste into EasyCart — this makes the main connection so EasyCart can talk to your MailChimp account securely.
MailChimp — API Keys Section
Paste the Key & Choose Your Subscriber List
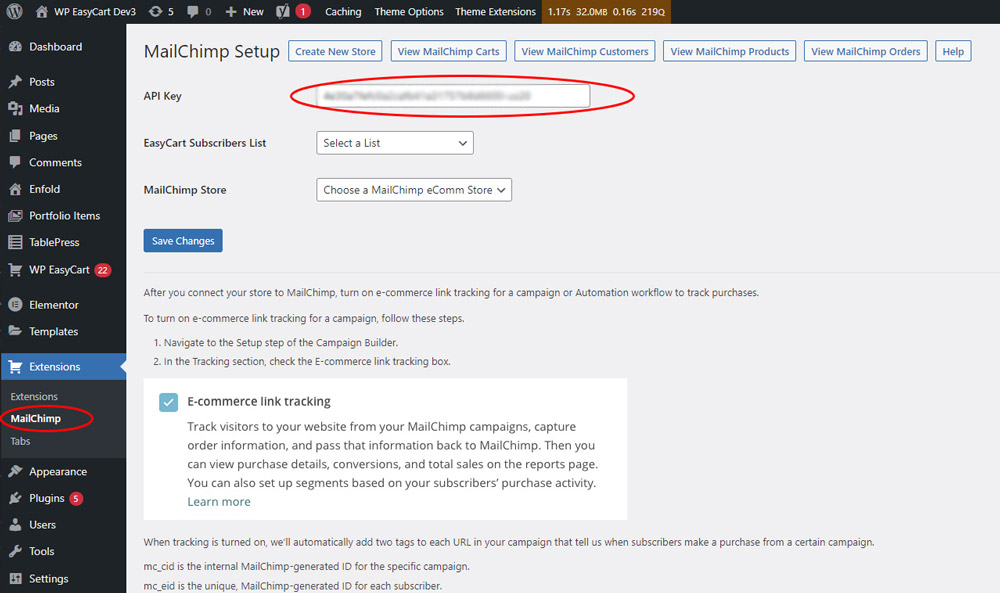
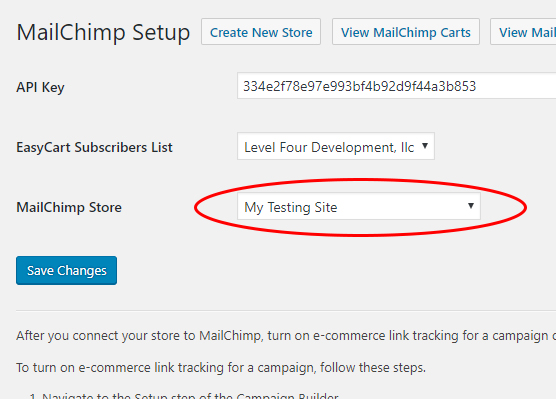
Be sure to download the MailChimp extension from your Premium members area and install it into your WordPress. Then go to WP EasyCart Extensions › MailChimp in your WordPress. Paste your API key into the plugin and Save. Once saved, connect to a subscriber list: MailChimp is a bit confusing here, but your main list can have multiple stores under it. You may think this is backwards — so did we — but go ahead and choose your business from the EasyCart Subscriber List section.
💡 Tip: MailChimp also refers to this list as your Audience — think of it as a default catch-all for all users and subscribers going into your MailChimp system.
WP EasyCart — MailChimp API Key & Subscriber List
Step 2 — Create & Connect Your MailChimp Store
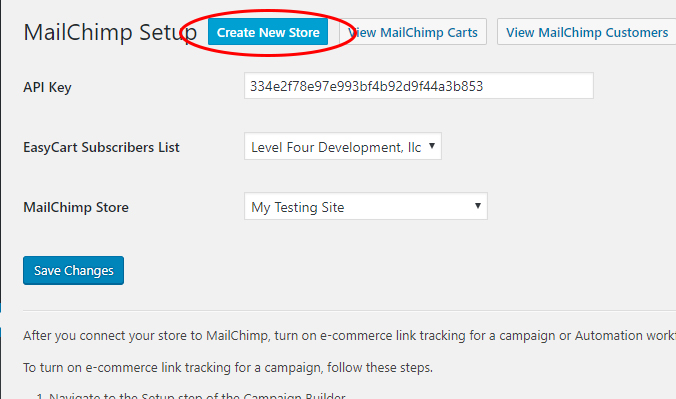
MailChimp offers an eCommerce system that lets you connect a MailChimp store to your EasyCart store. This step is fairly simple: with the plugin installed and connected to the API, click ‘Create New Store’ from EasyCart to MailChimp.
WP EasyCart — Create New Store

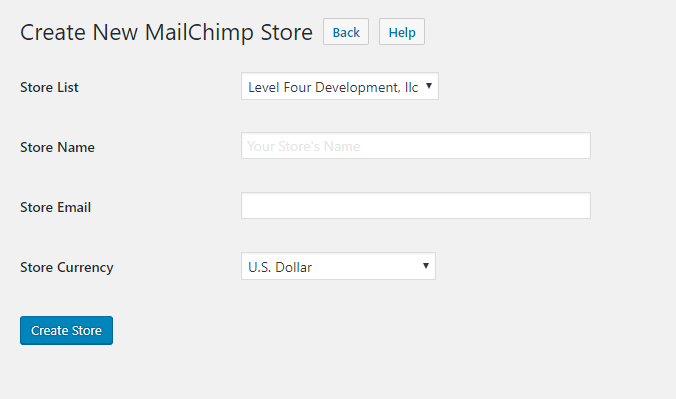
When creating a new store in the EasyCart MailChimp plugin, you’ll be asked which list, a unique name for your store, and a unique default email address your mail will come from — something like sales@mystore.com will work.
WP EasyCart — New Store Settings
Now that you’ve created a store, you should see it back on the main screen of your EasyCart MailChimp plugin. Be sure to save your settings along the way as you choose your store.
WP EasyCart — Store Connected
Syncing is REQUIRED
At this point you should have your API key set, your Subscriber List/Audience selected, and the store created. Now sync your existing products, orders, and users over to MailChimp. This is a required step — MailChimp needs the product data for future orders and users to be tied to. As new users subscribe or order, their revenue will show which items are purchased only if they have been freshly synced. If you create more products later, come back and re-sync as well.
Step 3 — Sync Products, Customers & Orders
The first time you set up the MailChimp plugin, you need to sync your store. After the initial sync, your store automatically pushes data to MailChimp as users interact with it.
Sync Your Products
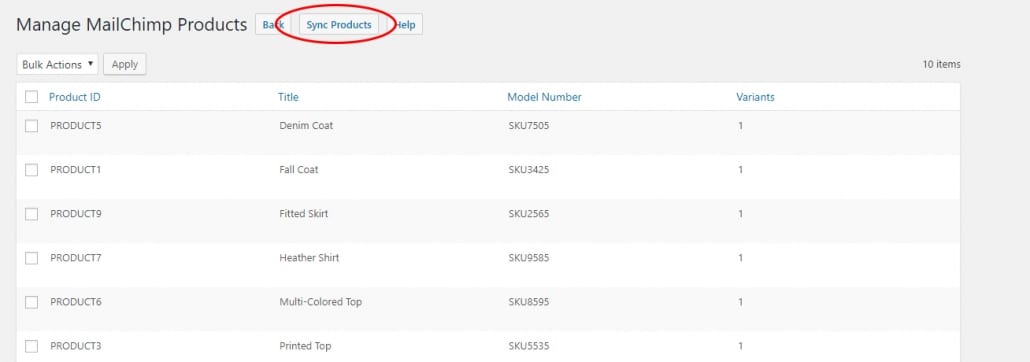
In your EasyCart MailChimp plugin, click ‘View MailChimp Products’ and then ‘Sync Products’ to start the process. You can even edit individual items here so your MailChimp data is exactly how you want it — including custom descriptions, titles, pictures, and more.
WP EasyCart — Sync Products
Sync Your Customers
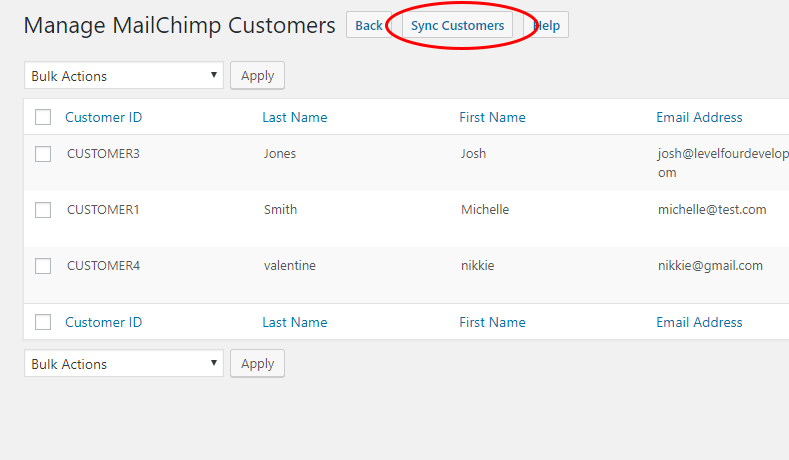
Next, click ‘View MailChimp Customers’ and then ‘Sync Customers’. You can edit individual entries here too, so your MailChimp data is exactly how you want it — including customer names, addresses, and order counts.
WP EasyCart — Sync Customers
Sync Your Orders
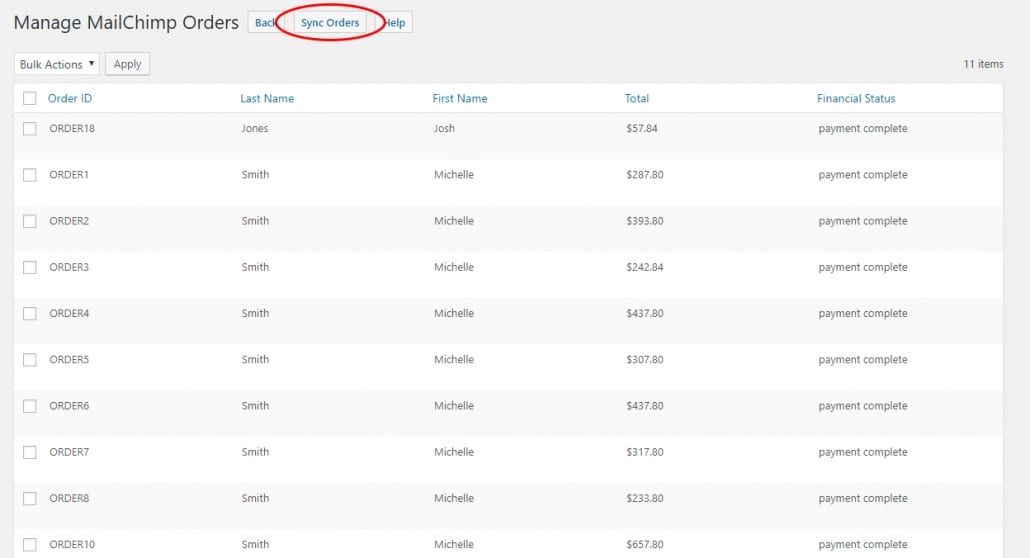
Finally, click ‘View MailChimp Orders’ and then ‘Sync Orders’ to complete the initial sync. As with products and customers, individual entries are editable so your data lands exactly how you want it.
WP EasyCart — Sync Orders
That’s It!
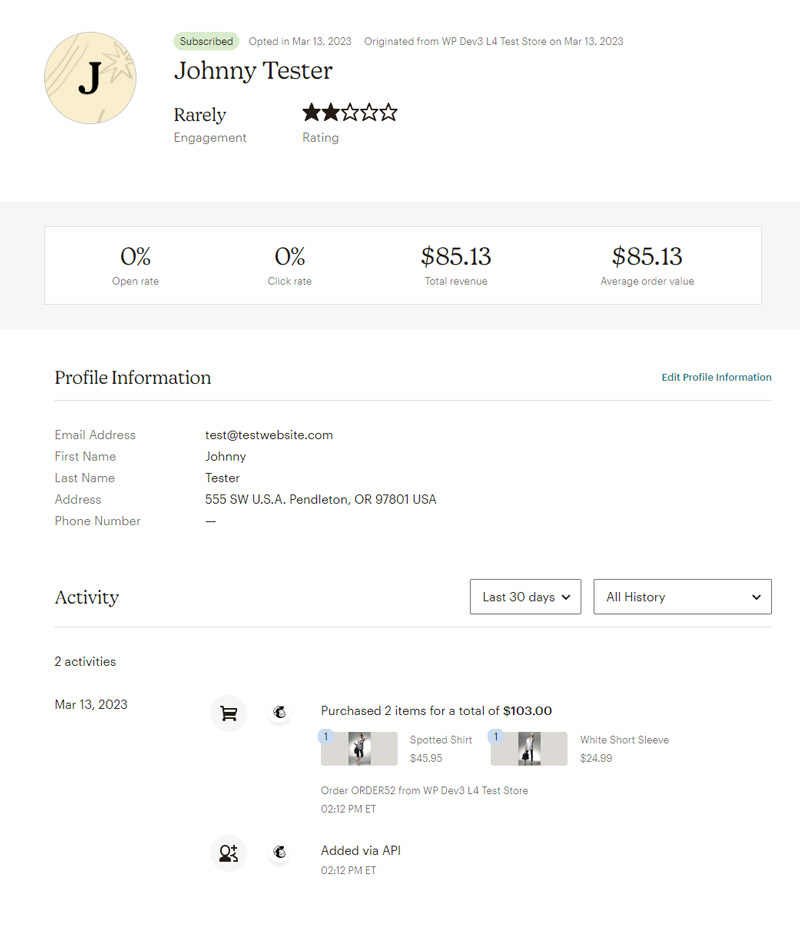
You now have WP EasyCart connected and synced up with MailChimp. New orders deliver to MailChimp, and subscribers who voluntarily select to be subscribed show as subscribed users. All facets and questions on how to use MailChimp from here on out should be directed to MailChimp. Here you can see an example of a user who purchased — their total revenue, even the items within the purchase.
MailChimp — Synced Customer with Purchase Data
Need an Email Marketing Path Forward?
With this plugin discontinued, our team can point you to the current EasyCart email marketing integrations that fit your store best.