Extension Guides
Stamps.com Labels Extension
Stamps.com enables you to print shipping labels with pre-paid USPS postage. WP EasyCart’s extension connects directly to the Stamps.com API — upgrade to Premium and begin buying and printing postage right from WordPress. Create real pre-paid USPS shipping labels directly from the orders placed on your eCommerce plugin.
Before You Begin
To connect WP EasyCart with Stamps.com, you need a Stamps.com account — the extension links your cart directly to it. Click here to get started with Stamps.com. You’ll also need the extension itself installed: all EasyCart extensions install as new plugins — a very easy task with WordPress. Click here to learn how to install a WordPress plugin and EasyCart Premium extensions.
Connect to the Stamps.com API
With your Stamps.com account ready and the extension installed, three quick steps make the connection.
Open the New Settings Menu
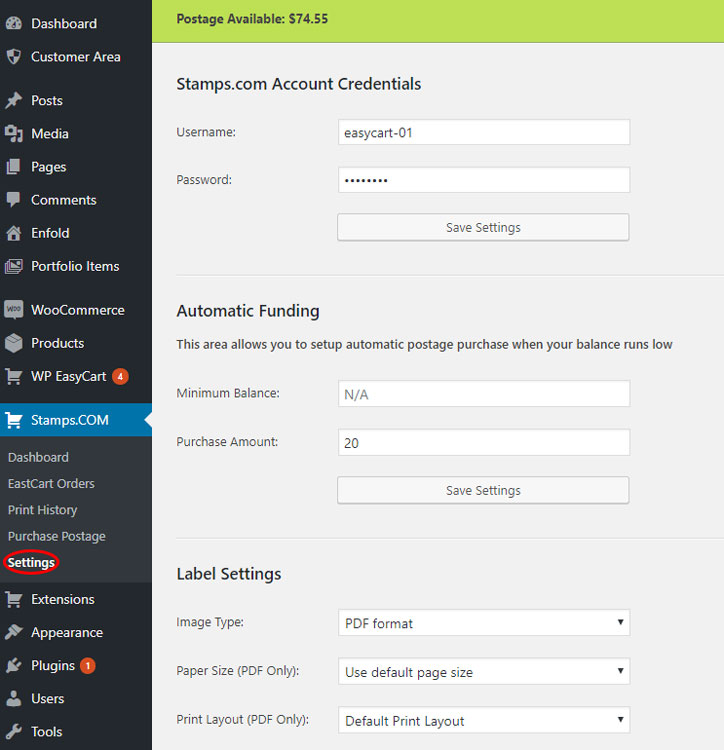
Once installed, click the new menu on your WordPress website. To create the connection, start by clicking on the settings menu.
WordPress — Stamps.com Menu Selection
Add Your Login Credentials
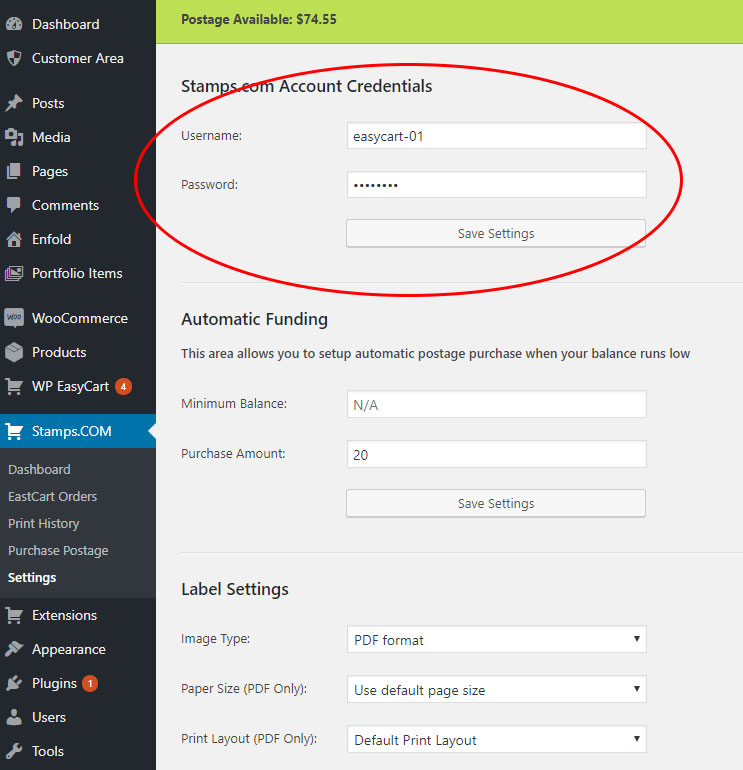
On the settings page, enter your Stamps.com account credentials for the API access.
Stamps.com — API Login Credentials

Set Your Shipping Return Address
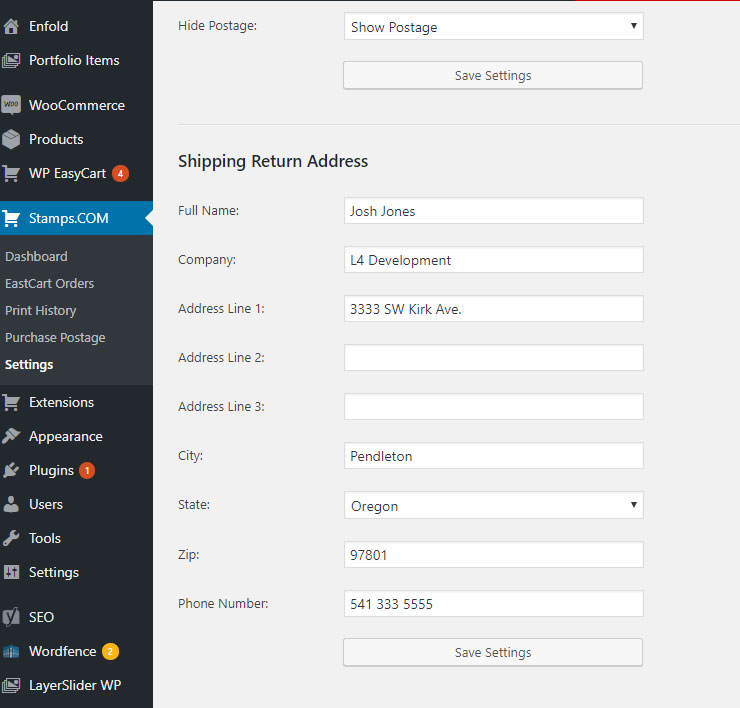
Scroll down and enter your ‘Ship From’ address — Stamps.com uses it to calculate shipping.
Stamps.com — Ship From Address

Purchase Postage
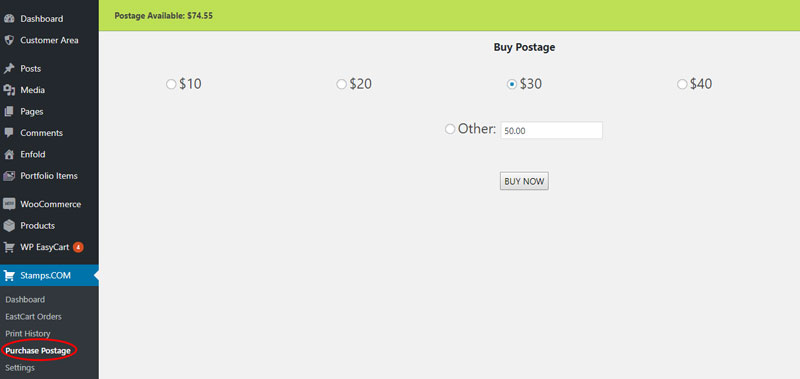
Configured and connected? Time to start processing labels. If you’re low on postage, buy it in your Stamps.com account or by using the “Purchase Postage” menu. We display your account balance near the top for your convenience.
💡 Good to know: This page requests on your behalf to have Stamps.com add postage to your account — no purchase is made by the WP EasyCart system.
Stamps.com — Purchase Postage

Create Shipping Labels from Your Orders
Connected and stocked with postage, you can begin printing and generating labels for orders — here’s the full workflow.
View Your Current Orders
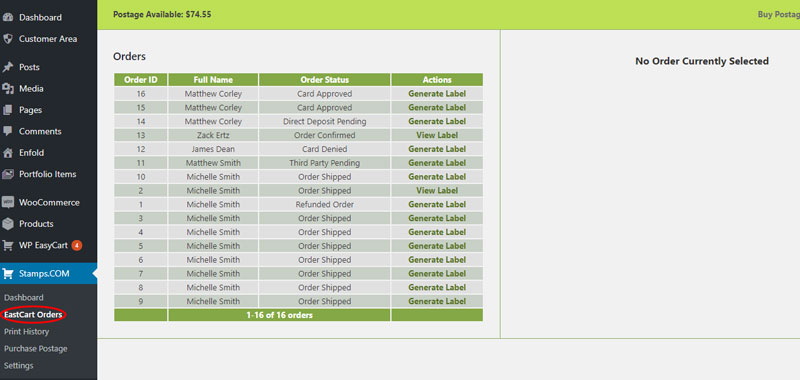
Click on the EasyCart Orders menu button to view the current orders.
Stamps.com Extension — View Orders
Generate a Label
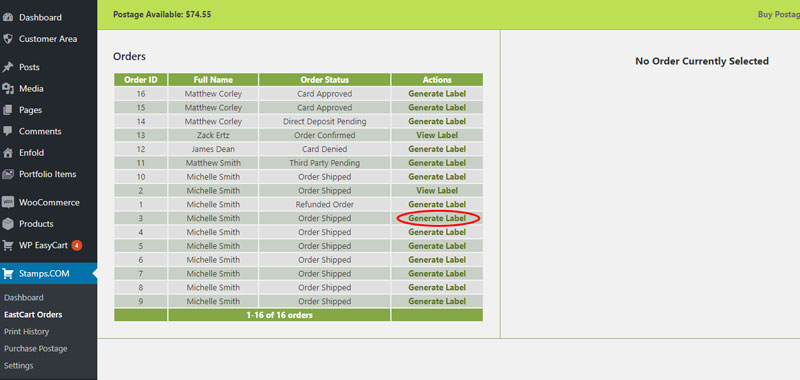
In the list of orders, names, and order statuses, start the label generation process by clicking ‘Generate Label’. If you have past labels already generated, simply choose ‘View Label’.
Stamps.com Extension — Generate Label
Confirm the Shipping Address
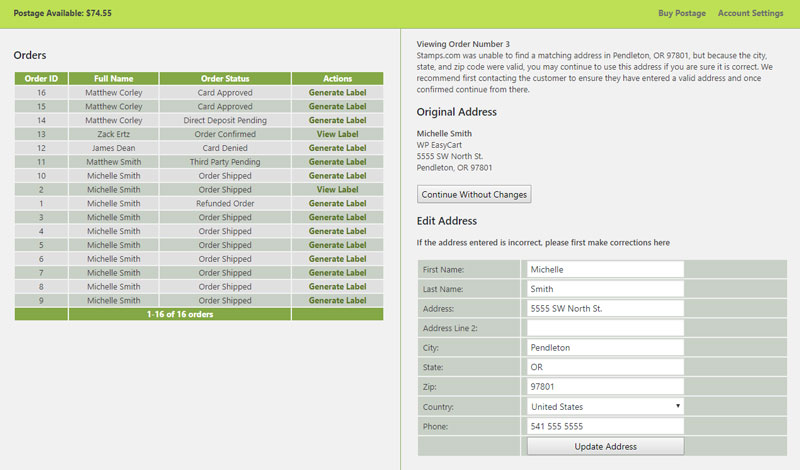
With an order selected, first choose to accept the address the user entered. You can manually update that address if you need to as well.
Stamps.com Extension — Confirm Address
Set Up the Package
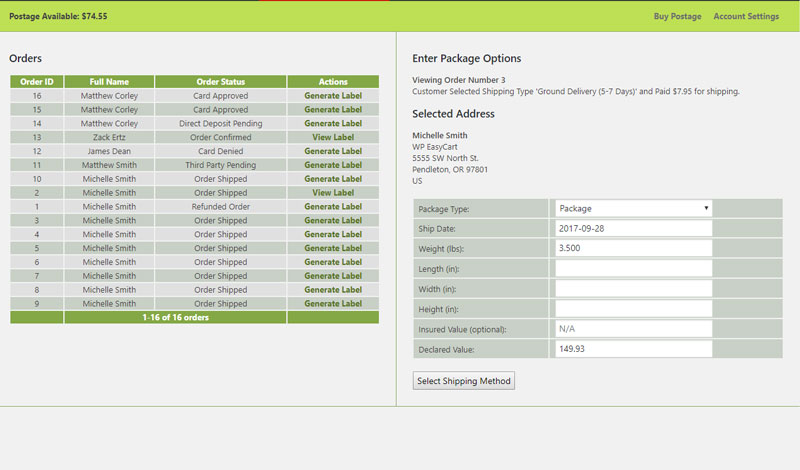
Once the address is set, configure the package type. There’s a variety of package types to choose from, plus weight and dimensional units to send to Stamps for accurate shipping costs.
Stamps.com Extension — Package Setup
Select a Shipping Method
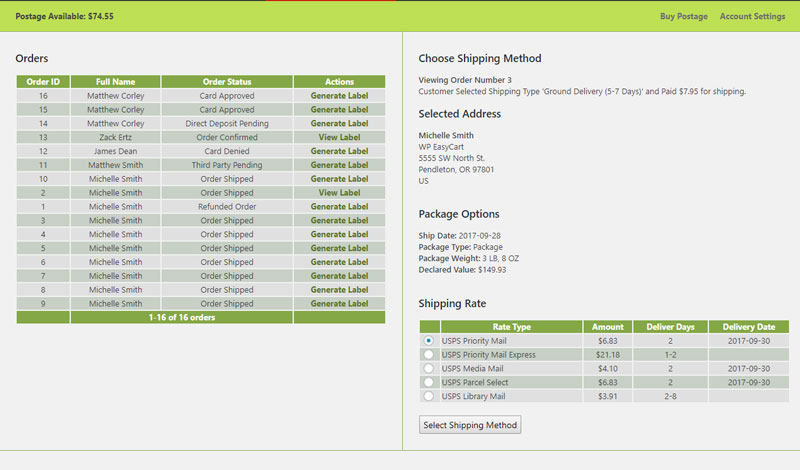
Choose from the shipping methods returned by Stamps.com. We also show the cost the customer paid and their selected shipping method at the top of this screen — ensuring you choose a shipping option as accurate as possible to the customer’s selected rate and method.
Stamps.com Extension — Select Shipping Method
Print, Track & Notify
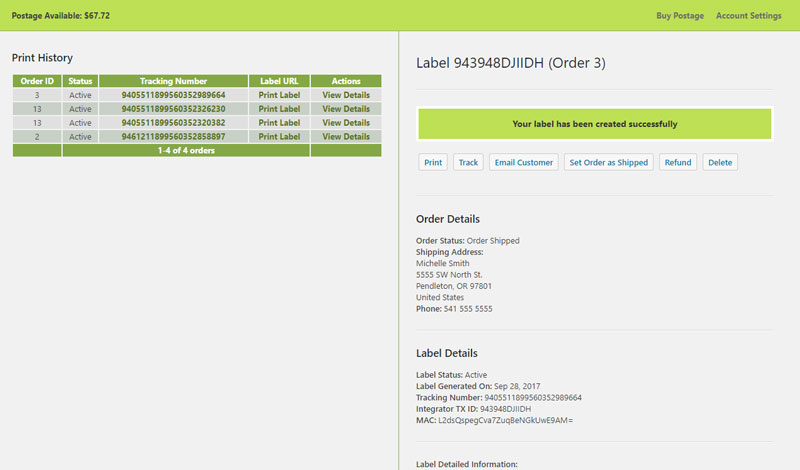
Once you select a shipping method, you’re presented with a variety of choices: print the label, track, email the customer, set the order as shipped, or refund/delete. You can also review a label later via ‘Print Label’ from the dashboard or the order history section.
Stamps.com Extension — Print & Track
Ship Faster. Right from WordPress.
Pre-paid USPS labels without leaving your dashboard — that’s the Stamps.com extension. Need a hand with the connection? We’ve got you.