Detailed Overview
We will walk through each step here as we export products, update quantities, and reimport the data.
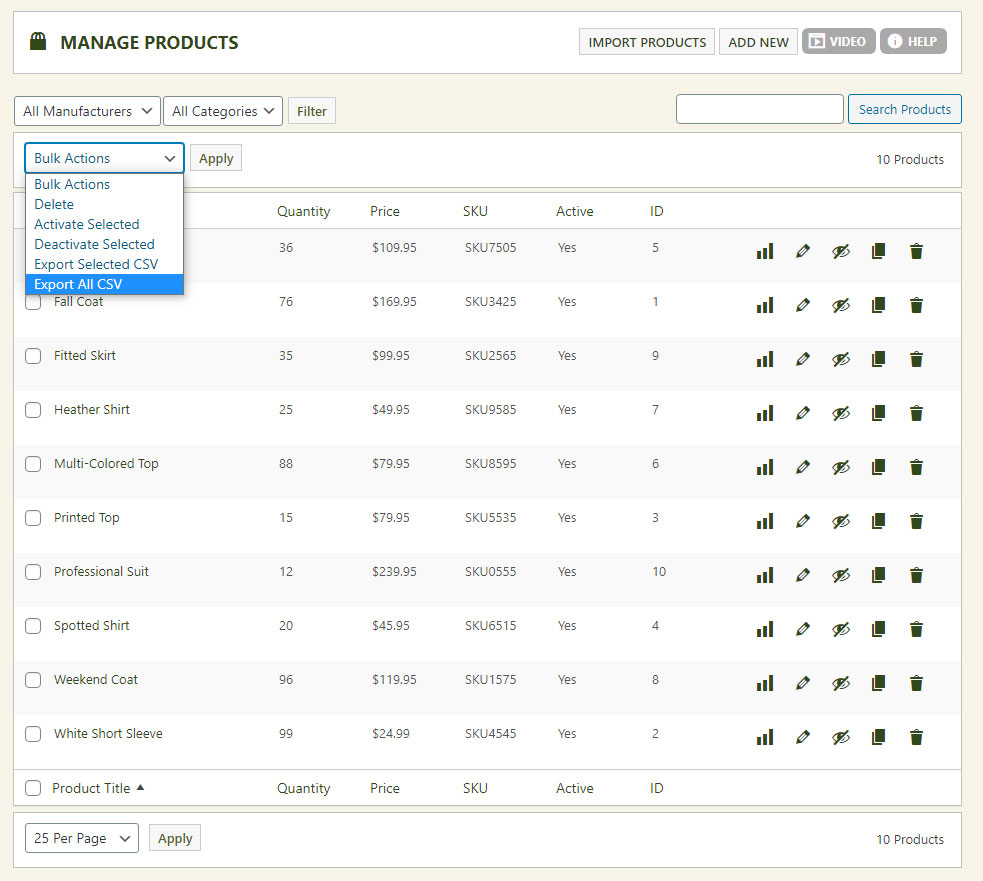
Step One – Export Data
We recommend you manually create a few products to get data into the system, then do an export. You can export only certain products you would like to bulk update, or you can export all to CSV.
Step Two – Open CSV and Adjust Data
You can open the CSV file in most spreadsheet applications and edit the data. All columns are necessary and should not be renamed. Edit your data and use the existing products as a guide for what data should be entered like.
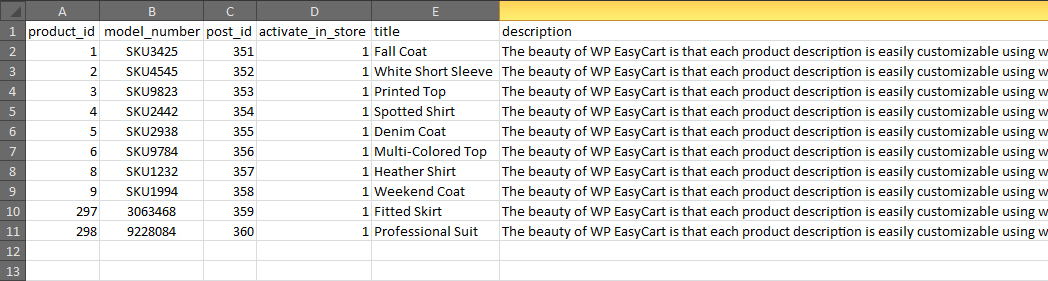
Notice the product_id’s are all set from our export. IF we wanted to add a new product, we could simply create a new line, leave the product_id and post_id at zero (0) and the importer will add new product.
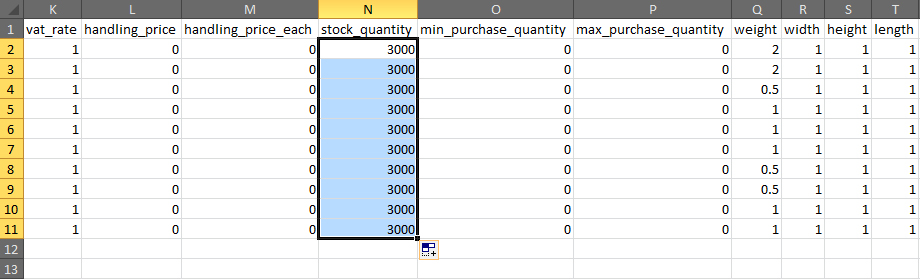
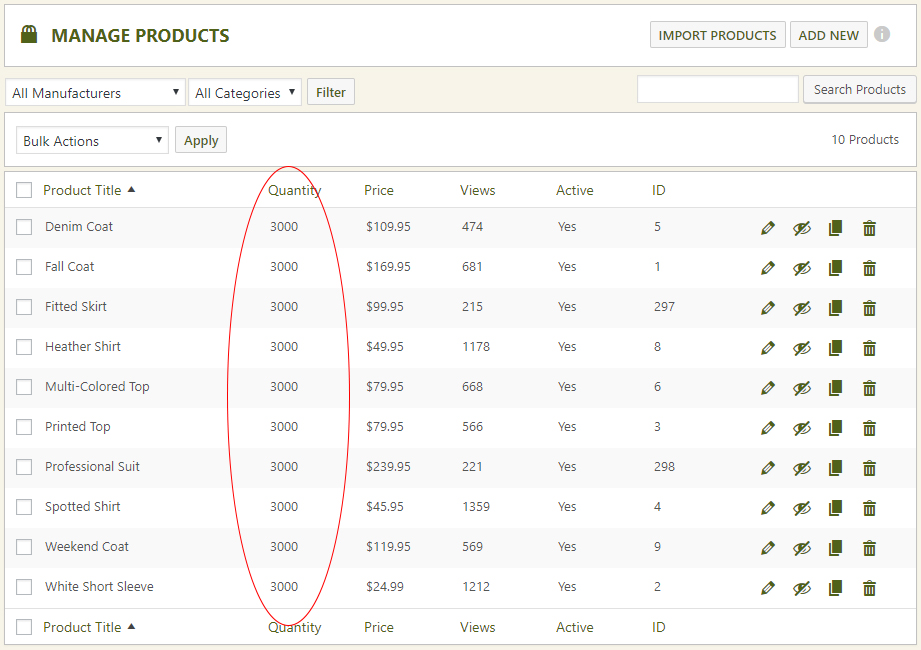
In this example, we will update all our products with a quantity of 3,000.
Note: You may add basic option sets here as well as advanced option sets. If you add advanced option sets, simply use a comma separated list of the option sets you wish to add in the column ‘advanced_option_ids’ at the end of the CSV file. You may find your option ID’s back on the option set list where they are created. You must also turn on (with a 1) in the ‘use_advanced_optionset’ column.
Step Three – Save our CSV file
Now we can save our file. Be sure your editor saves the file as a .csv Comma Delimited file format. Some computers may try to save it as a .txt file and that is incorrect, save it as a .csv.

Step Four – Browse and Import
Now you may return to EasyCart and start the import process. Simply go to the products panel, click on ‘Import Products’.

Next, you will browse and find your CSV file.

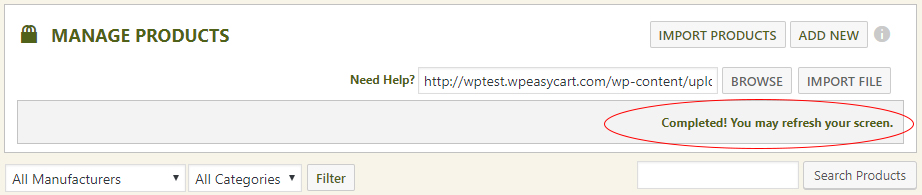
Once you find your file and upload it to WordPress, click ‘Import File’

Once finished, any errors you encounter will appear, or a ‘Completed’ notice will show that it has finished. Depending on the number of products you have, it may take a few seconds to work through that data.
Note: We recommend you only do products with a maximum count of 500 or less in one CSV file. We find that some servers can get overloaded and timeout if you go beyond this.
Step Five – Verify Data
Now that you ran through the importer, simply look to verify changes. In this example, we updated quantities to 3000 for all products and can quickly verify it by refreshing our Products panel.
Special Note on Product Images
When using unlimited images, videos, etc… There are special steps required to import:
- The default is to use the media library ID of a picture. This allows the system to choose the proper sizing for best optimization.
- If an older version is used or you started on the free version, you may see “image1”, “image2”, “image3”, “image4”, or “image5”. These point to the full URL or the location in the EasyCart system, stored in the matching database field.
- To add your own image url, the line should be image:https://www.fullurl-site.net/image.jpg
- To add an embedded video, use video:https://www.full-urlsite.net/your-video.mp4
- To add an embedded YouTube video, use youtube:https://www.youtube.com/embed/SOMEID
- To add an embedded Vimeo video, use vimeo:https://player.vimeo.com/video/SOMEID
- Comma separate each one! Here is a complex example of the product_images field: “24,929,34,video:https://www.full-urlsite.net/your-video.mp4,https://www.youtube.com/embed/SOMEID,https://player.vimeo.com/video/SOMEID,image:https://www.fullurl-site.net/image.jpg,image1,44,image4,image2,image3,image5,888,1223”. Do not include the double quotes.
You may also add 5 direct URL images in the image1, image2, image3, image4, and image5 columns, it will still work.
Special Note on Data
When importing data, you should be very careful about what data you are importing. A common mistake is to copy and paste coding into the description of products taken from other websites or files. You can inject scripting and cause errors by doing so and is an unsafe practice. Exporting/Importing product data can save a lot of time, but be diligent about what data you are inserting in bulk.